About OneTick Upsell Cross Sell
Once you installed the OneTick Upsell Cross Sell app, it’s time to create your own checkbox! In this article, we will guide you through all steps to create a checkbox on OneTick. Let’s get started!
How To Create A Checkbox
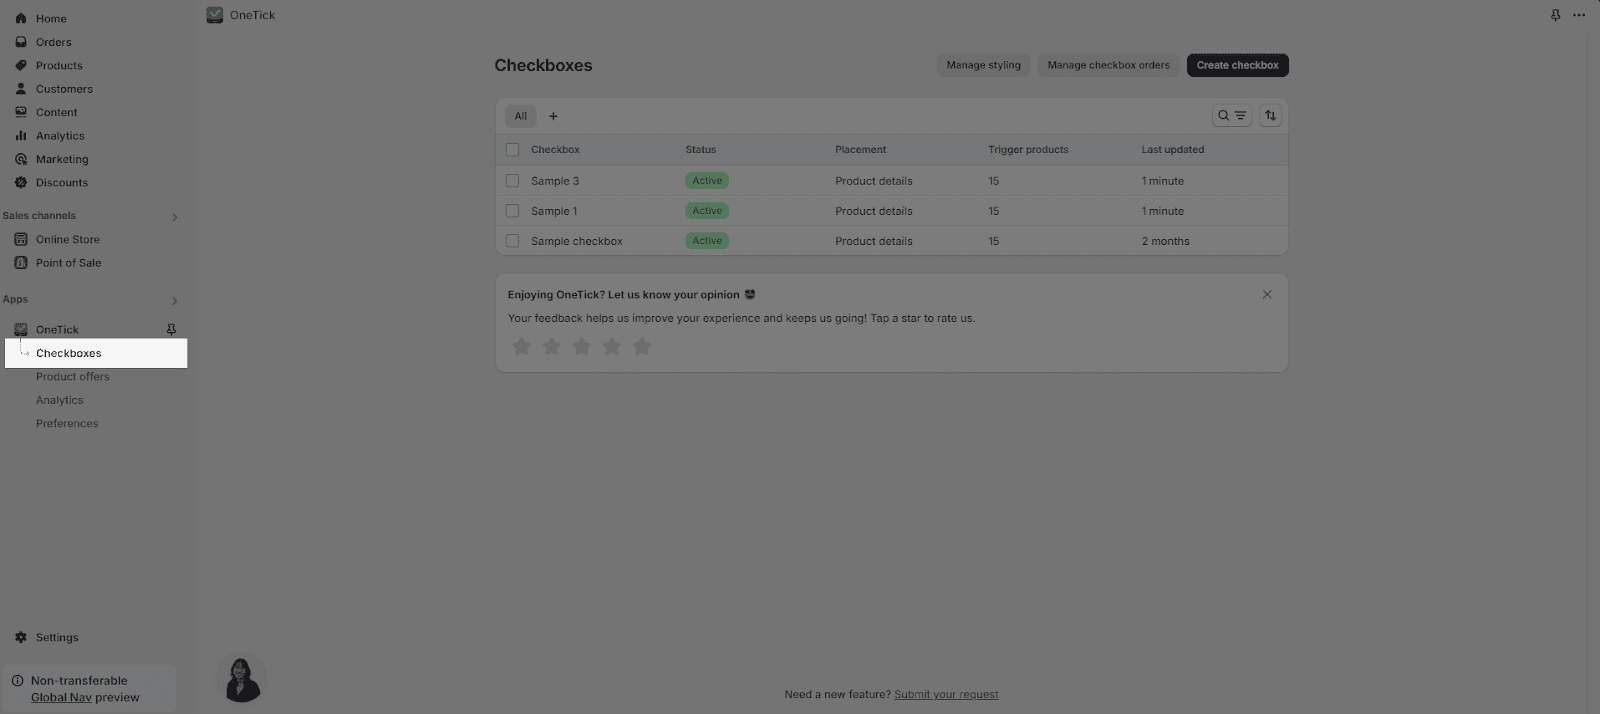
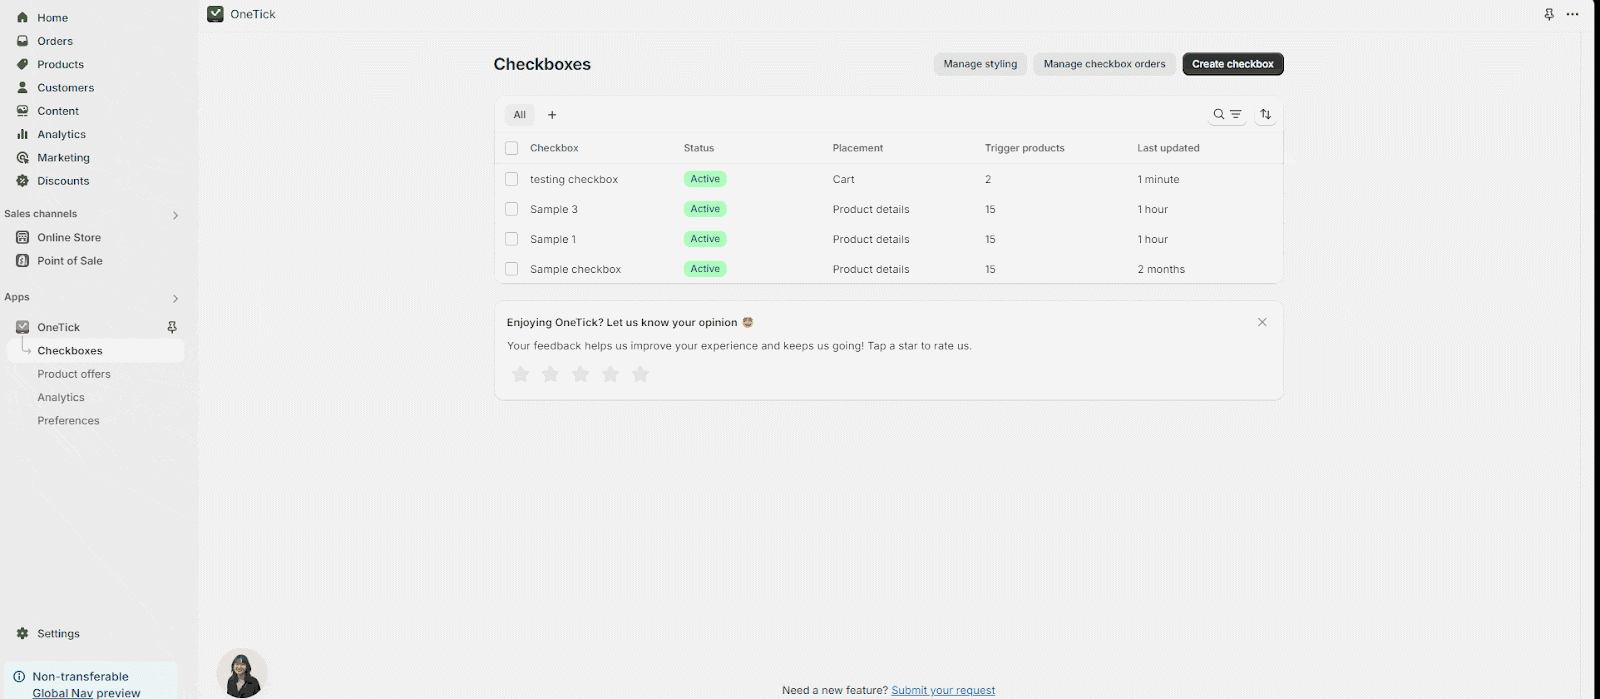
Step 1: Access Checkboxes Listing
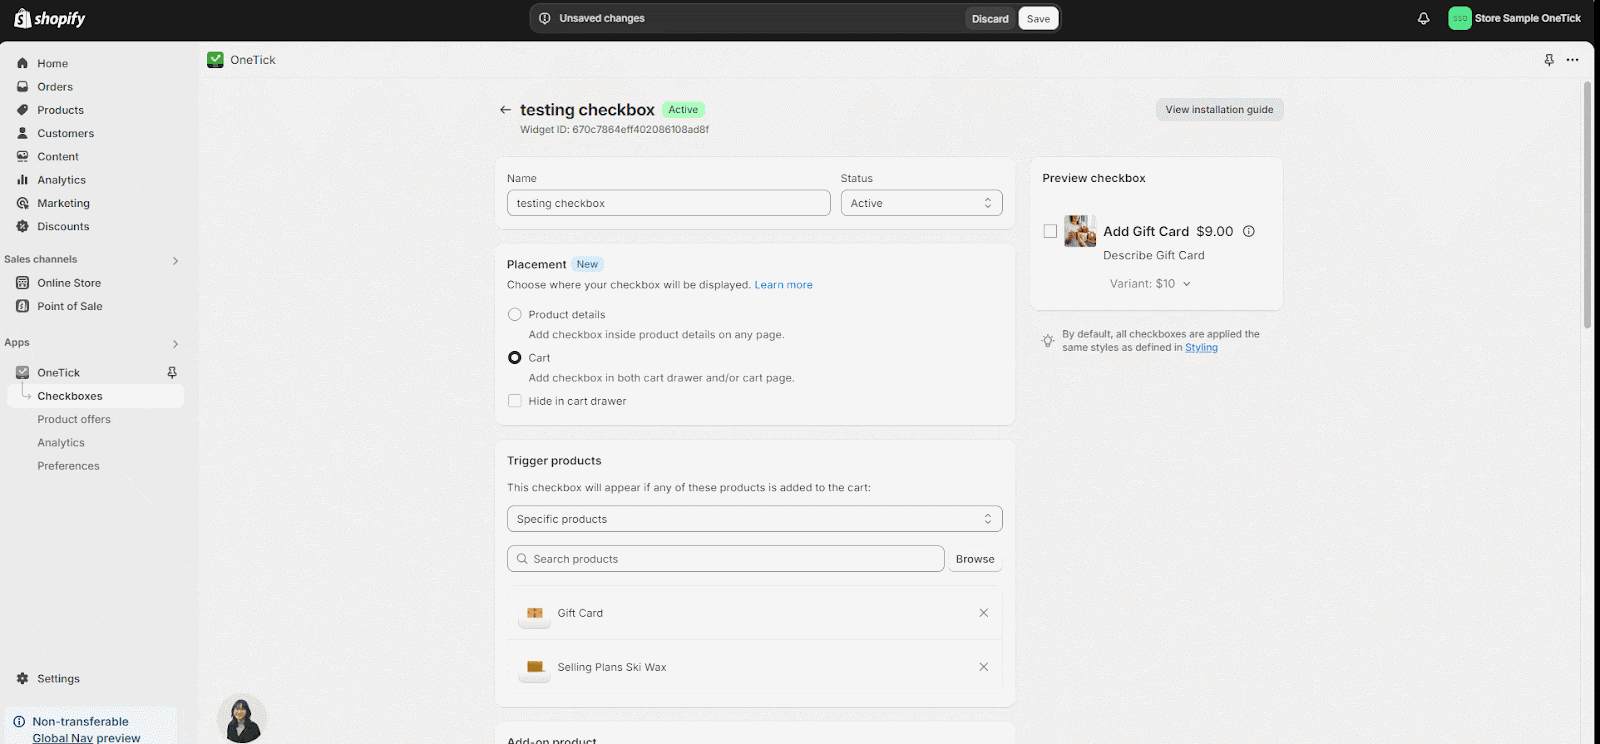
From OneTick dashboard, click on “Checkboxes” on the left menu bar to access Checkboxes listing. You can see all created checkboxes here.
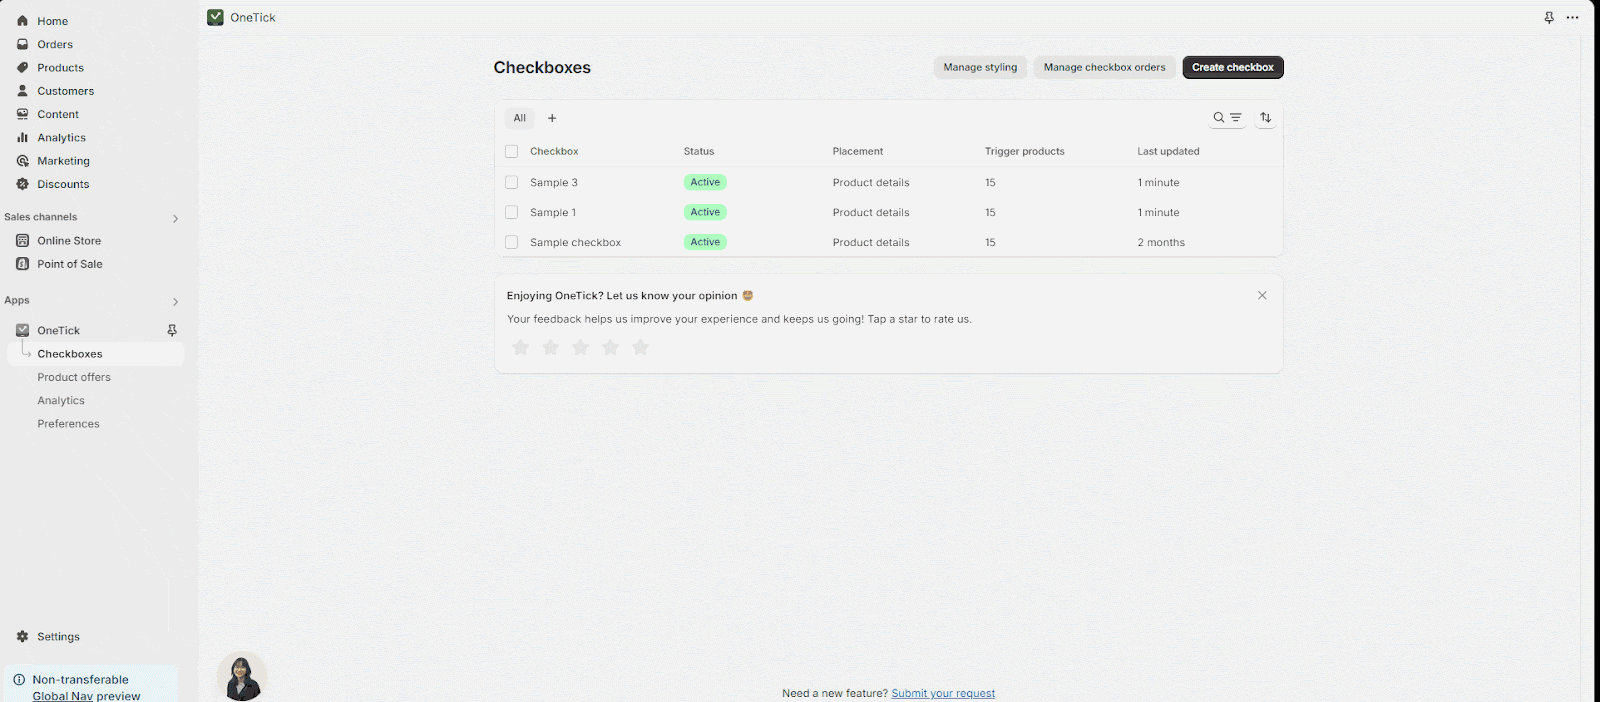
Step 2: Click “Create Checkbox” Button
After accessing Checkboxes listing, click on the “Create checkbox” button to start the journey with OneTick Upsell Cross Sell.
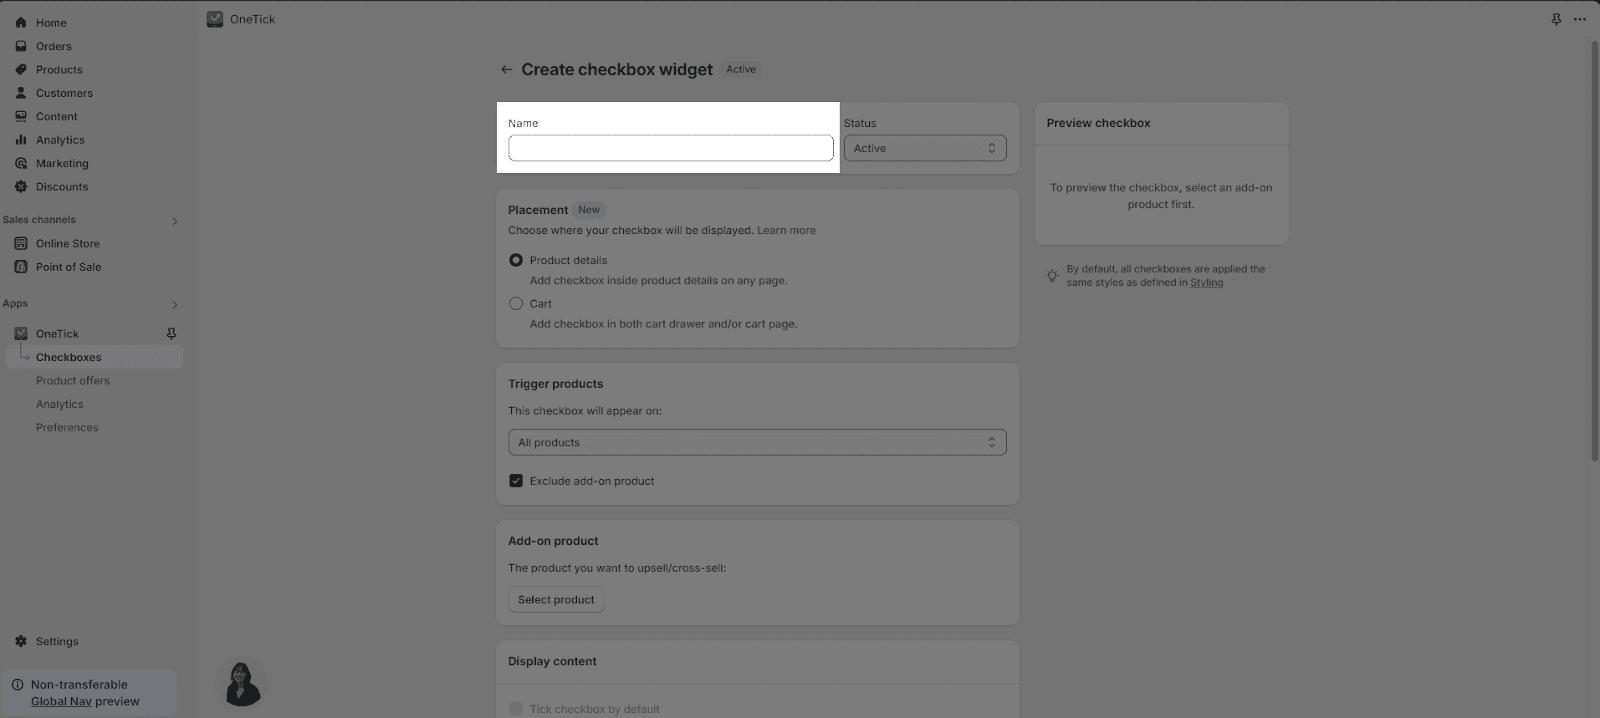
Step 3: Name The Checkbox And Choose The Status For It
At the top of the checkbox editor, you’ll find a “Name” placeholder and a “Status” dropdown menu.
Checkbox Name
In Name placeholder, you can enter the name for the checkbox
- The title will not show for your customers on the live page.
- It is limited to 250 characters.
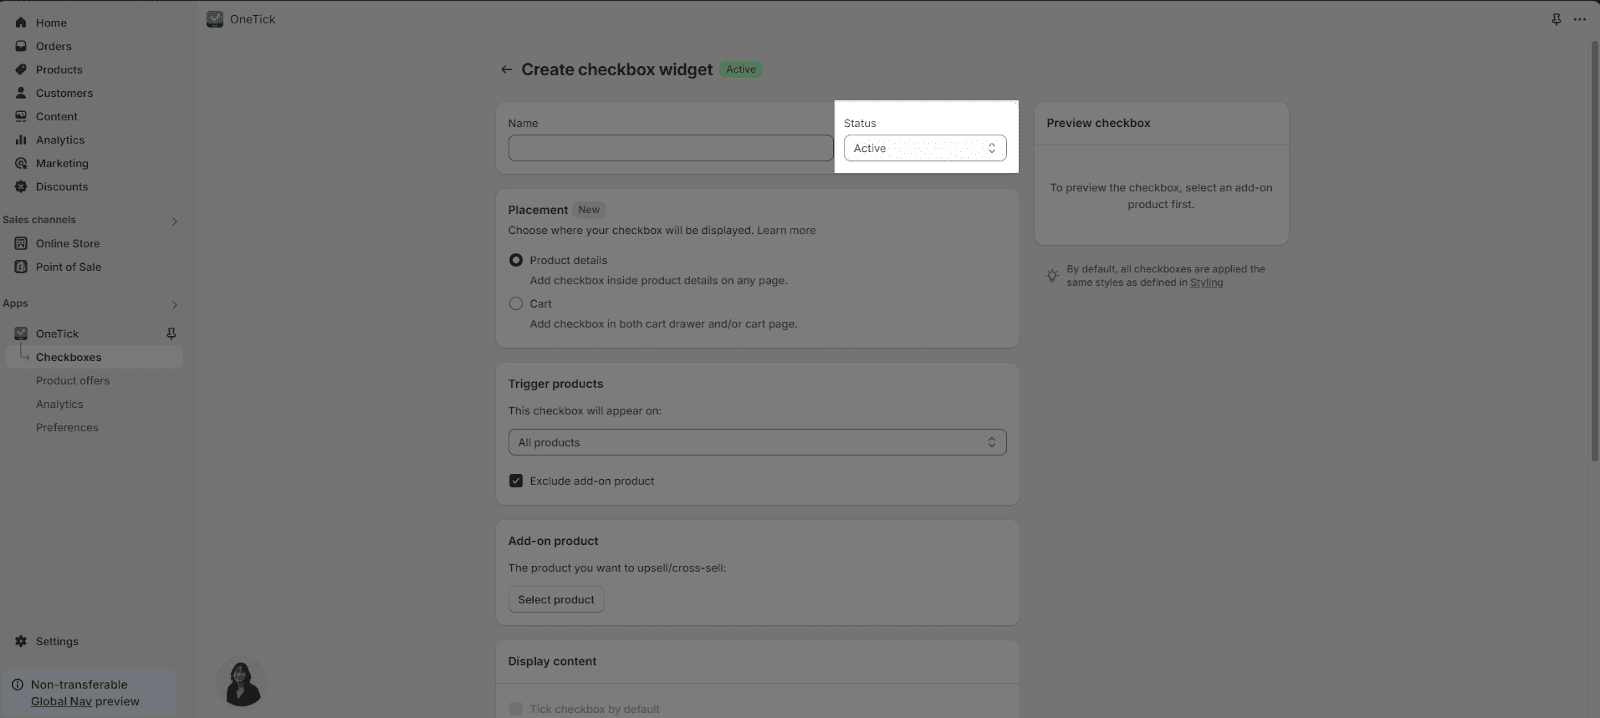
Checkbox Status
There are 2 statuses for the checkbox:
- Active: the checkbox will be ready to be used on the live page immediately after creation
- Draft: the checkbox will be saved as a draft and can be activated later
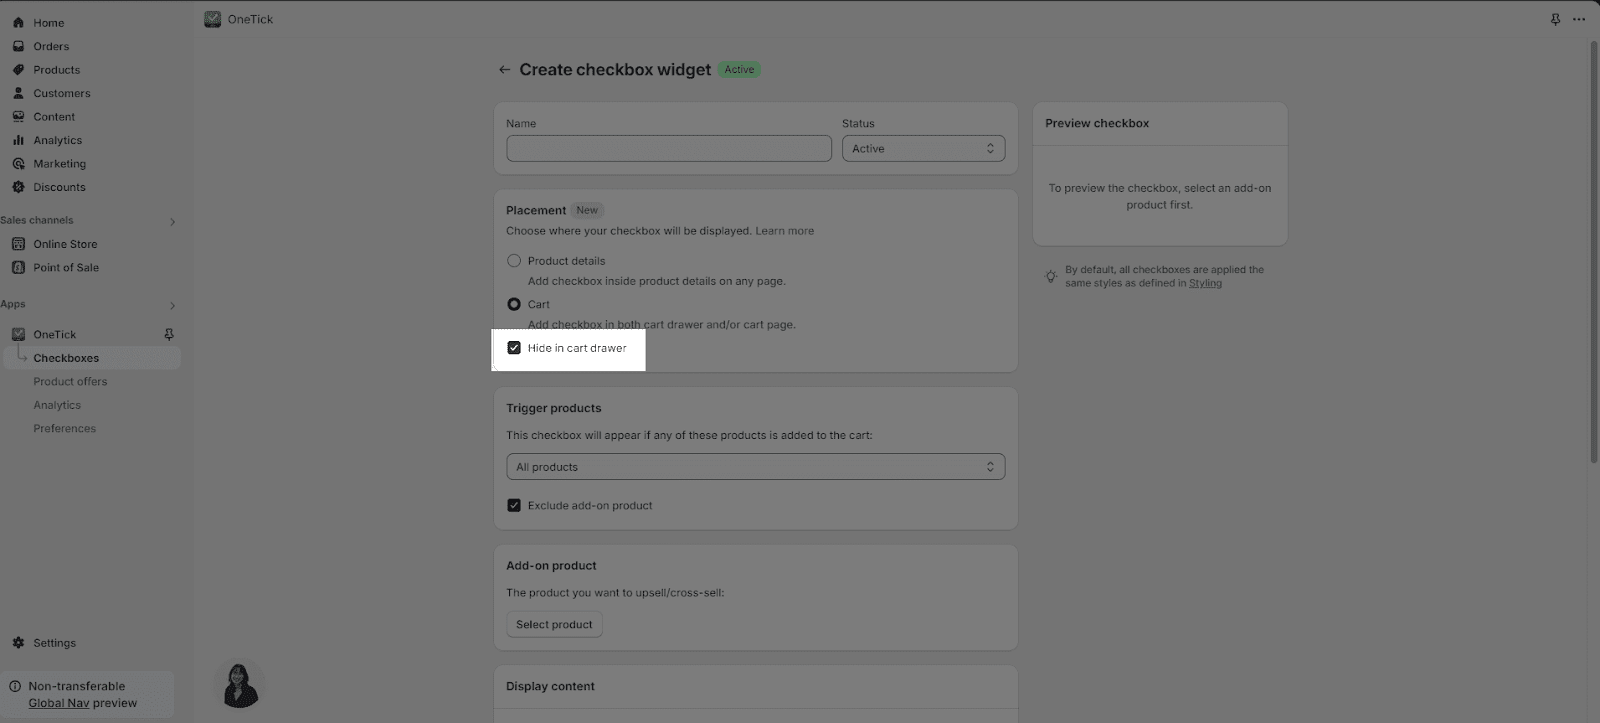
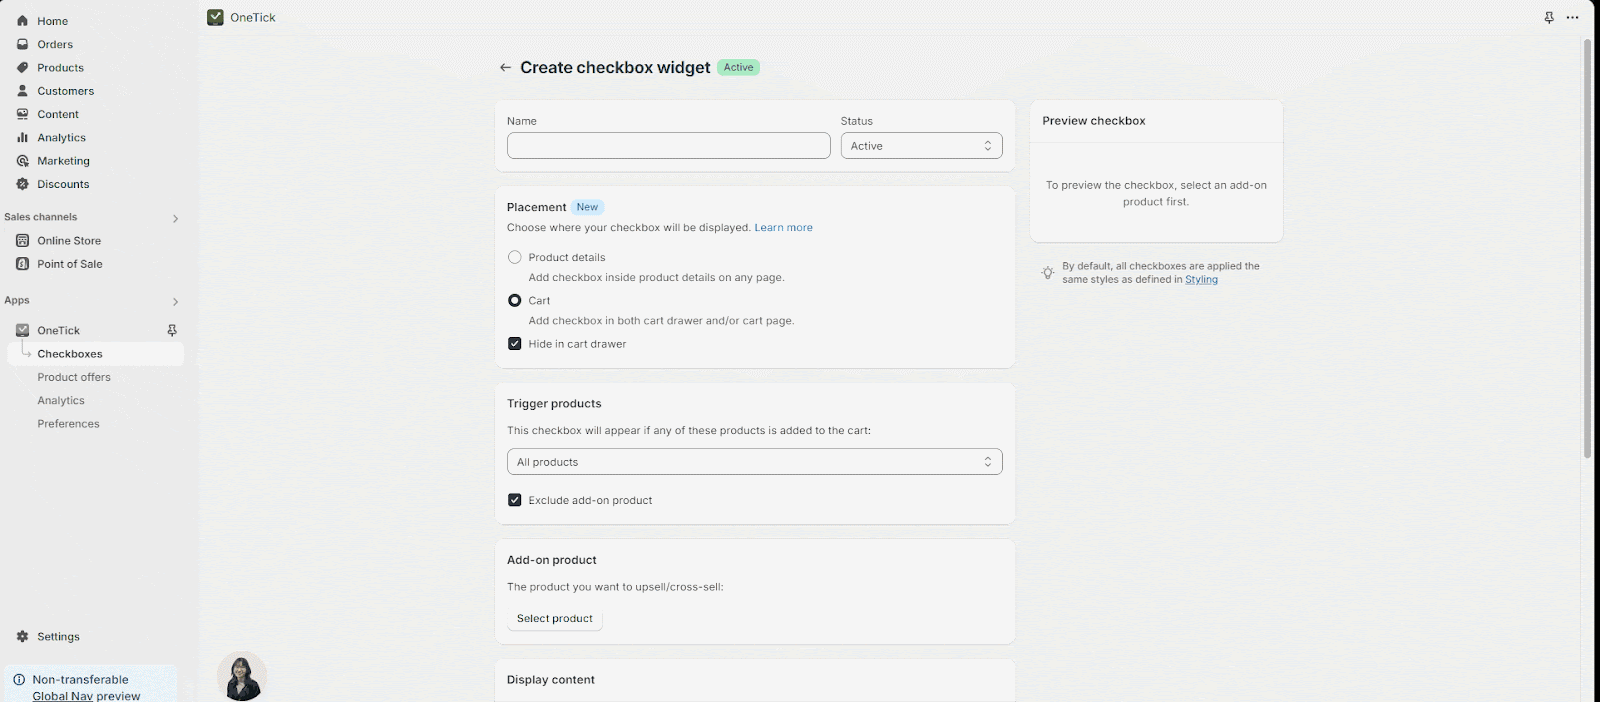
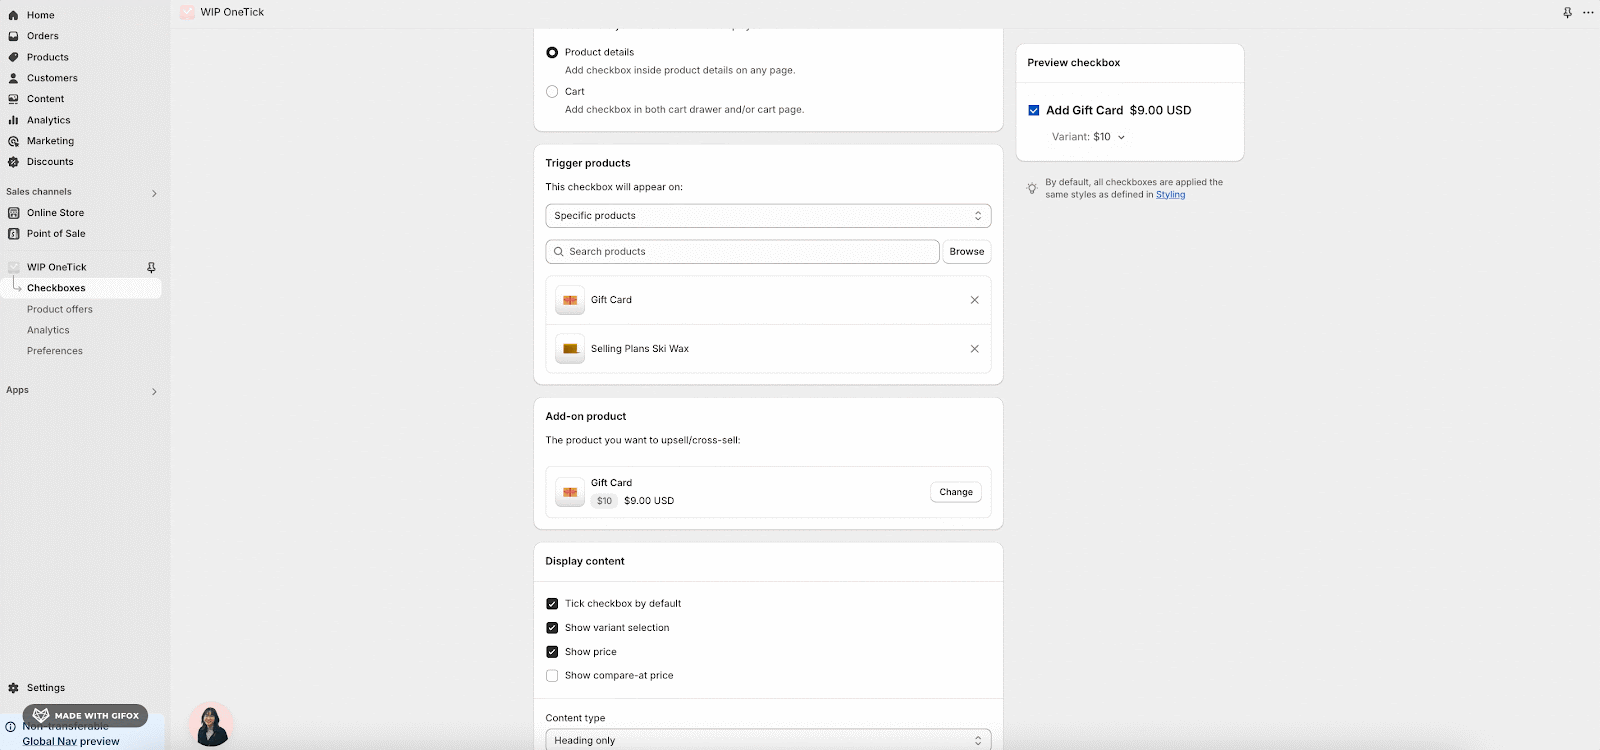
Step 4: Choose Placement
There are two options that you can select to display the checkbox: Product details and Cart.
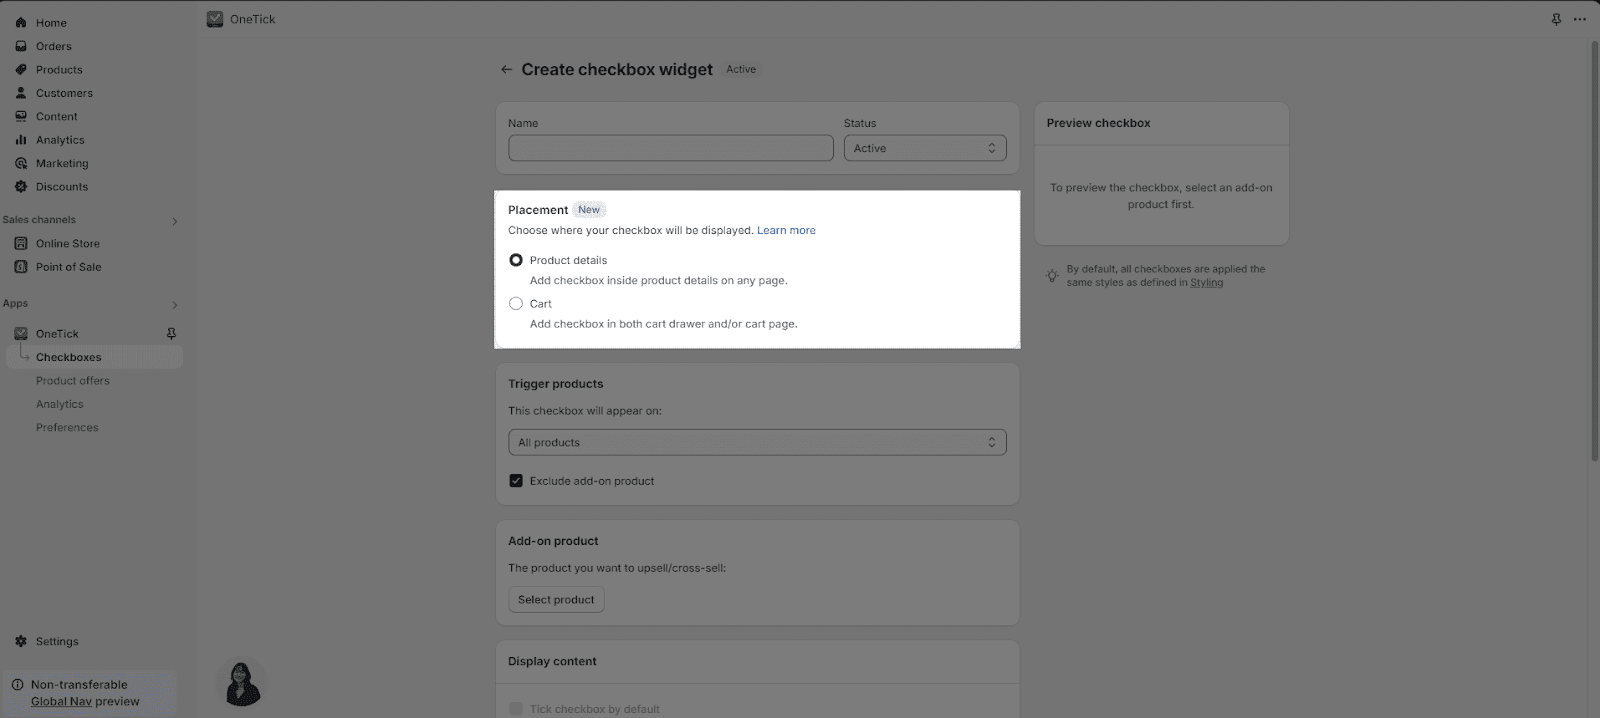
- Product Details: The checkbox will display on the Product Page.

- Cart: The checkbox will be added to the Cart Drawer and Cart Page.
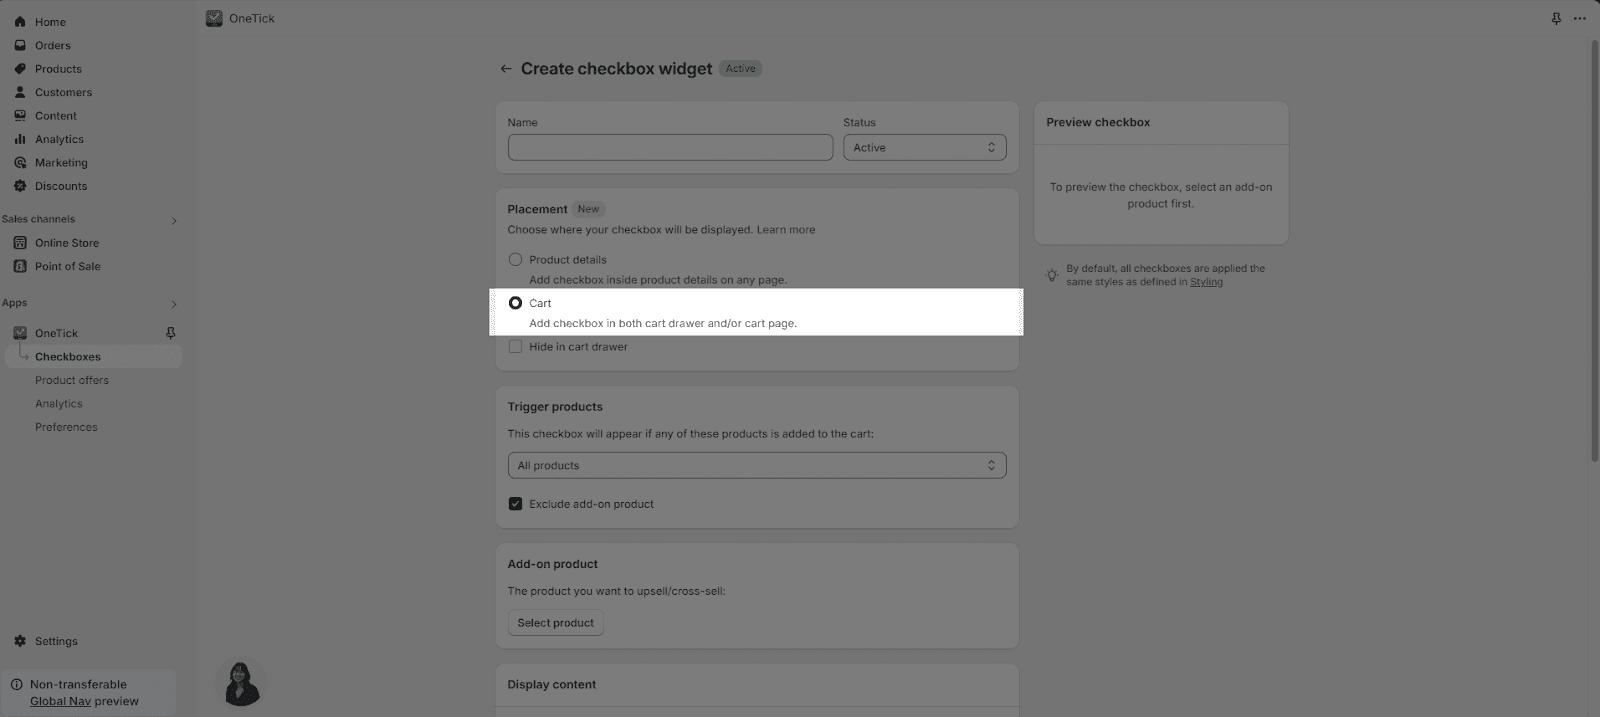
If you want the checkbox to be displayed only on Cart Page, you can select “Hide in Cart Drawer“.
Step 5: Set Up “Trigger Products And Add-on Product”
Here, you’ll select the upsell products and decide which products the checkbox applies to.
Trigger Products
In “This checkbox will appear on”, you will need to choose between:
- All products: apply the checkbox for all products
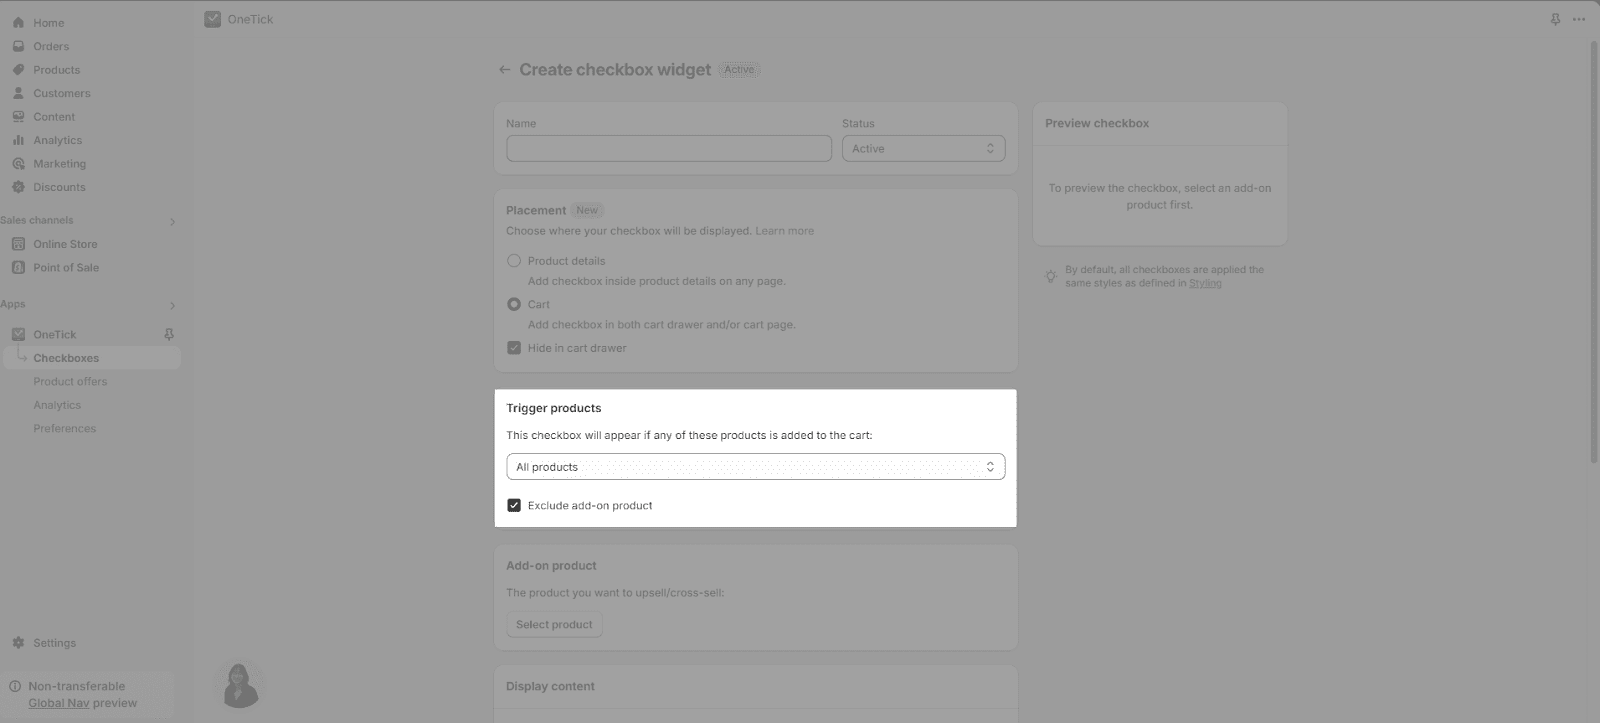
- Specific products: apply the checkbox for some selected products
If you choose Specific products, click on the search bar to select products you want for the checkbox to be applied.
Or you can choose “Browse” button to select the products.

Add-on Product
Click on the “Select product” button to choose the product for upsell with OneTick Upsell Cross Sell.
- You can only select 1 product for this option.
- On the product you have selected, you can only choose 1 variant of that product for the upsell
Step 5: Add Content For The Checkbox
Scroll down and you will see the “Display content” block where you adjust the content to show with the checkbox.
Content
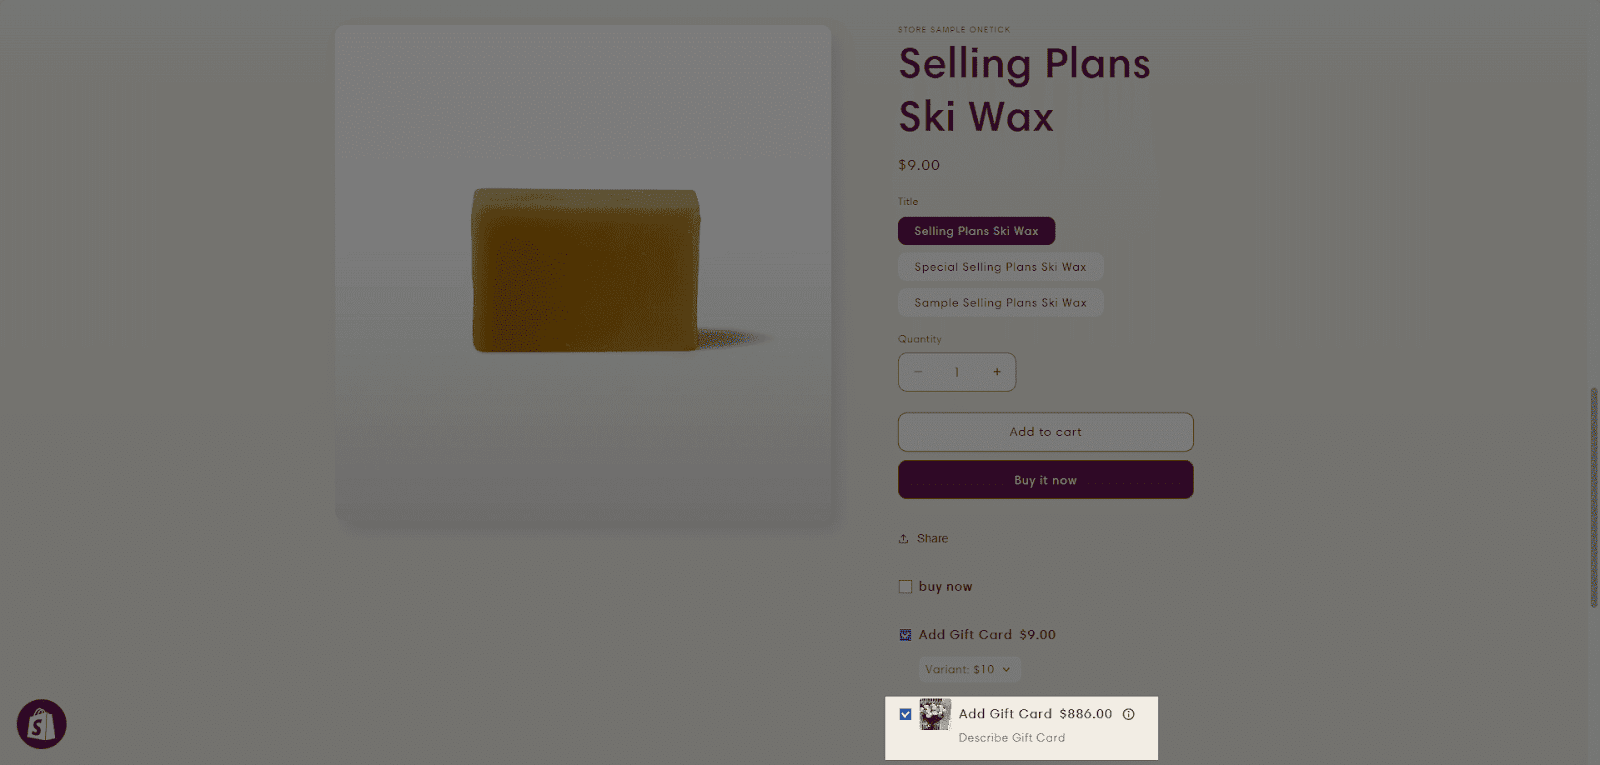
In Content, there are 3 options for displaying in the checkbox:
- Tick checkbox by default: the checkbox will be automatically selected when your customers open the assigned products page
- Show price: show the price of the add-on product
- Show compare-at price: show the compare-at price of the add-on product
- If Show price is not enabled the Show compare-at price will not display.
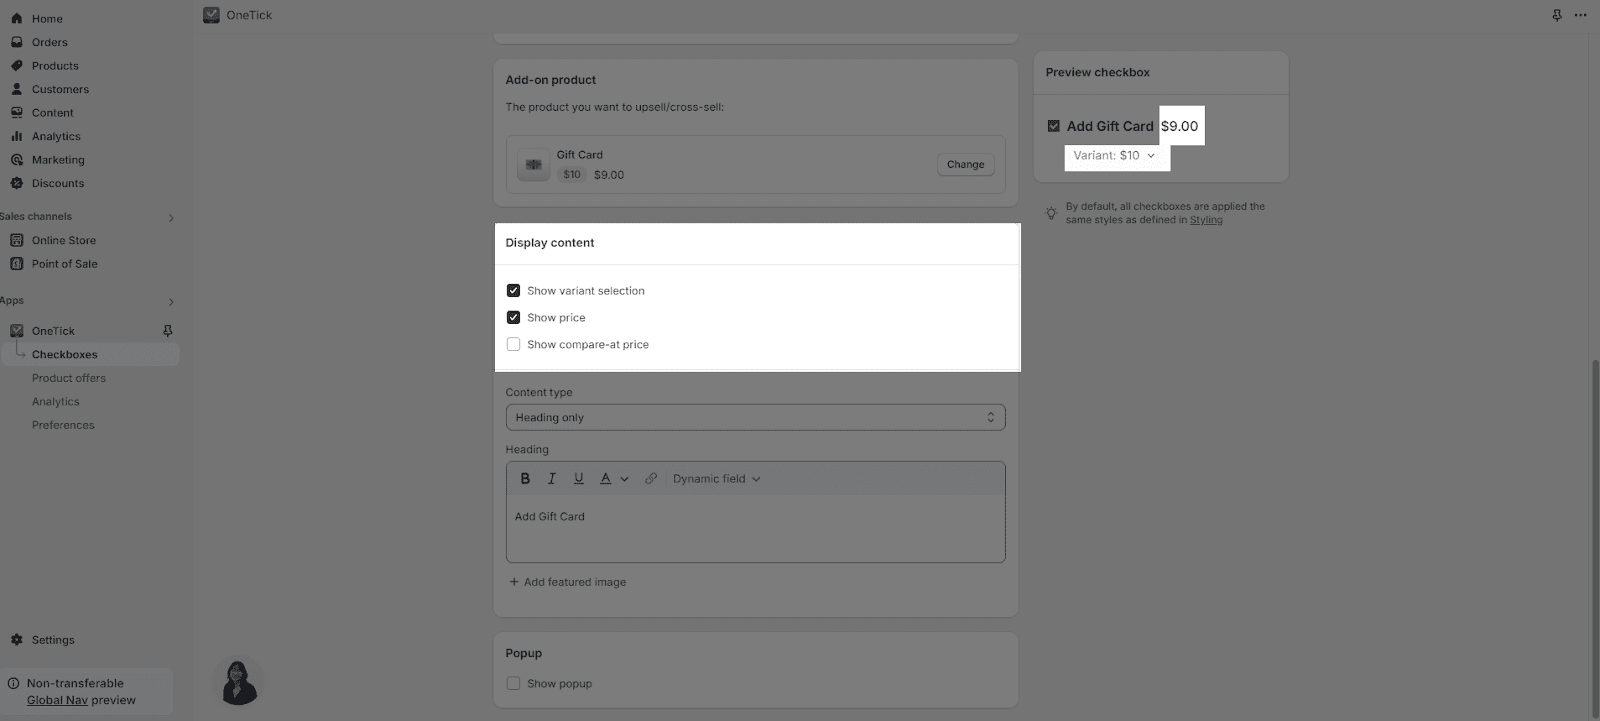
Please be noted that when you choose the product to be displayed in Cart, the option “Tick checkbox by default” will be disappeared..
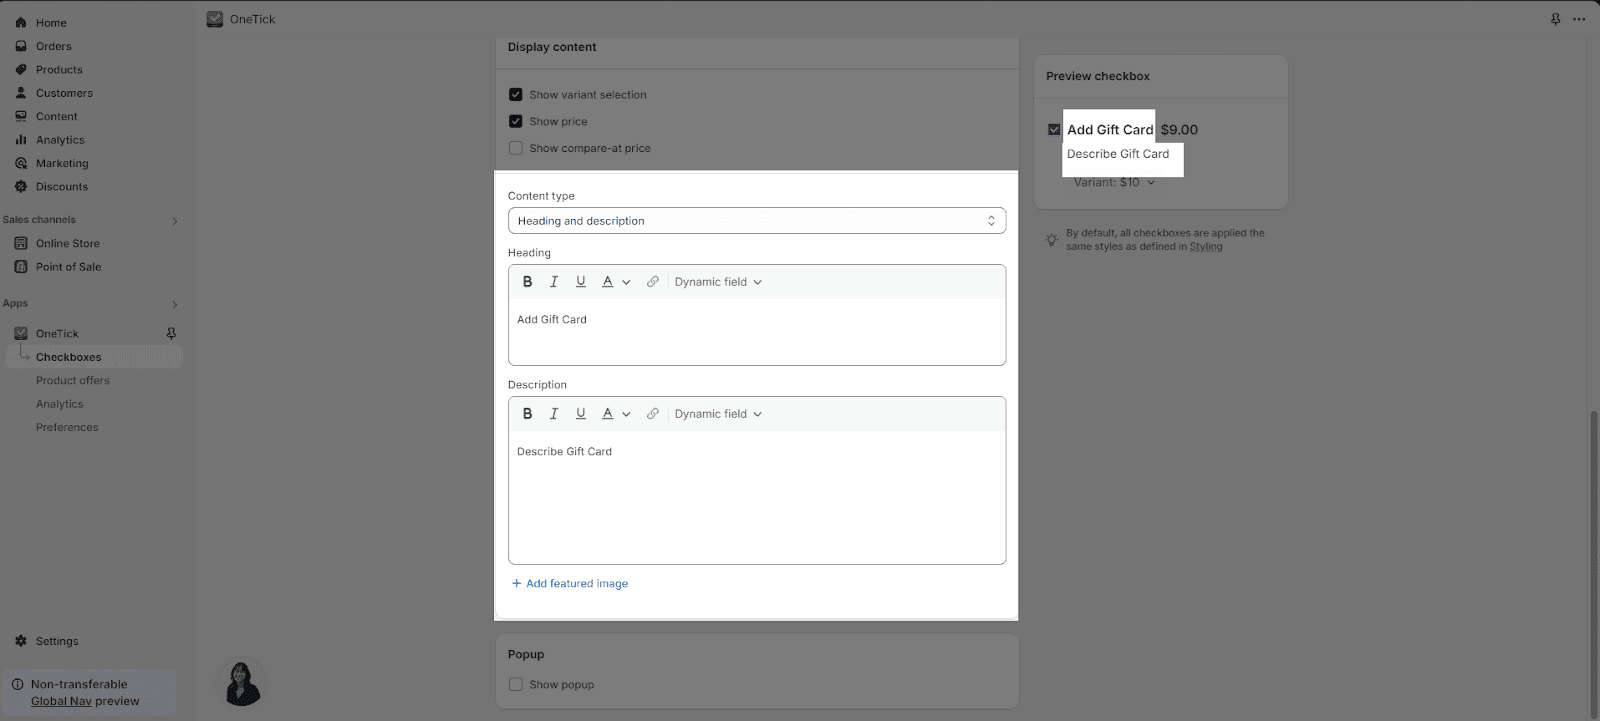
Next, you can add the content for the checkbox by selecting the content type. There are 3 type of content for you to select:
- Heading only
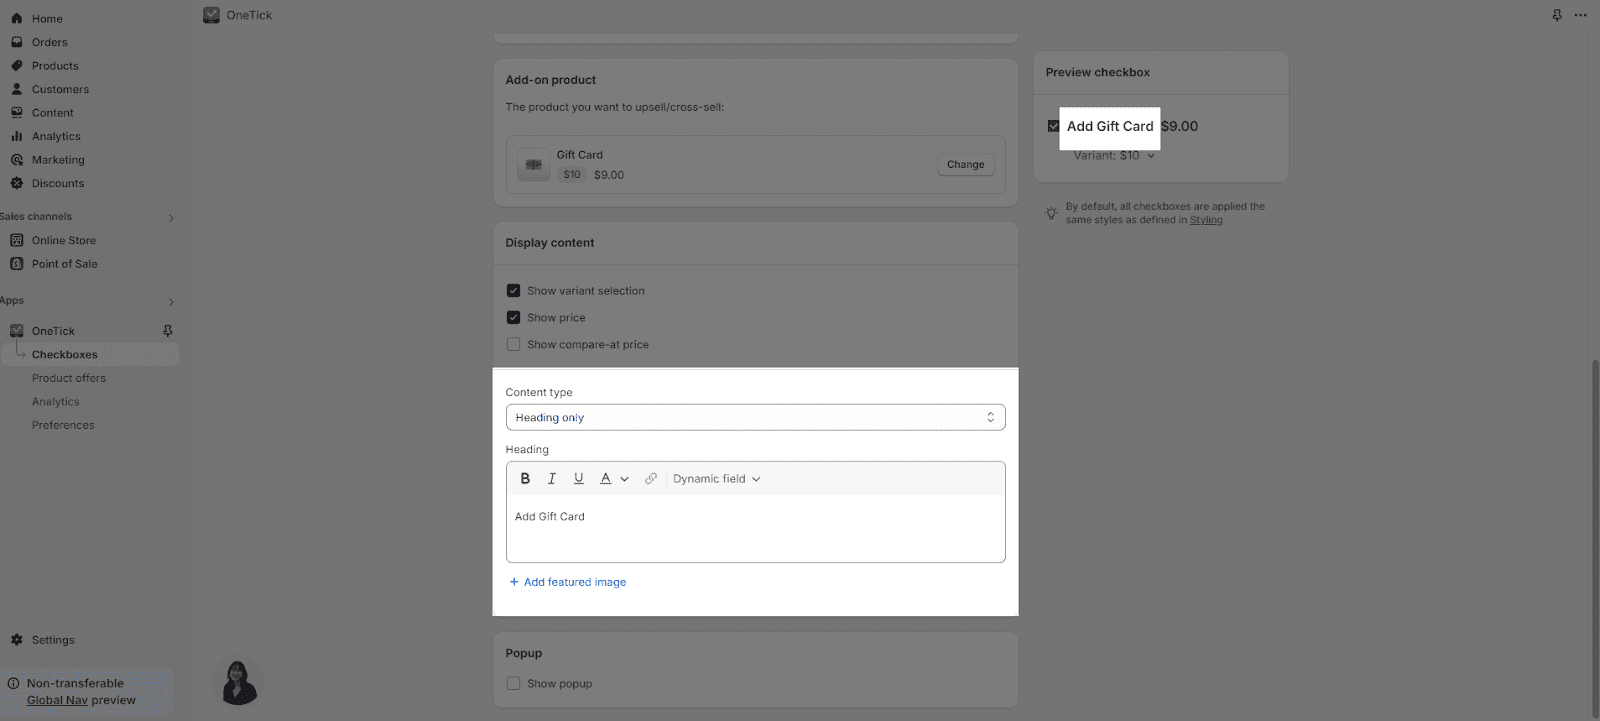
- Description only
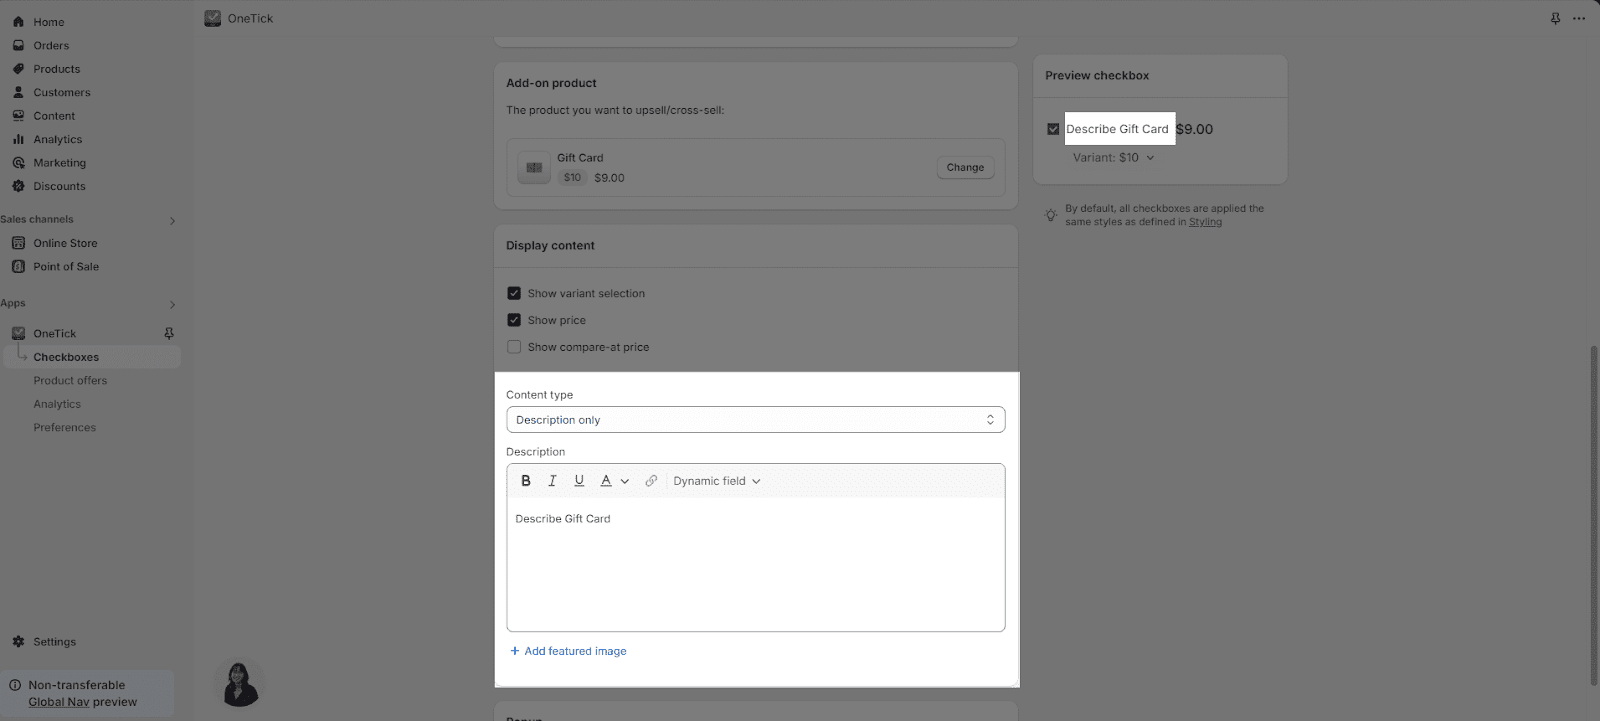
- Heading and description
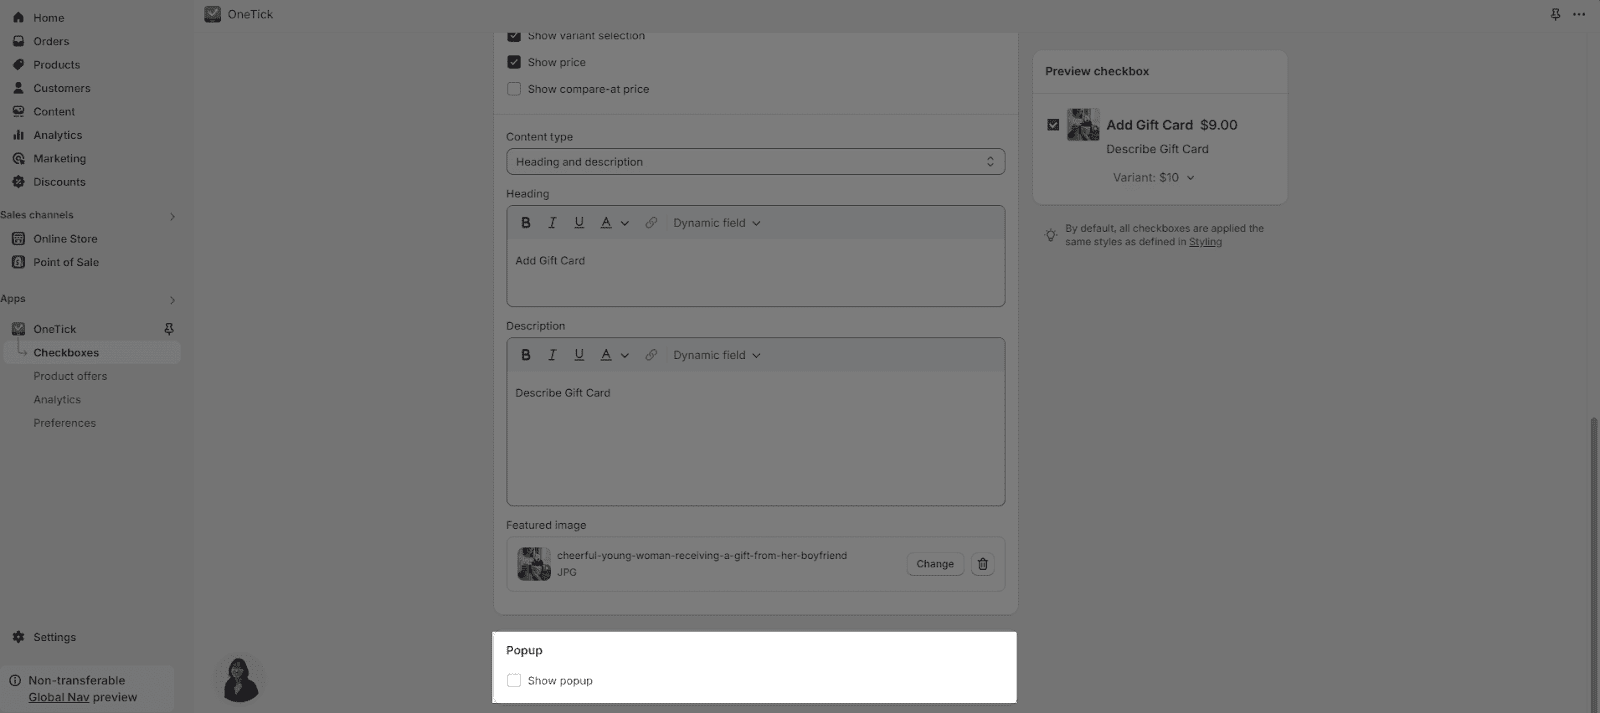
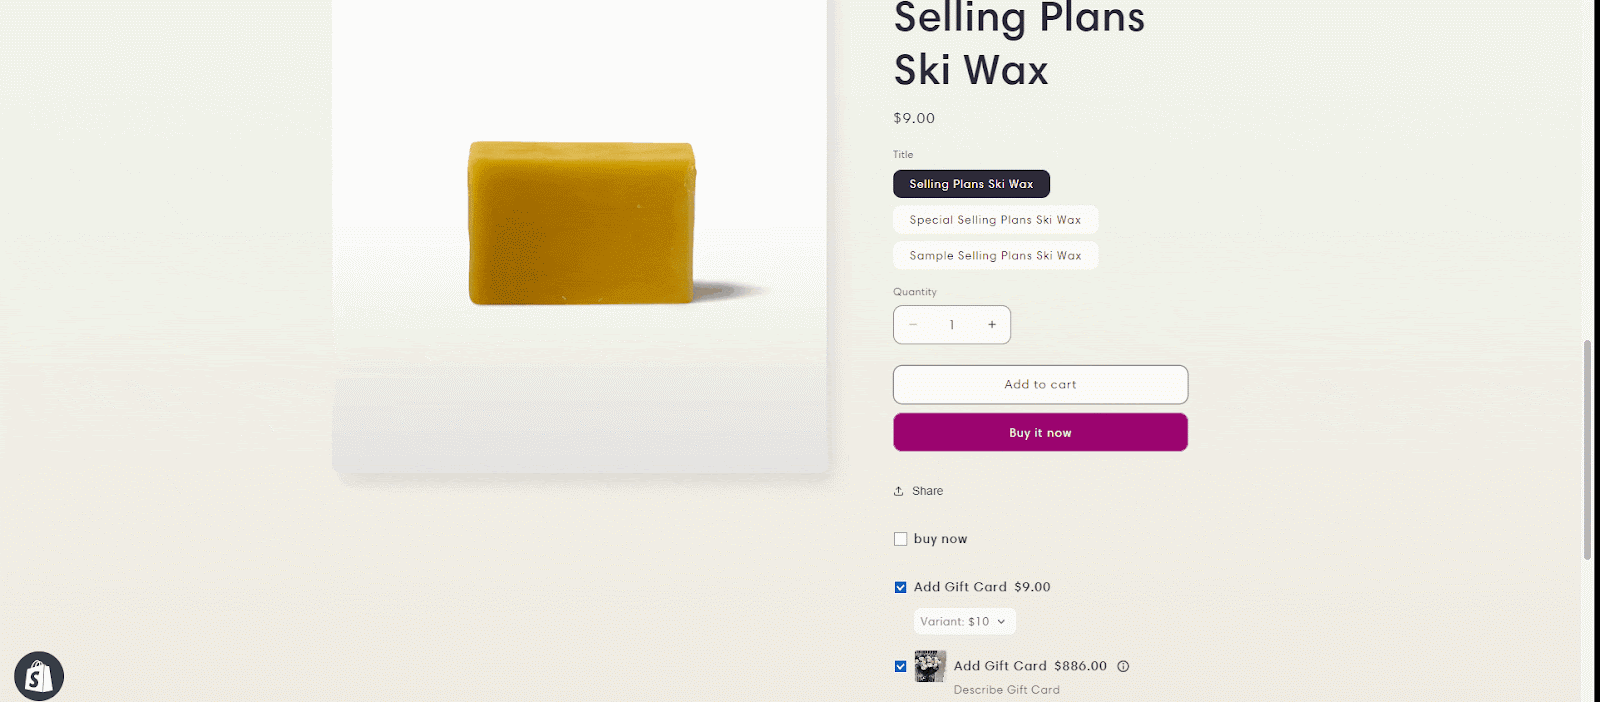
Featured Image
You can also add an image to your checkbox by clicking “Add featured image”. Ensure the image is clear, of high quality, and relevant to the upsell product.

Popup
Popup is a feature that provides your customers with more details of your add-on products. In short terms, Popup is like a short description of your add-on products.
After selecting the “Show Popup” option, you can begin to customize your Popup:
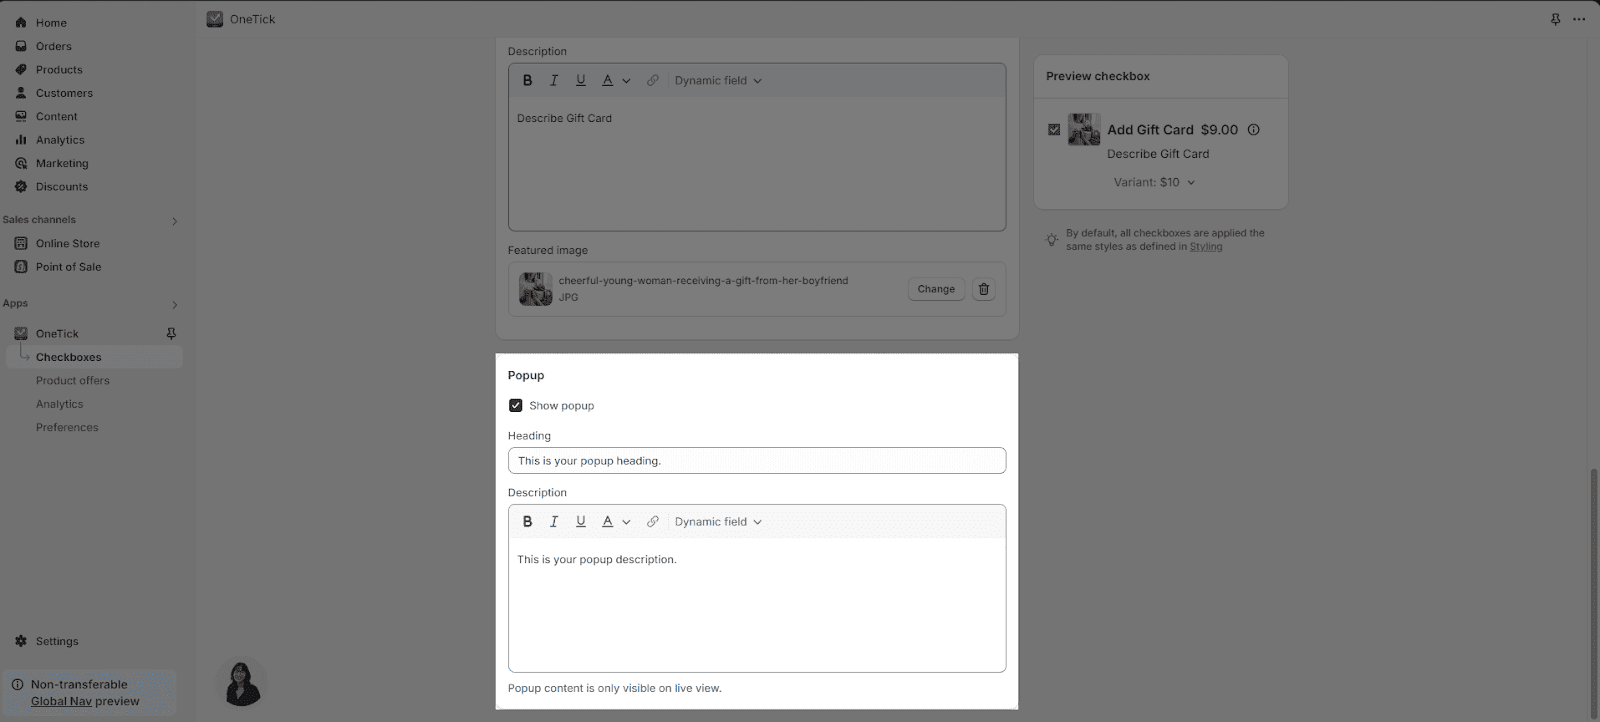
For the contents of the Popup field, you can add:
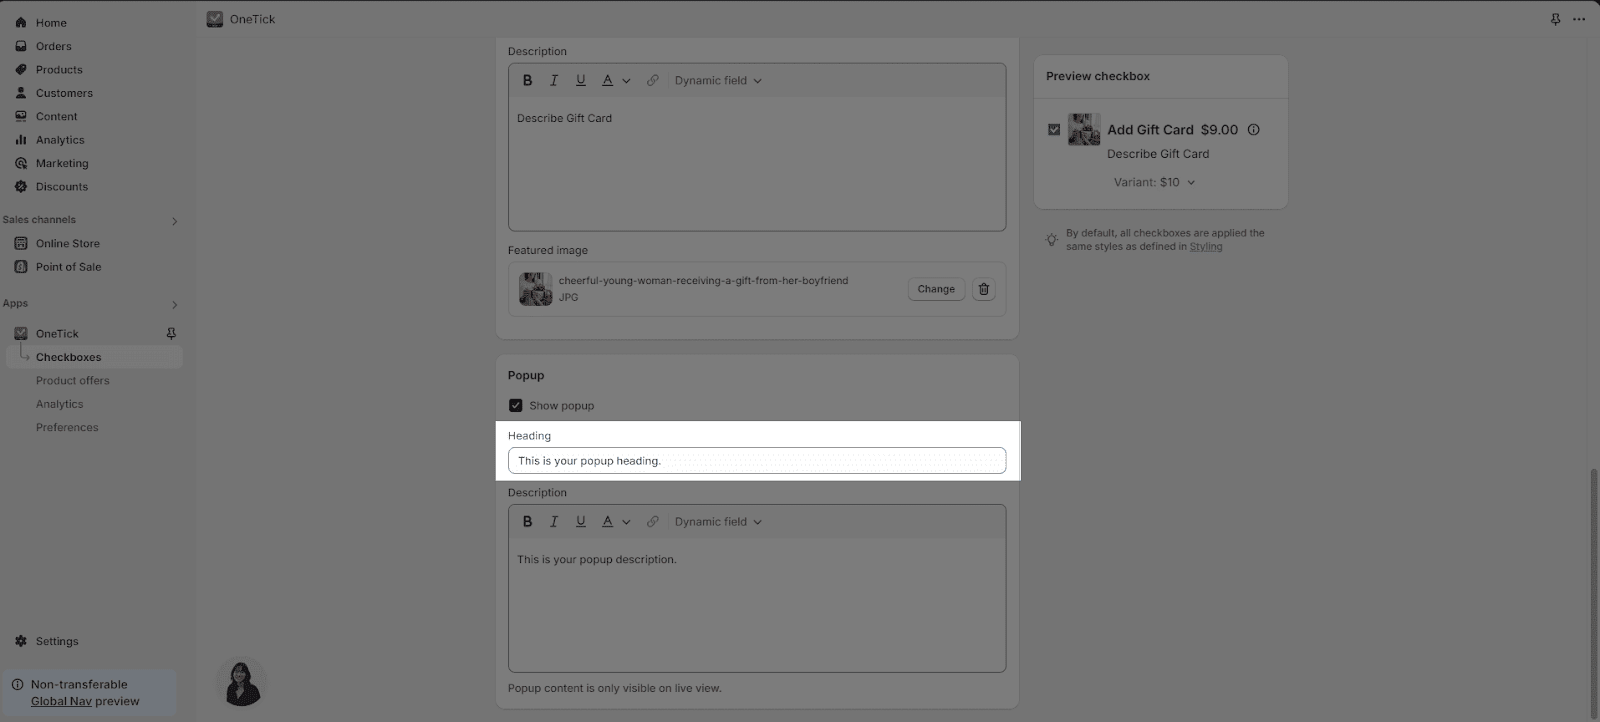
- Heading:
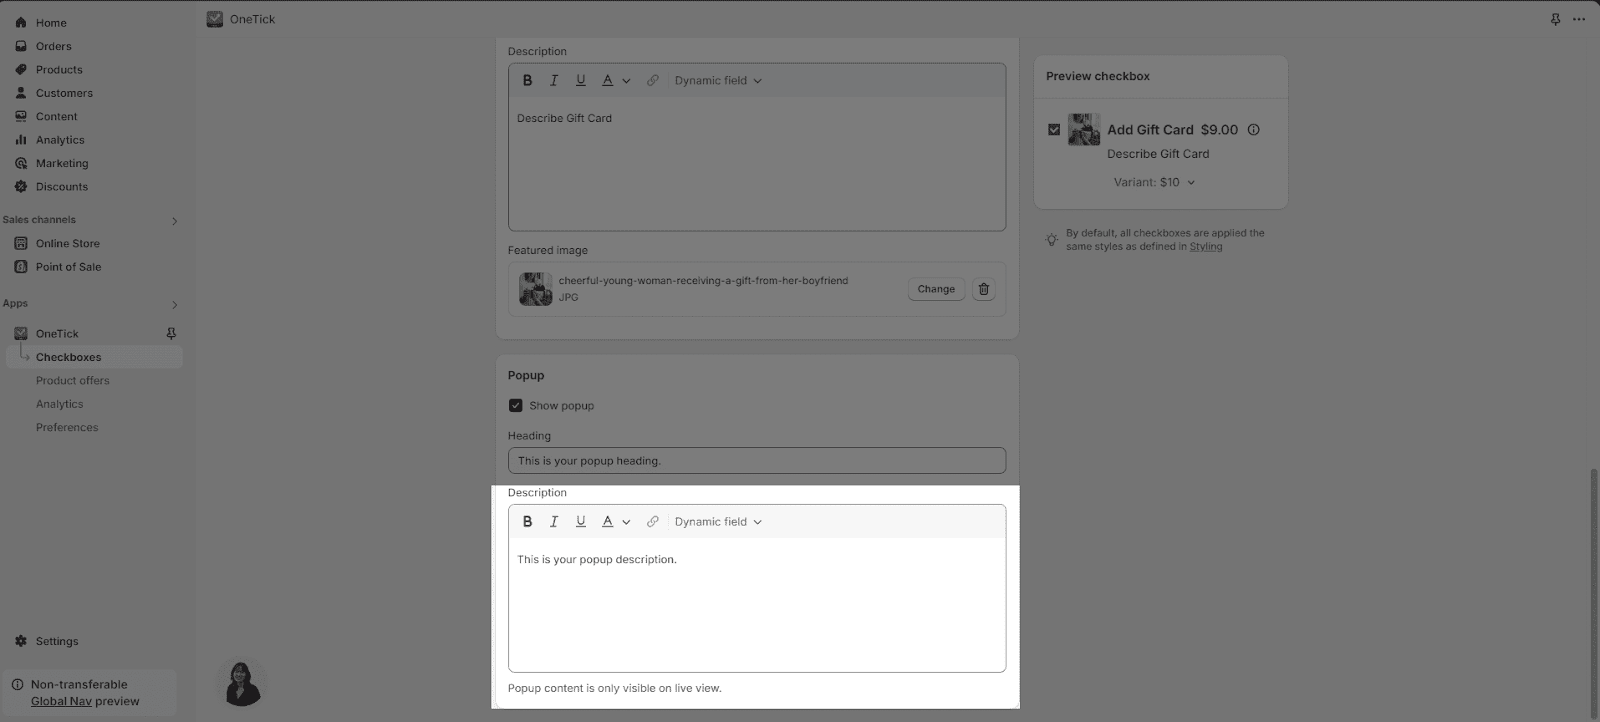
- Description:
Popup on Live view
In order for the Popup to show up on Live view, you can add the OneTick Checkbox block in the theme editor. Click ‘Add block‘ in the section. Then, under ‘App blocks‘, choose ‘OneTick Upsell Cross Sell‘. The Popup will automatically be added along with the regular checkbox. Remember, you can only use OneTick checkbox in sections with product details, like ‘Featured Product’ (on pages other than product pages) or ‘Product Information’ (on product pages).
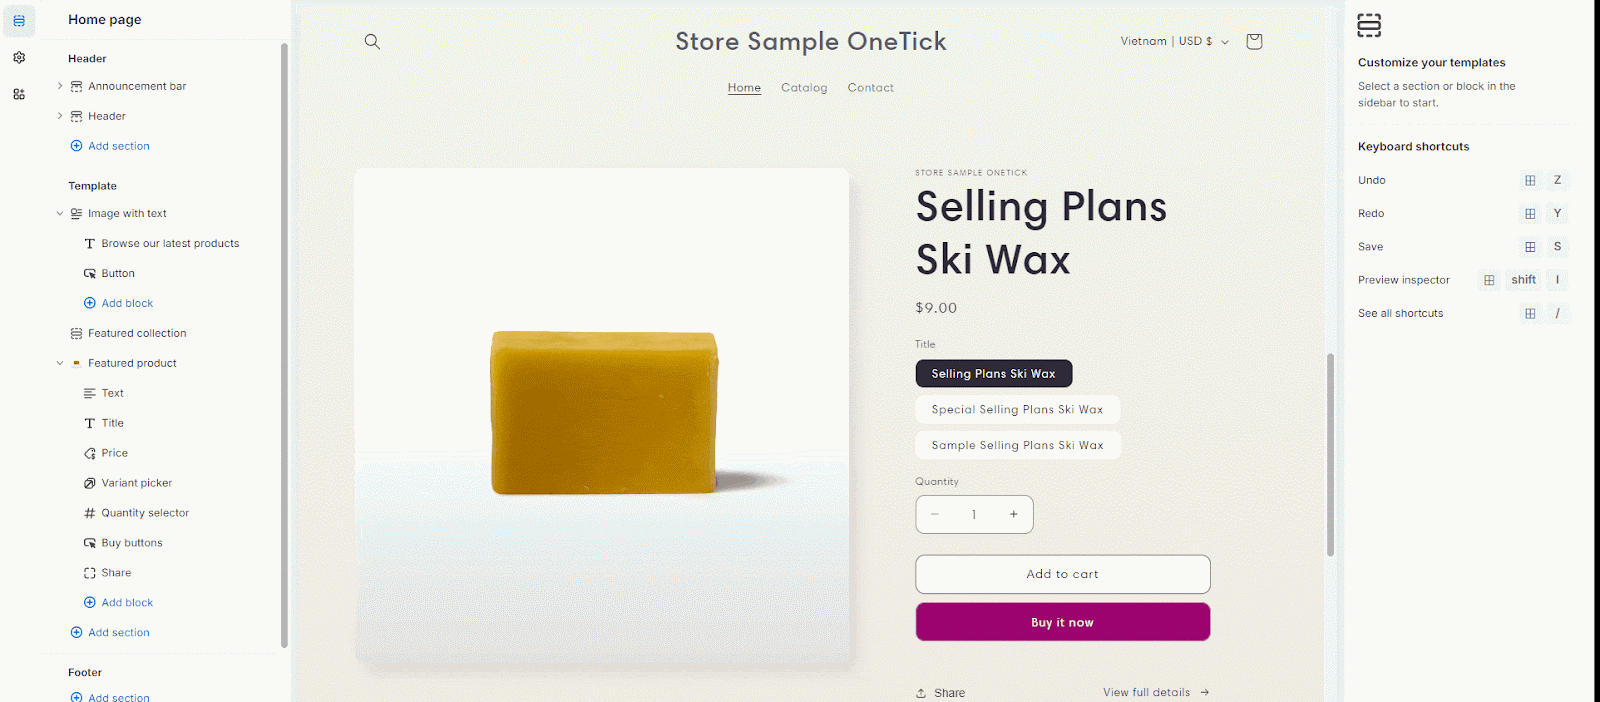
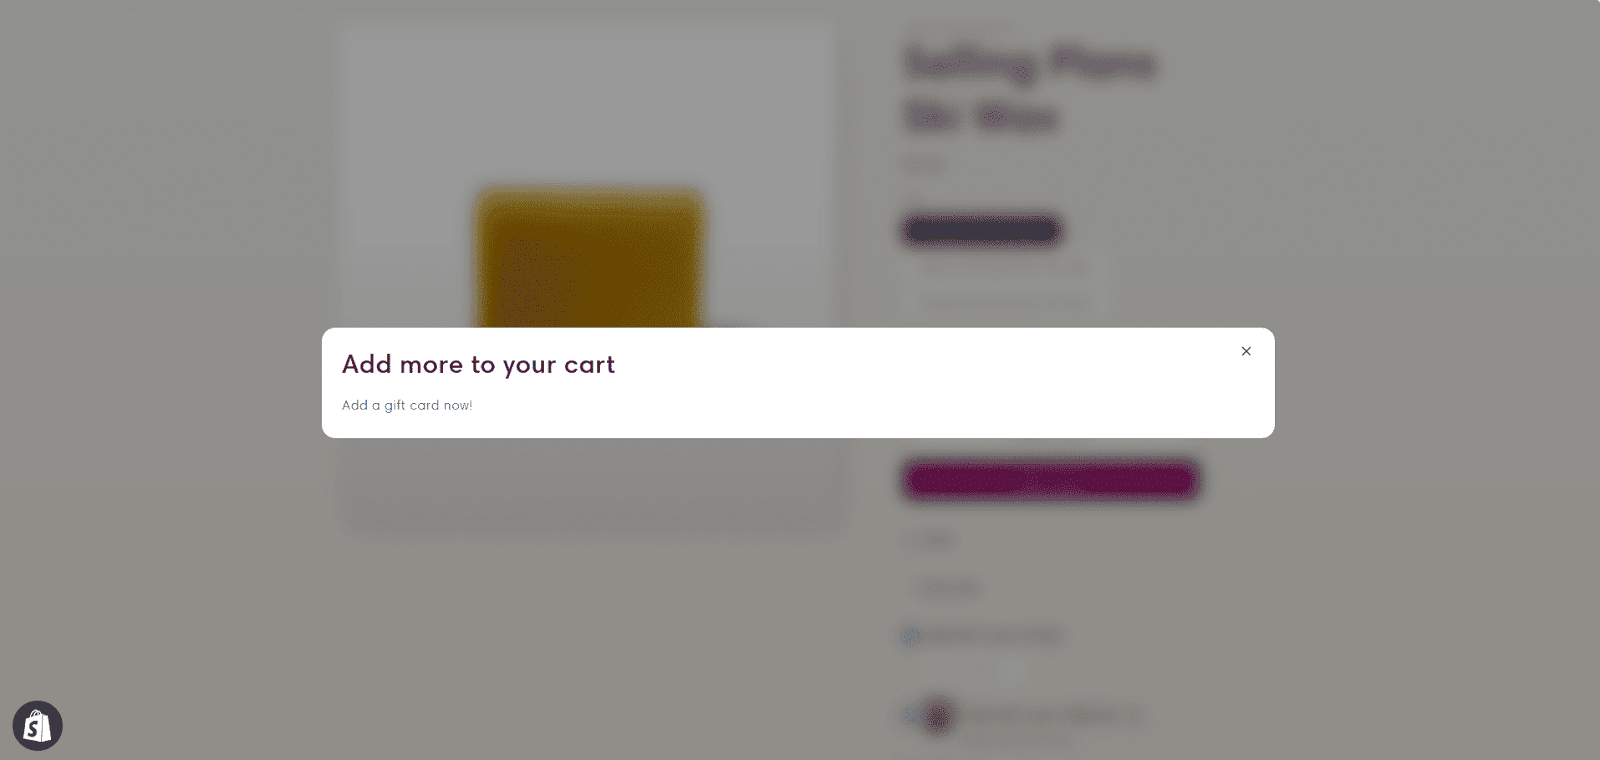
On the Live view, your Popup will appear as below:
To view Popup, click the ⓘ icon:
After clicking on the icon, you can see the Popup in the center of the page with blurred background:
Step 6: Check Preview And “Save” The Checkbox
Finally, preview your checkbox on the right-hand side of the screen. Once satisfied with how it looks, click the “Save” button to save and copy the checkbox ID or copy embed code to use it in your live store.
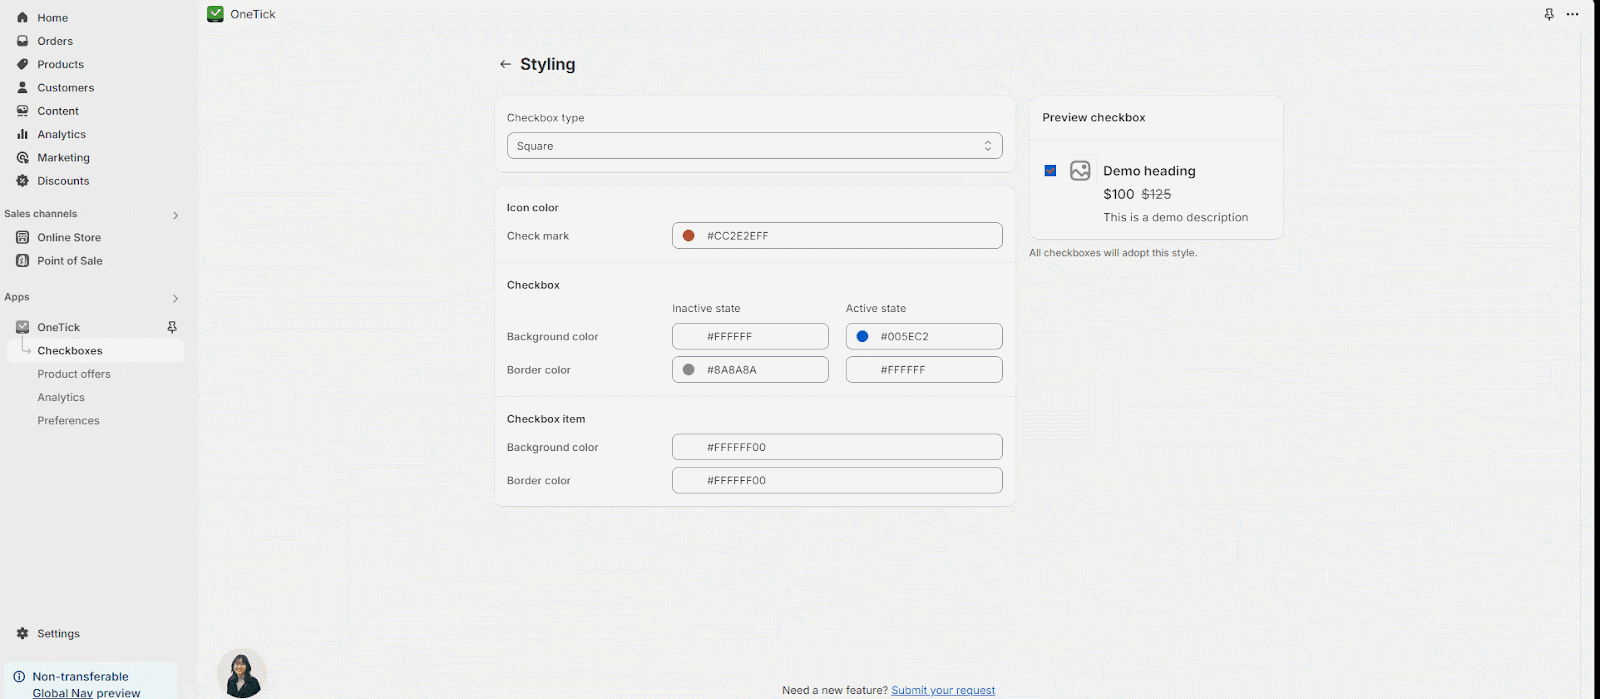
Step 7: Set Up Styling For The Checkbox
From the OneTick dashboard, you can visit Styling to set up style for the Checkbox.
In Styling, you can customize the box of the checkbox upsell with type and color.
You can decide the checkbox type: Square, Round, Rounded Corner.
IMAGE
Beside, you can change the icon color in the Icon color option.
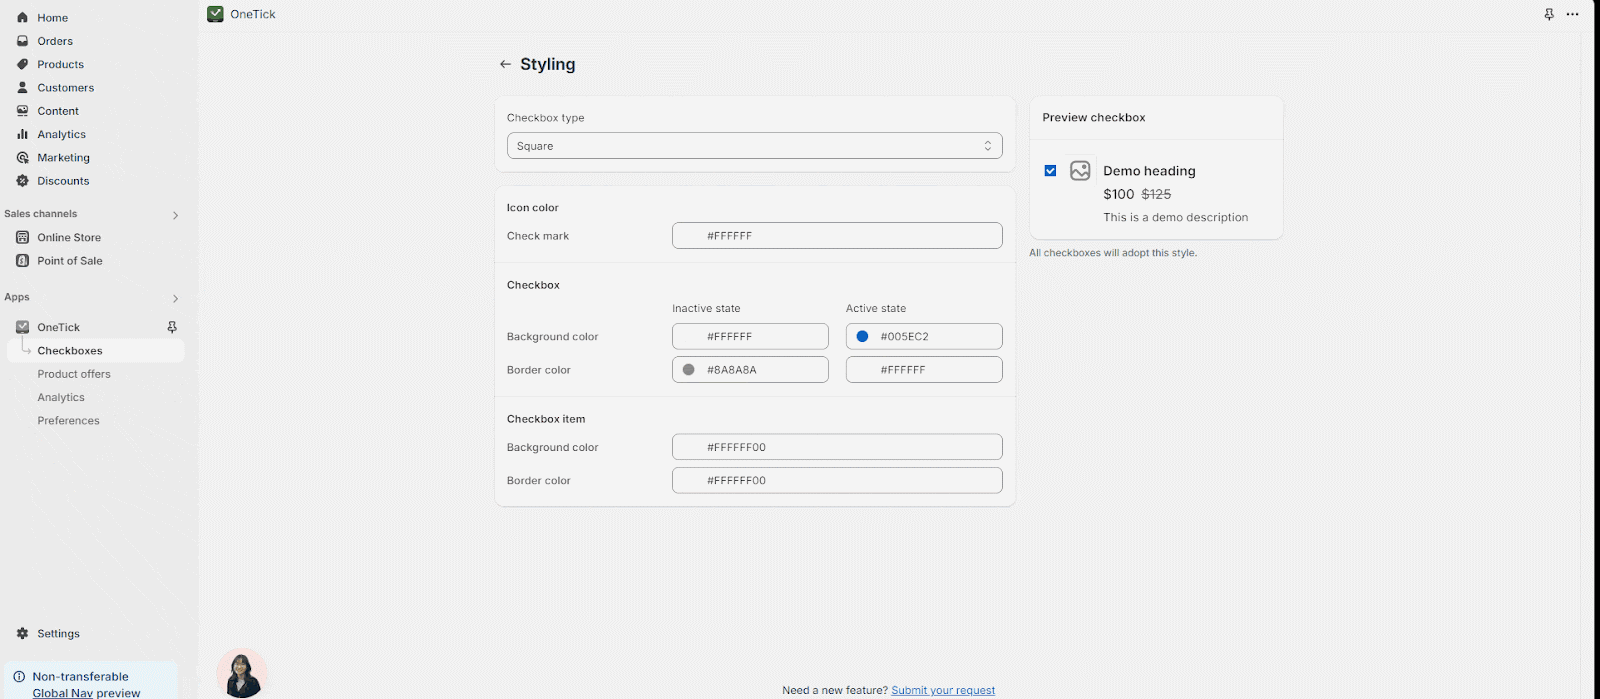
You can also make changes on Checkbox background and border color. There are active and inactive states. However, only the active state will change the color when you make a change.
Frequently Asked Questions
1. What steps must I finish to make the checkbox work?
To make the checkbox work normally, the Checkbox name, Checkbox status and Add-on product must be selected.
2. What image formats can I upload in the checkbox?
You can use images with format .jpg, .jpeg, .webp and .png