Overview
In this article, you’ll learn how to install the OneTick checkbox into your Shopify Theme editor, enhancing your online store’s functionality.
Check the difference between a Shopify theme 2.0 and a vintage theme in this article.
The OneTick Upsell Cross Sell app enables you to add customizable checkboxes to all sections of the ‘Product Details‘ type, such as ‘Featured Product‘ or ‘Product Information‘ section.
How To Install OneTick Checkbox To Your Shopify Theme OS 2.0
Step 1: Enable “OneTick Upsell Cross Sell” In Theme Editor
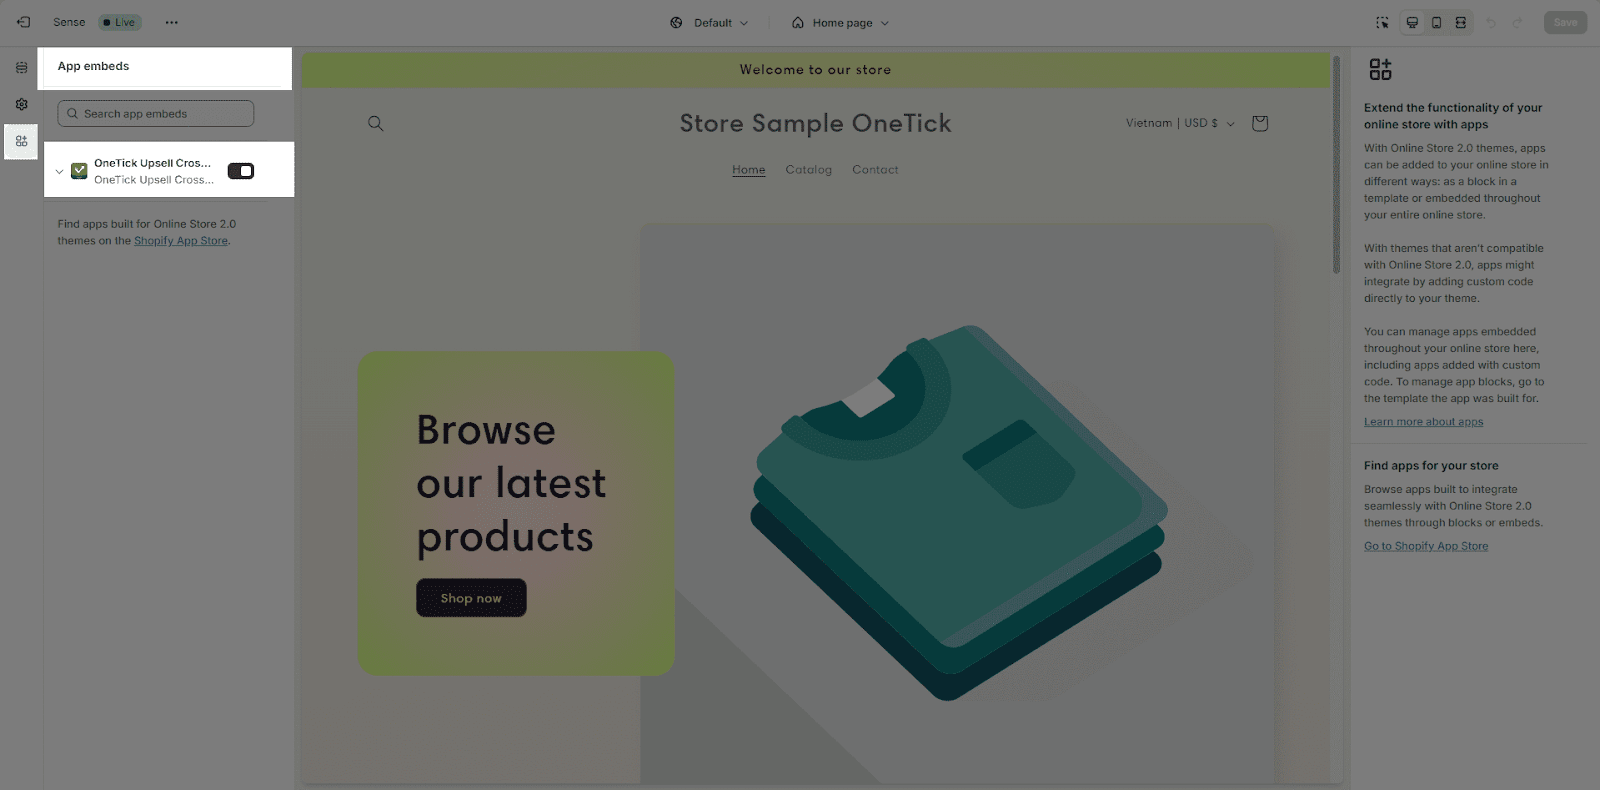
Ensure you’ve turned on “OneTick Upsell Cross Sell” in your theme editor > App embeds for optimal functionality.
Step 2: Open Theme Editor
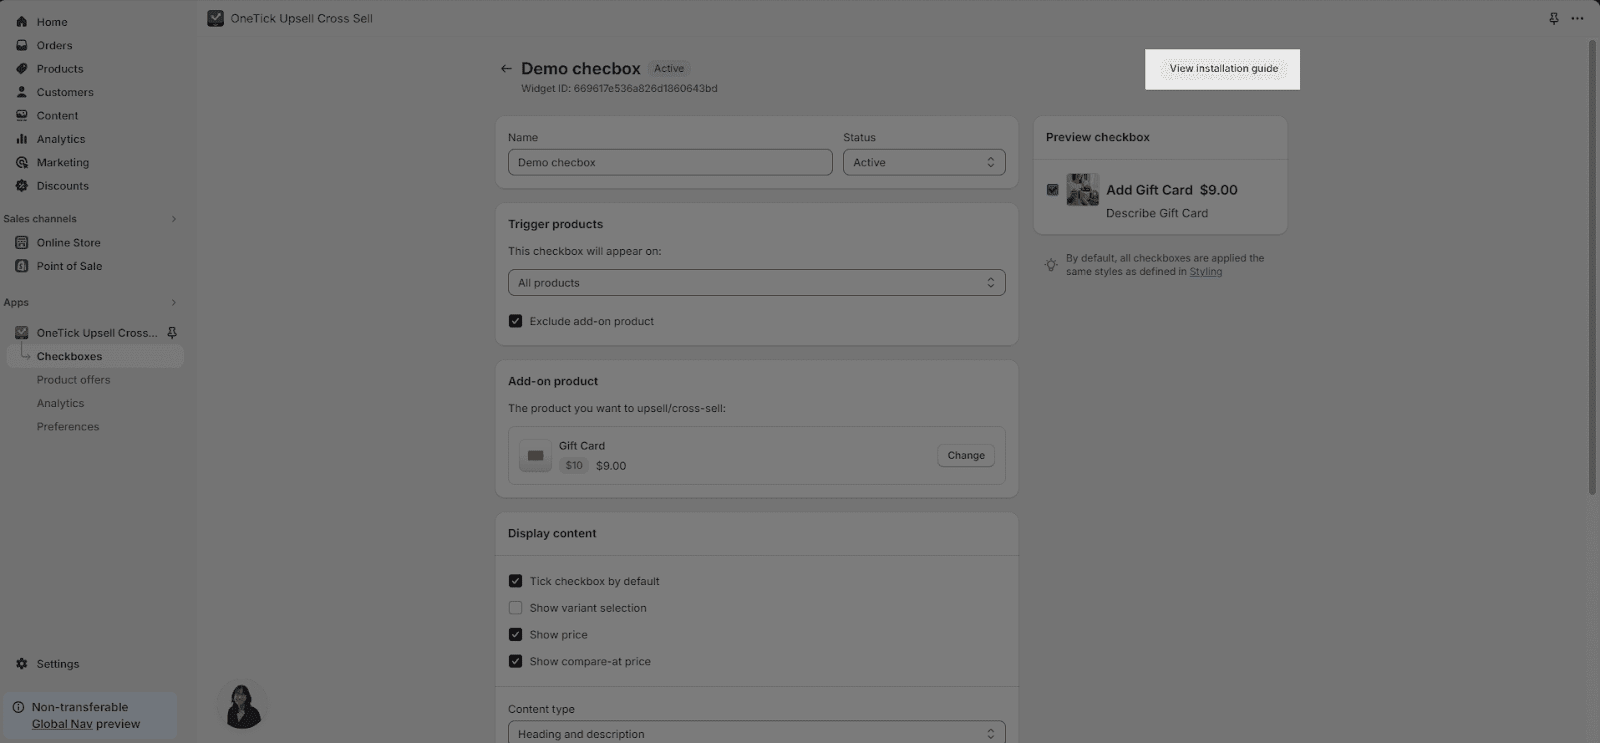
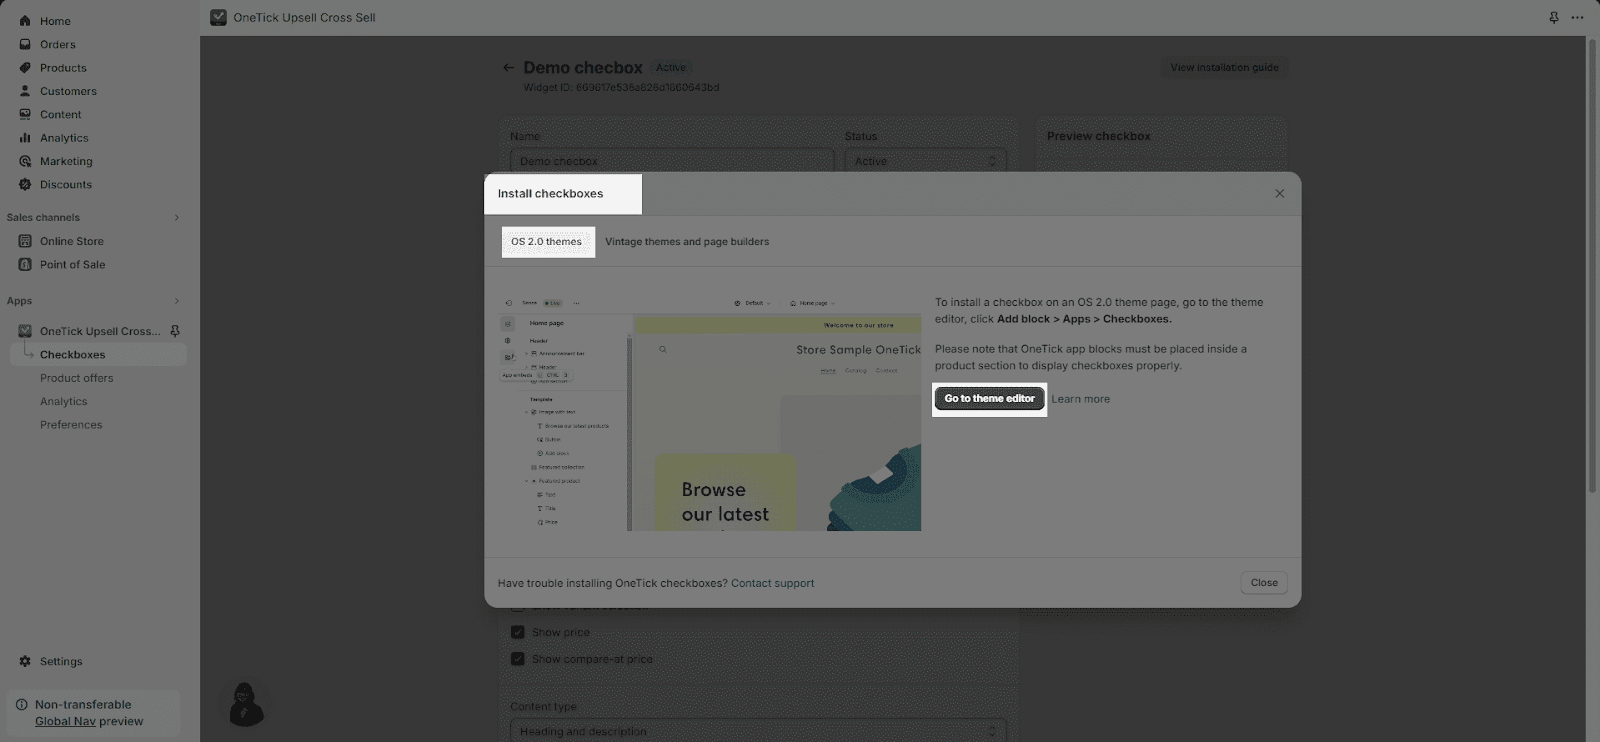
After creating your checkbox, the ‘Install Checkboxes‘ modal will appear. You can access this feature by clicking on the “View installation guide” at the top right corner of the page.
In the modal, look for the ‘Go to Theme Editor‘ button and click it to open the editor.
If you want to leave the checkbox for later use, you can also find the ‘View installation guide‘ again in the checkbox editor page. Simply look for the ‘View installation guide‘ button at the top right of the checkbox editor page, and click on it to open the widget.

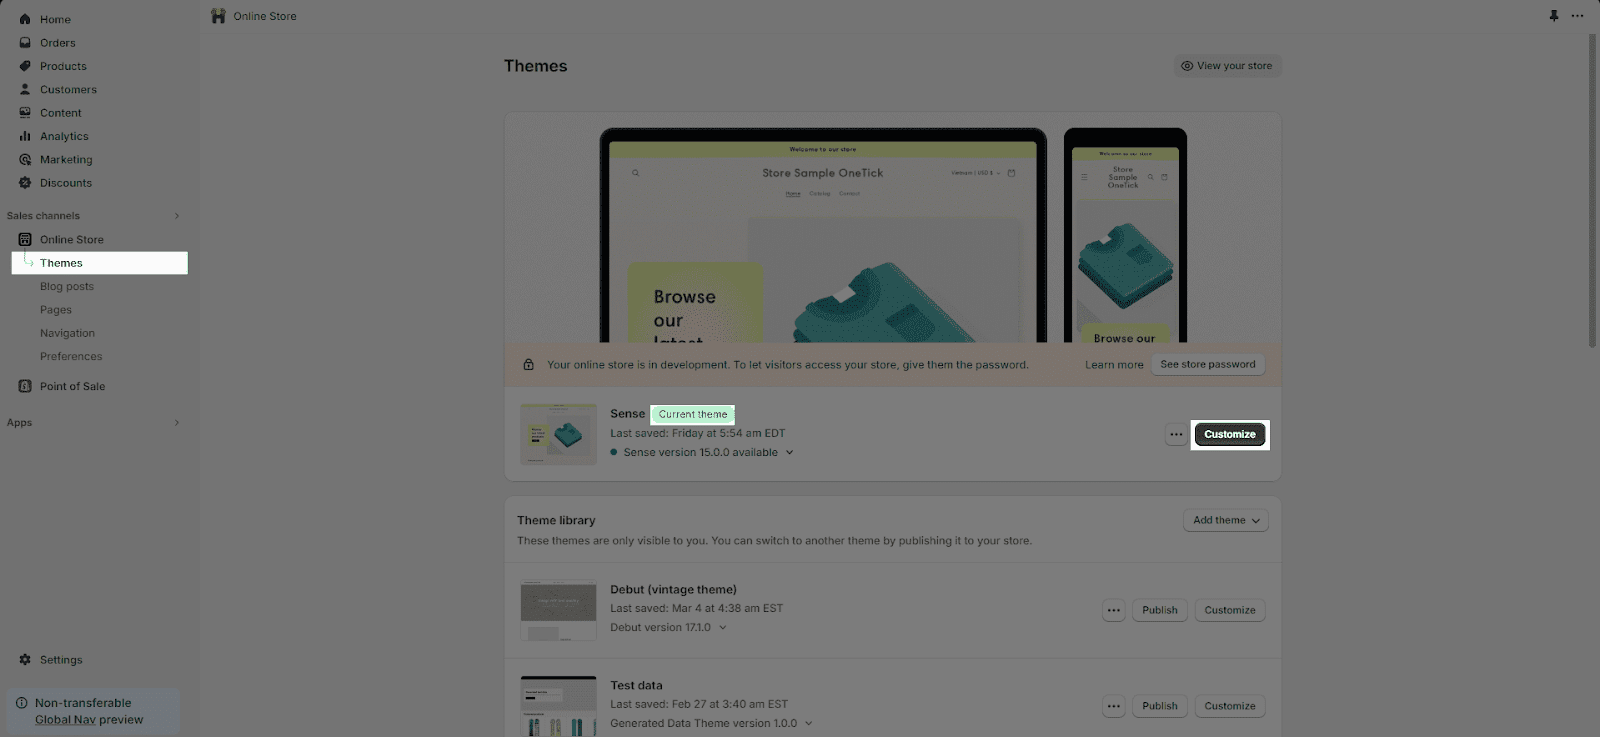
You can also go to the theme editor a different way: Go to your Shopify admin, then choose ‘Online Store‘, then ‘Themes‘. Select your current theme and click ‘Customize‘.
Step 3: Add OneTick Checkbox App Block To Your Section
In the theme editor where you want the checkbox, click ‘Add block‘ in the section. Then, under ‘App blocks‘, choose ‘OneTick Upsell Cross Sell‘.
Remember, you can only use OneTick checkbox in sections with product details, like ‘Featured Product‘ (on pages other than product pages) or ‘Product Information‘ (on product pages).
Now, your checkboxes are ready! Click the ‘Save‘ button to make the changes appear on your website. All checkboxes that have an “Active” status and have been selected for that trigger product will be displayed on your store. You can change the order of the checkboxes in the OneTick app.
How To Install OneTick Checkbox To Your Shopify Vintage Theme
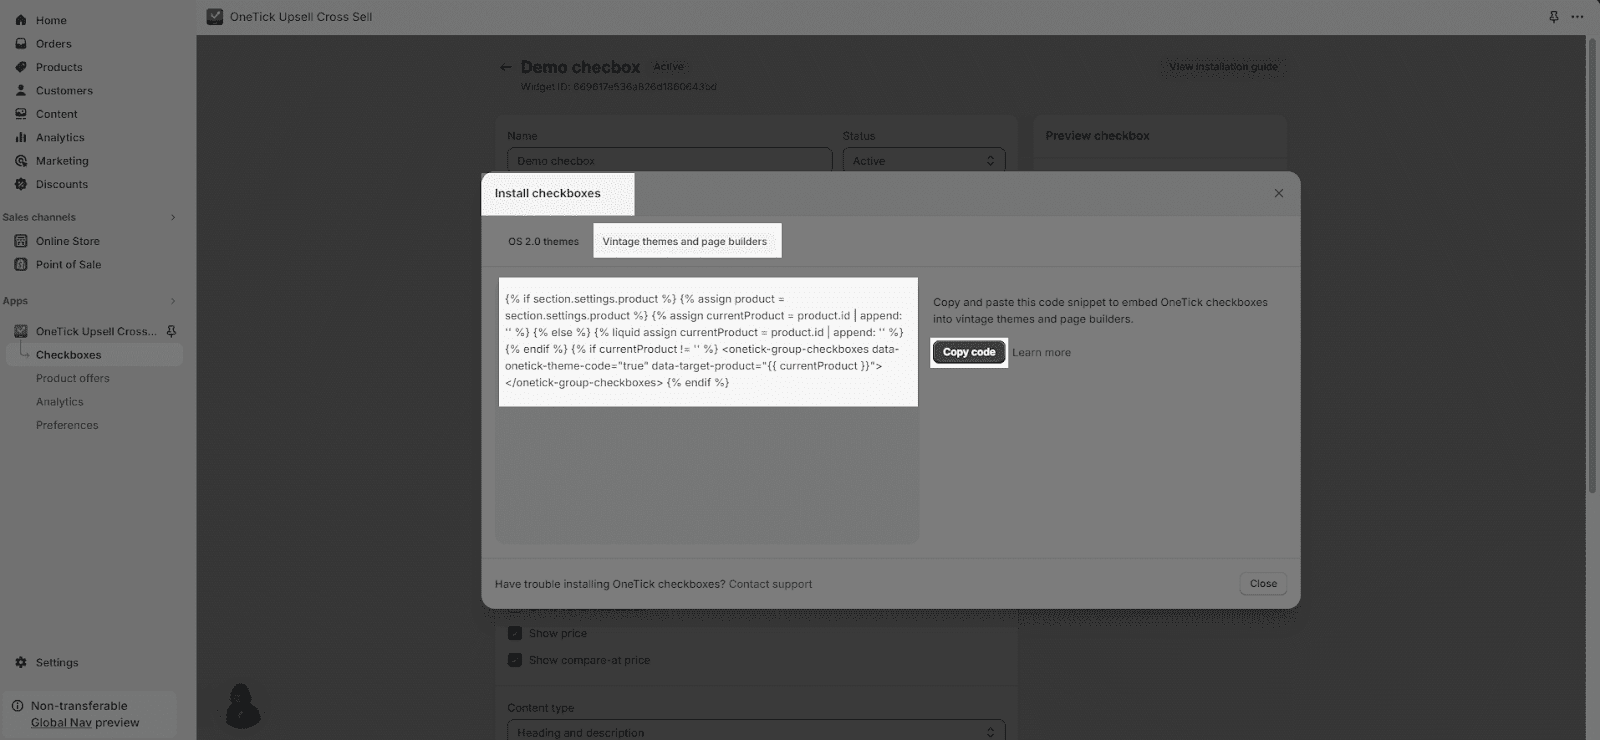
Step 1: Copy The Widget Code
In the ‘View installation guide’, go to the ‘Vintage Themes and Page Builders‘ tab. Here, you will see the widget code.
Click the ‘Copy Code‘ button to copy this code. You will need it in the theme editor.
Step 2: Open Theme Code Editor
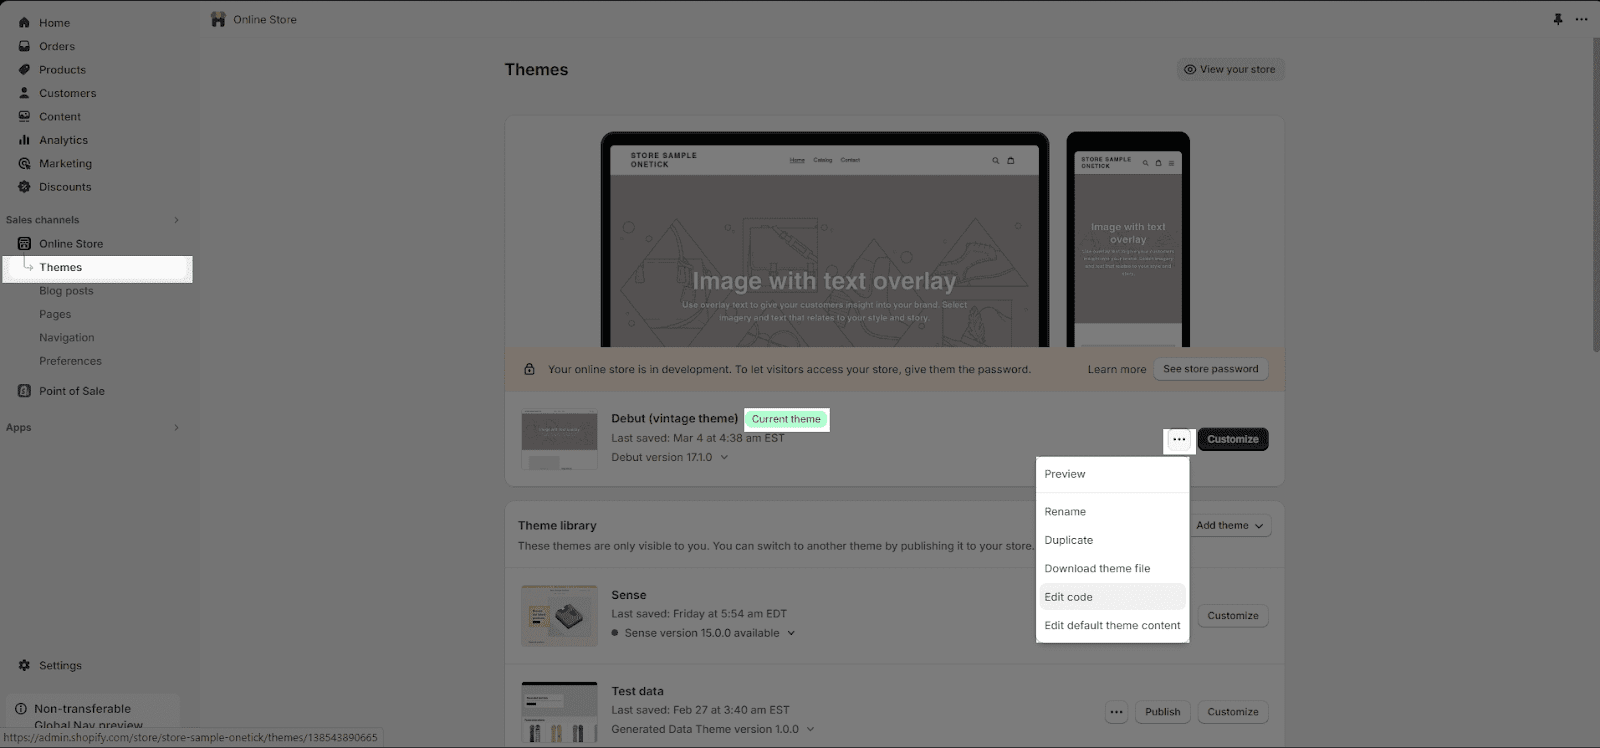
To get to the theme code editor, go to the Shopify admin. Then, click ‘Online Store‘, then ‘Themes‘. Choose your current theme and click the 3 dots icon. Finally, select ‘Edit Code‘.
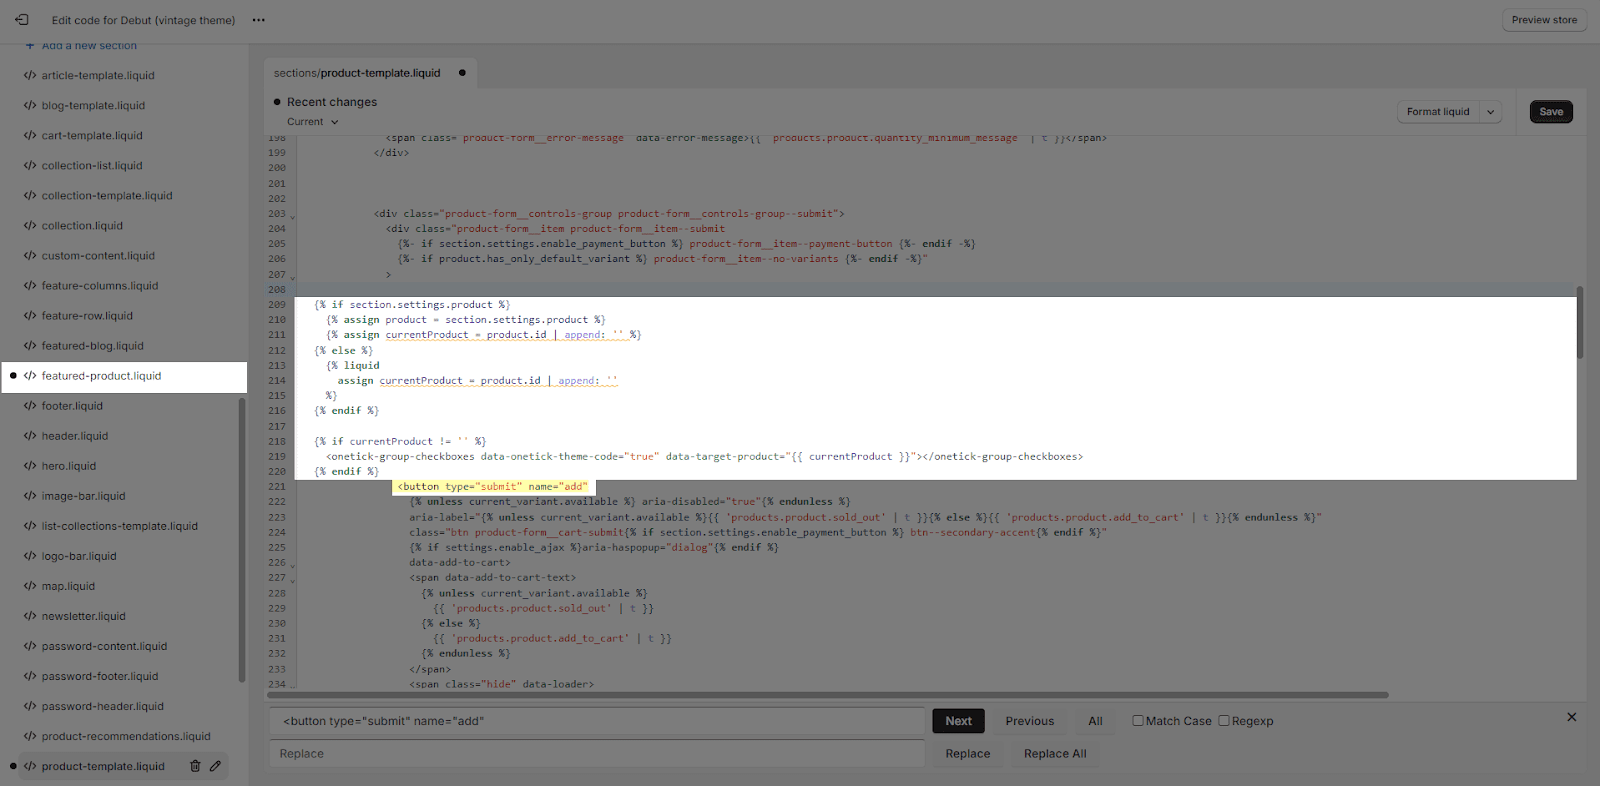
Step 3: Paste The Widget Code In The Theme Code
After opening the theme code editor, search for “product-template.liquid”. Next, paste the checkbox code before the code <button type=”submit” name=”add”…>
Frequently Asked Questions
1. Do I need to add a block for each checkbox in the same page?
No, after adding the OneTick checkboxes block onto the page, all the checkboxes you created with an “Active” status on the OneTick app and have been selected for that trigger product will be displayed on the page right away.
2. Can I hide a specific checkbox on the page?
Yes, if you want to hide a specific checkbox for a product, you can change the status of that checkbox from “Active” to “Draft“, or unselect the trigger product for that checkbox.
3. When I make changes in the OneTick app, do I need to copy and paste the code in the theme again?
No, once you add the code in the theme, this code will help to automatically show all the latest updates of the checkboxes in the live store.