Overview
In this article, we will guide on how to create quick checkout links to streamline the buying process for customers.
By following this guide, merchants will be able to generate quick checkout links that simplify the purchase experience, leading to reduced cart abandonment and increased conversion rates.
Requirements
User account with administrative privileges.
How To Create Quick Checkout Links
Step 1: Access to Preferences
First, you need to log in to your account to the Shopify Admin.
From the EverFlow app, navigate to the Preferences Dashboard, then choose Quick Checkout Link to generate a checkout link.
Step 2: Add Product Items To The Checkout Link
You can include items with or without selling plans. Items not associated with any selling plan will be treated as one-time purchases.
From here, you can search the product’s name on the search bar in order to select them.
Or you can choose the “Browse” option to select the product.
After you choose the products, it will show their quantity, selling plans, and the subtotal price of the product.
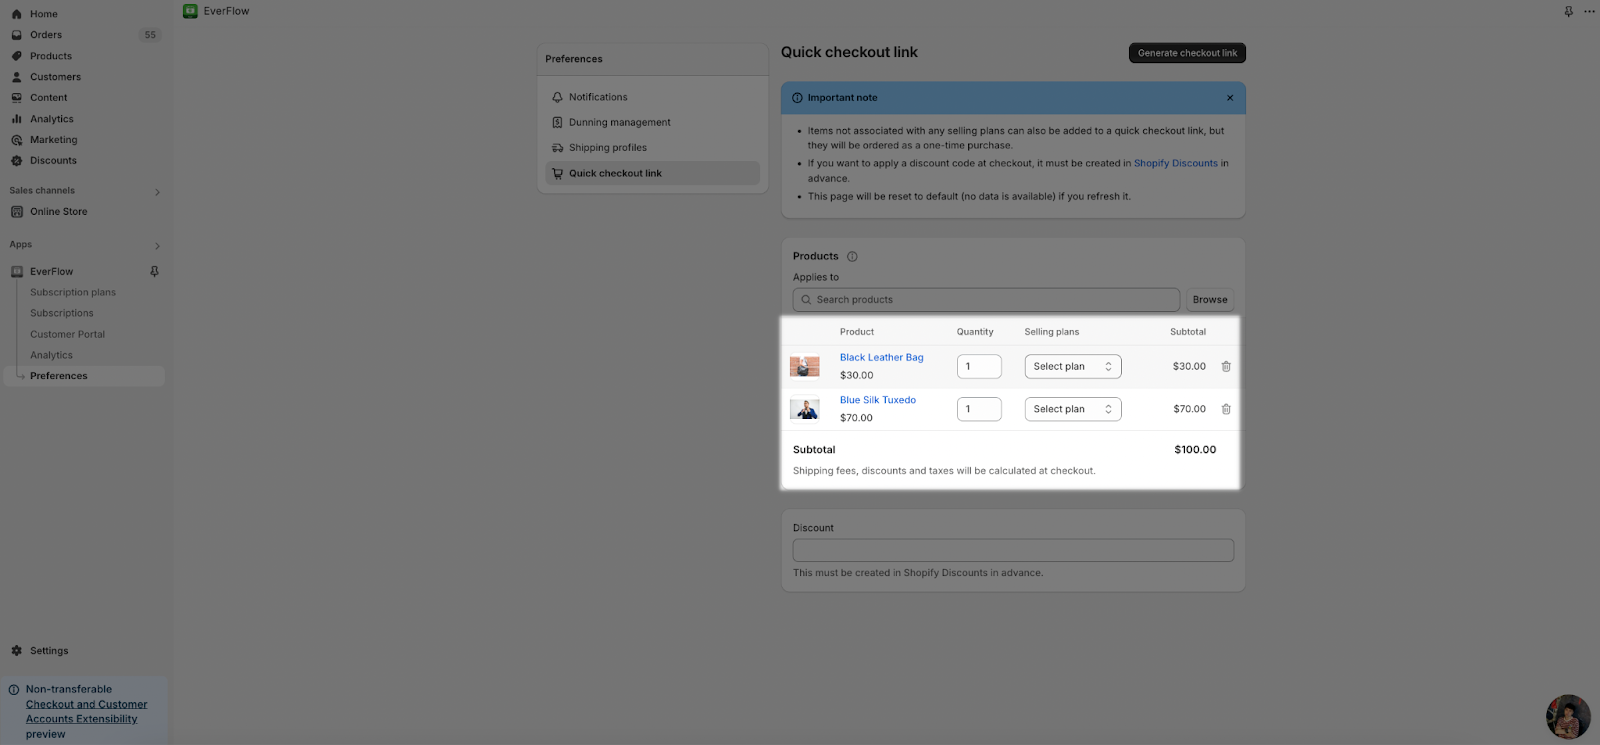
Step 3: Add Selling Plans For Each Product
Select the applicable selling plans for each line item. All ACTIVE selling plans assigned to the item will be available for selection, and the item price will adjust based on the selected discount.
Note: The prices of the products are calculated based on the discounts set up in the selected selling plan during the subscription creation process. Learn more at “How to create subscription plans for your products”.
The discount code below has not yet been applied to this price; the final price, which includes the discount code, will only be visible when the customer checks out.

Besides, you can change the quantity of each line item if needed (default is set to one).
Step 5: Add Discount Code
If applicable, you have to add a discount code. This coupon code must be created in the Shopify admin beforehand and must be active.
In case you don’t remember the code, you visit the Shopify Admin, go to Discounts, and then copy the Discount code.
After copying the code, you go back to the Quick Checkout Link to apply to the products.
Step 6: Generate Checkout Link
After finishing with applying products and discount code, you will click “Generate checkout link” to create the link. You will see the generated link to proceed to the checkout page.
You can copy links and send them to customers (via email, ect).
You can also edit and regenerate the link as needed.
Common Cases
To quickly create a checkout link for a single product, simply add the product and generate the link without any additional items or discounts.
Quick Checkout Links can transform how you create your subscription landing pages by allowing customers to click on a promotional banner and be taken straight to a checkout page with the subscription already added to their cart, which can boost conversion rates and enhance customer satisfaction.
Additionally, these versatile links enable you to promote subscriptions across various platforms—whether through ads, blogs, banners, your homepage, or emails—ensuring customers can easily access the checkout page with just one click.
If you need to create a checkout link for multiple products with various selling plans, refer to the detailed guide on managing quick checkout links.
Frequently Asked Questions
1. How can I verify that the checkout link works correctly?
Click on the generated link to ensure it directs you to the correct checkout page with the appropriate items and prices.
2. What should I do if my discount code is not working?
Ensure that the discount code was created in Shopify admin, is active, and meets all criteria specified for use. Beside, please make sure this Discount is applied for selected products in Checkout Link.
3. Can I create a quick checkout link for an out-of-stock item?
No, quick checkout links can only be created for items that are currently in stock and active.
4. Can the generated link be deleted or expired?
No, it cannot be deleted or expired.
5. What happens if all the products in the link go out of stock or become inactive after the link is created?
When the user clicks the link, Shopify will display an error page with the message ‘Cart Error: Cannot find variant‘.