What Is TailorKit?
TailorKit is a product personalization app designed to help POD merchants increase sales and customer engagement by:
- Enabling print-on-demand sellers to create designs and integrate custom design options into products more quickly and easily with smart features, allowing them to spend more time promoting and selling their products to grow their business.
- Generating print files and seamlessly connecting with fulfillment services.
- Enabling print-on-demand sellers to create designs and integrate custom design options into products more quickly and easily with smart features, allowing them to spend more time promoting and selling their products to grow their business.
TailorKit Main Features
- Saves time by automating design tasks with smart features and an easy-to-use interface.
- Increases efficiency by allowing for quick integration of multiple designs into various products, while providing customizable mockups for effective product showcases.
Getting Started With TailorKit
Step 1: Download The TailorKit App
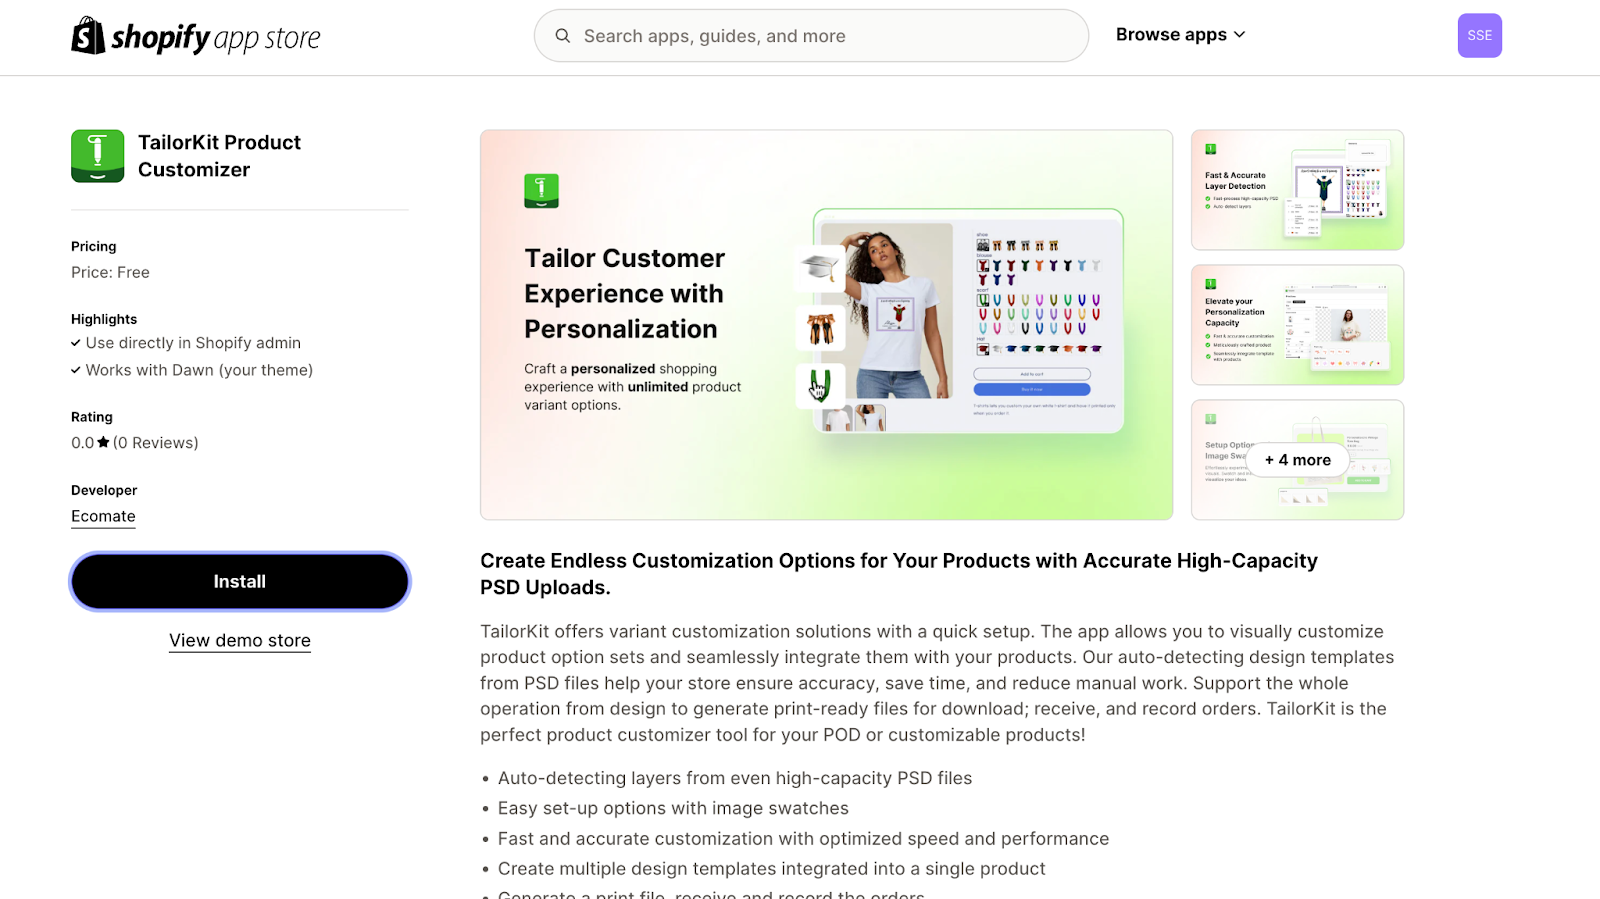
Find TailorKit on the Shopify App Store and install it in your store.
Step 2: Enable TailorKit App On Theme Editor
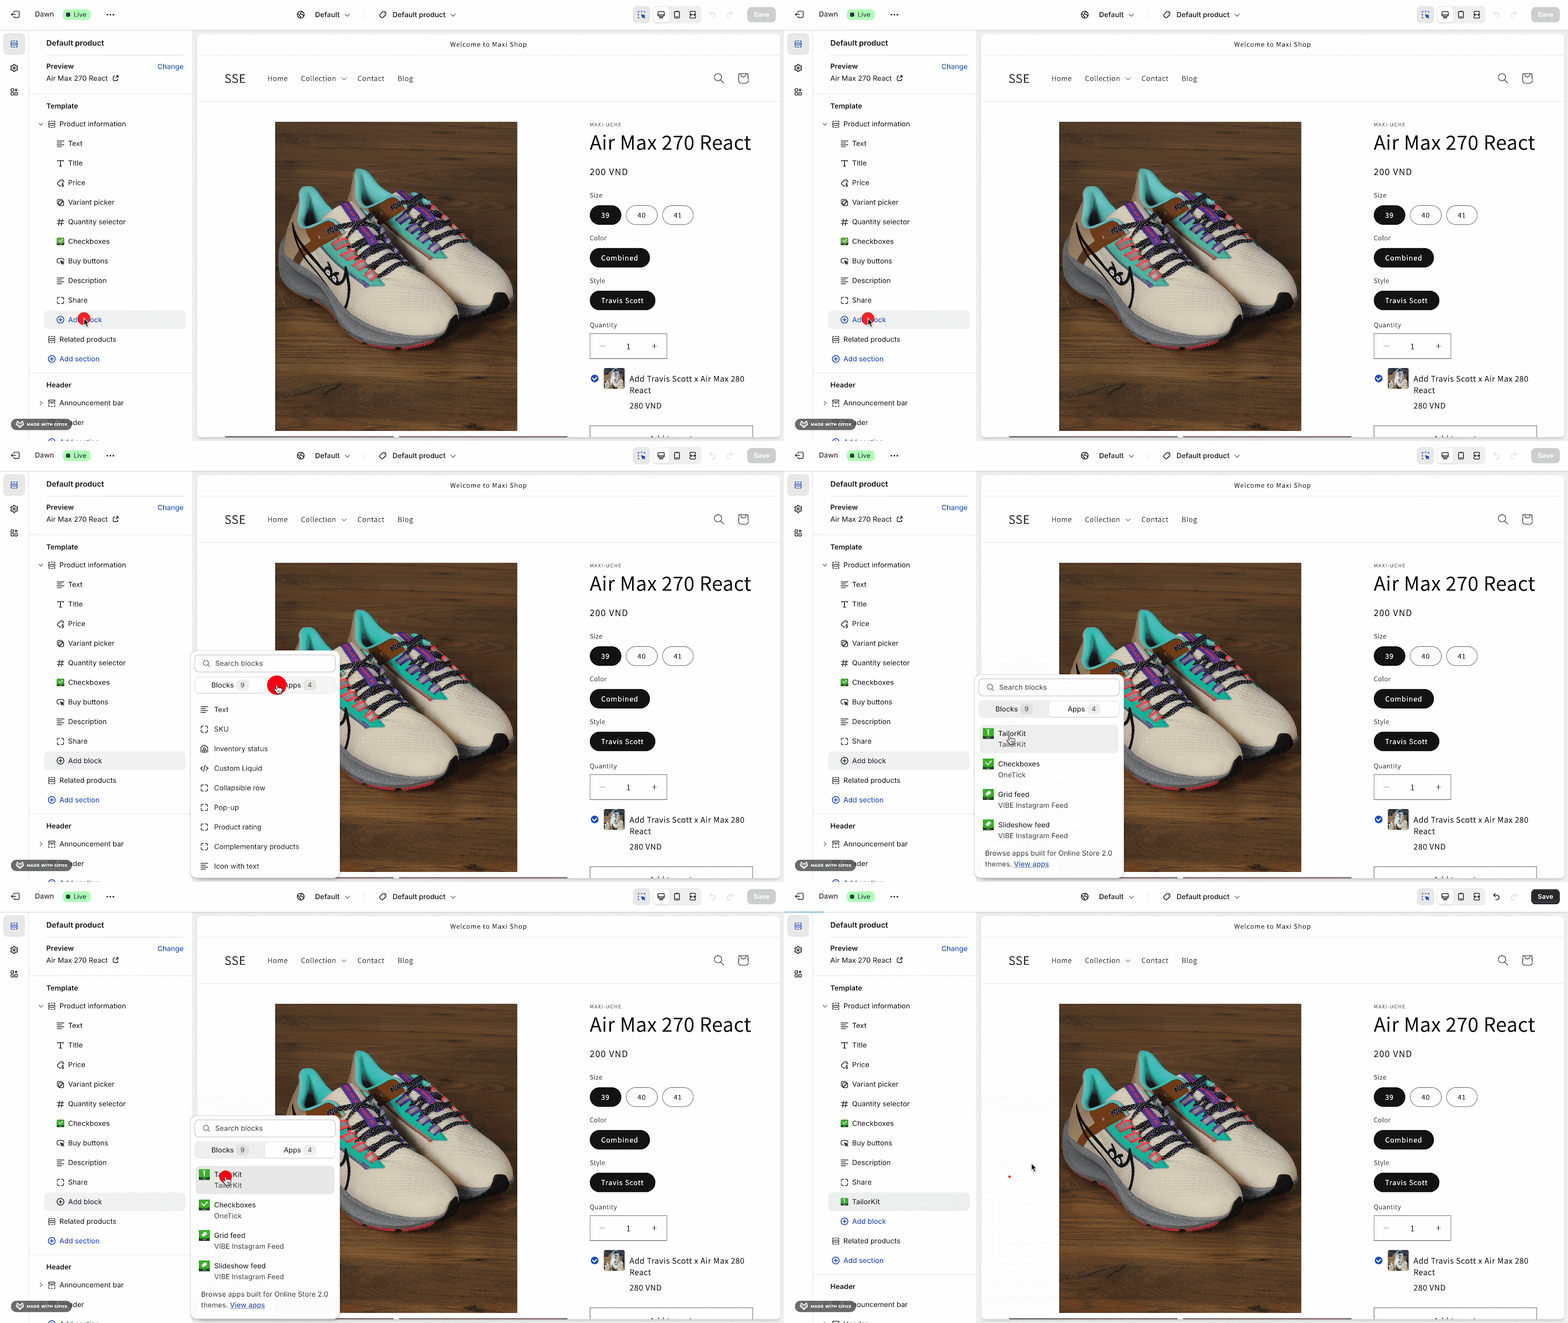
Then, to install the TailorKit app block on an OS 2.0 theme page, go to the theme editor, click Add block > Apps > TailorKit.
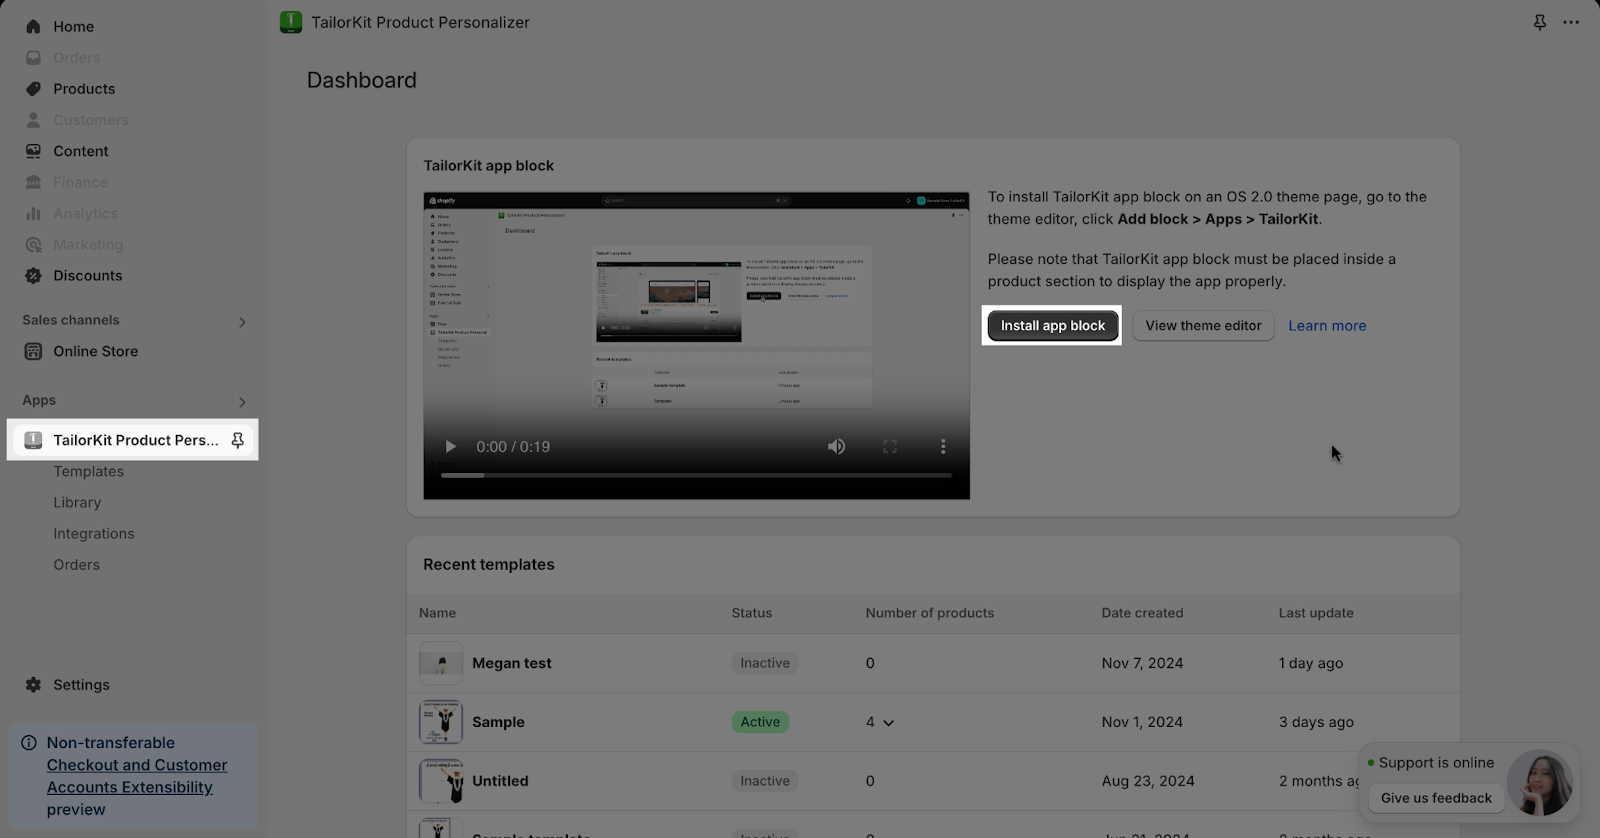
You can also auto-install the TailorKit app to your theme from the dashboard, click “Install app block” button.
Step 3: Create Your First Template
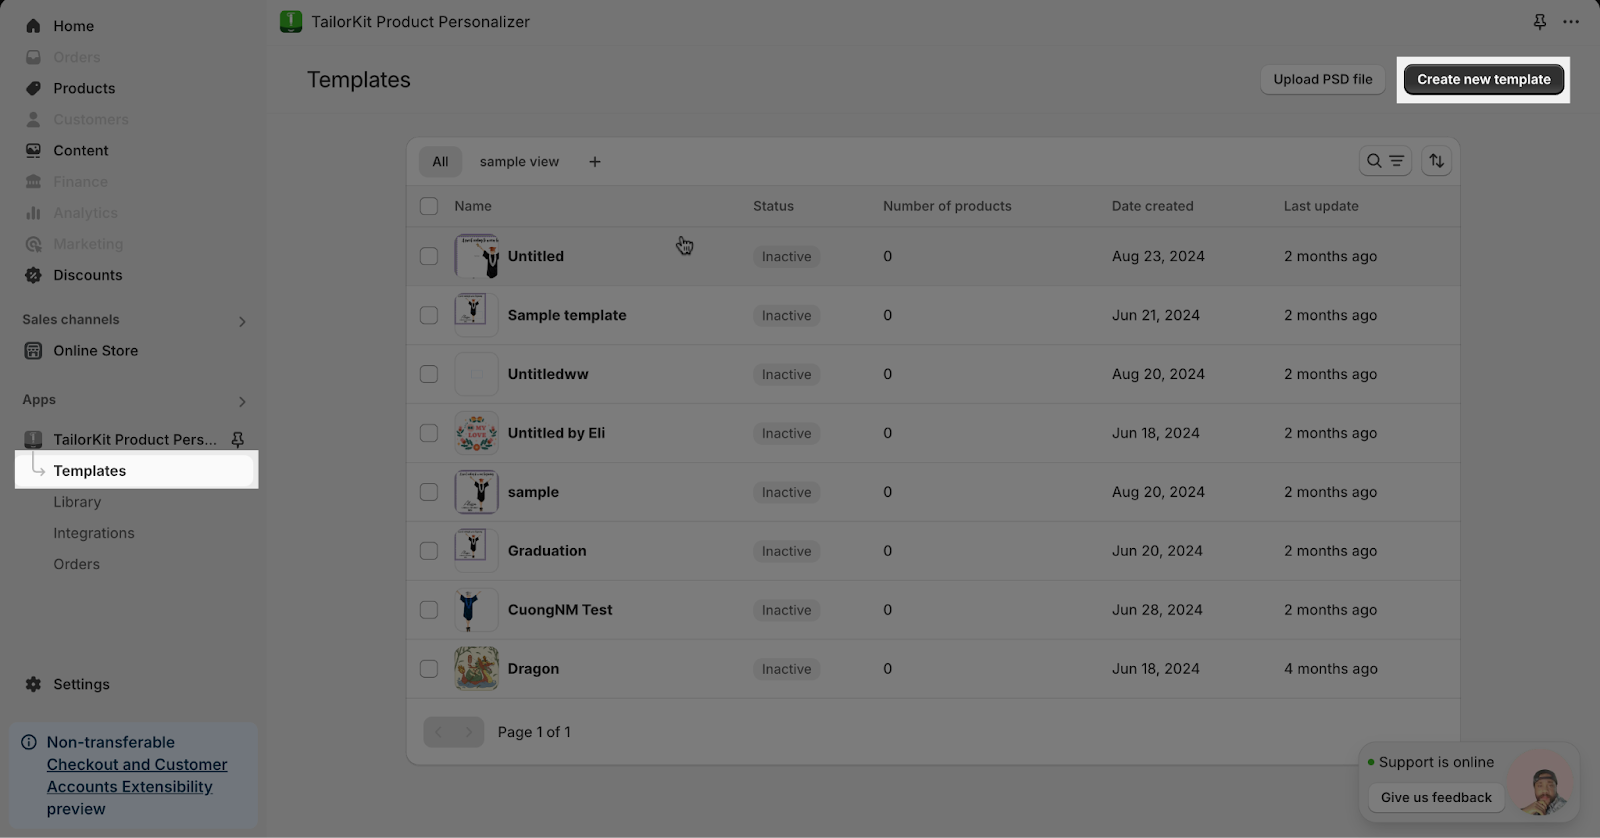
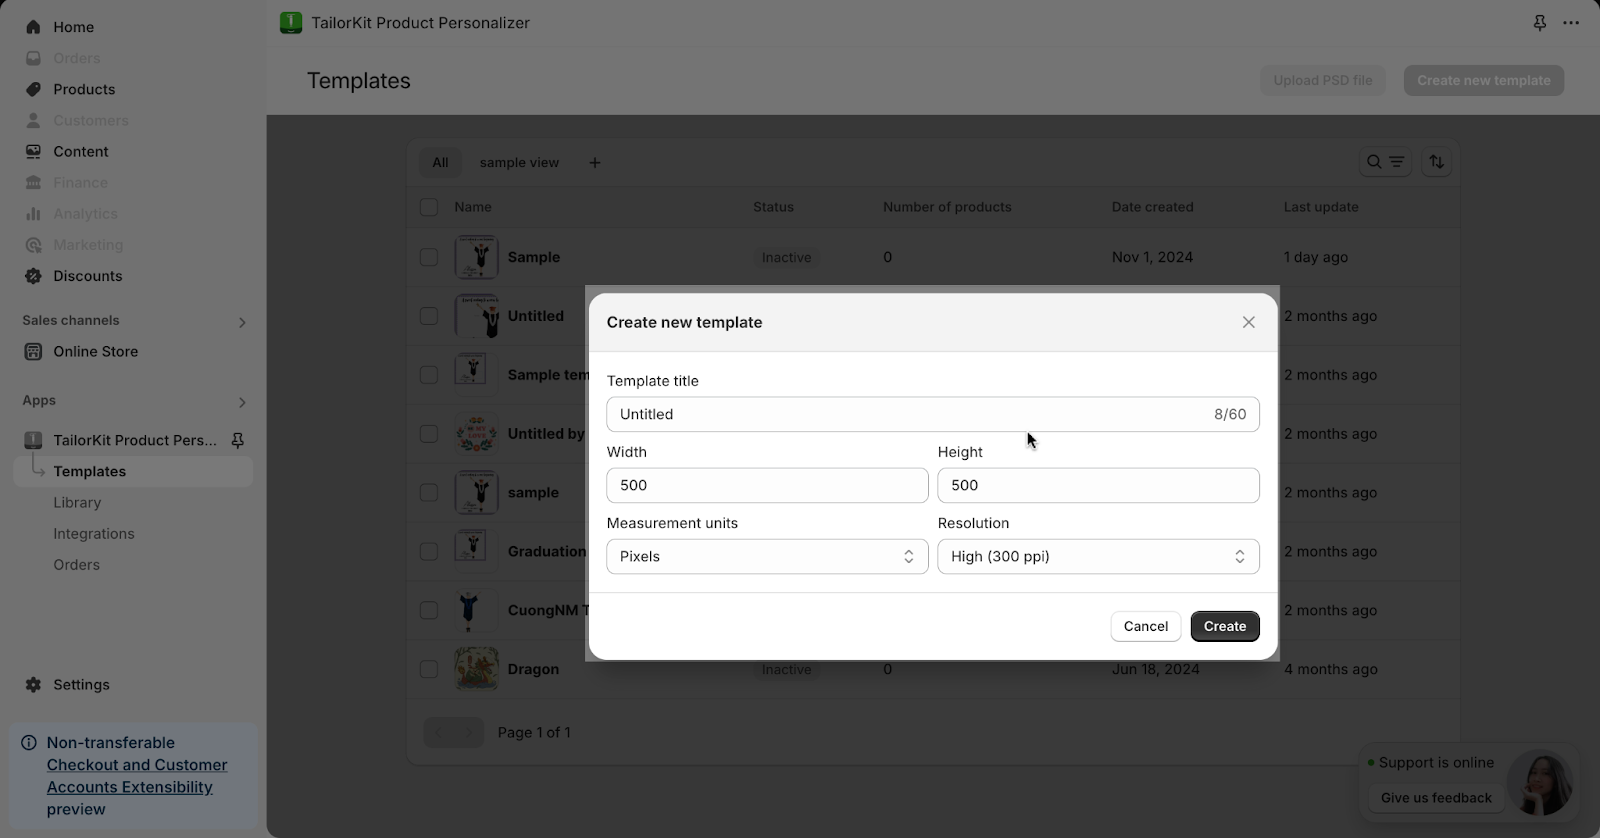
From the app dashboard, go to Template > choose “Create new template”
Then, you will see a Popup screen for setting the size of the template.
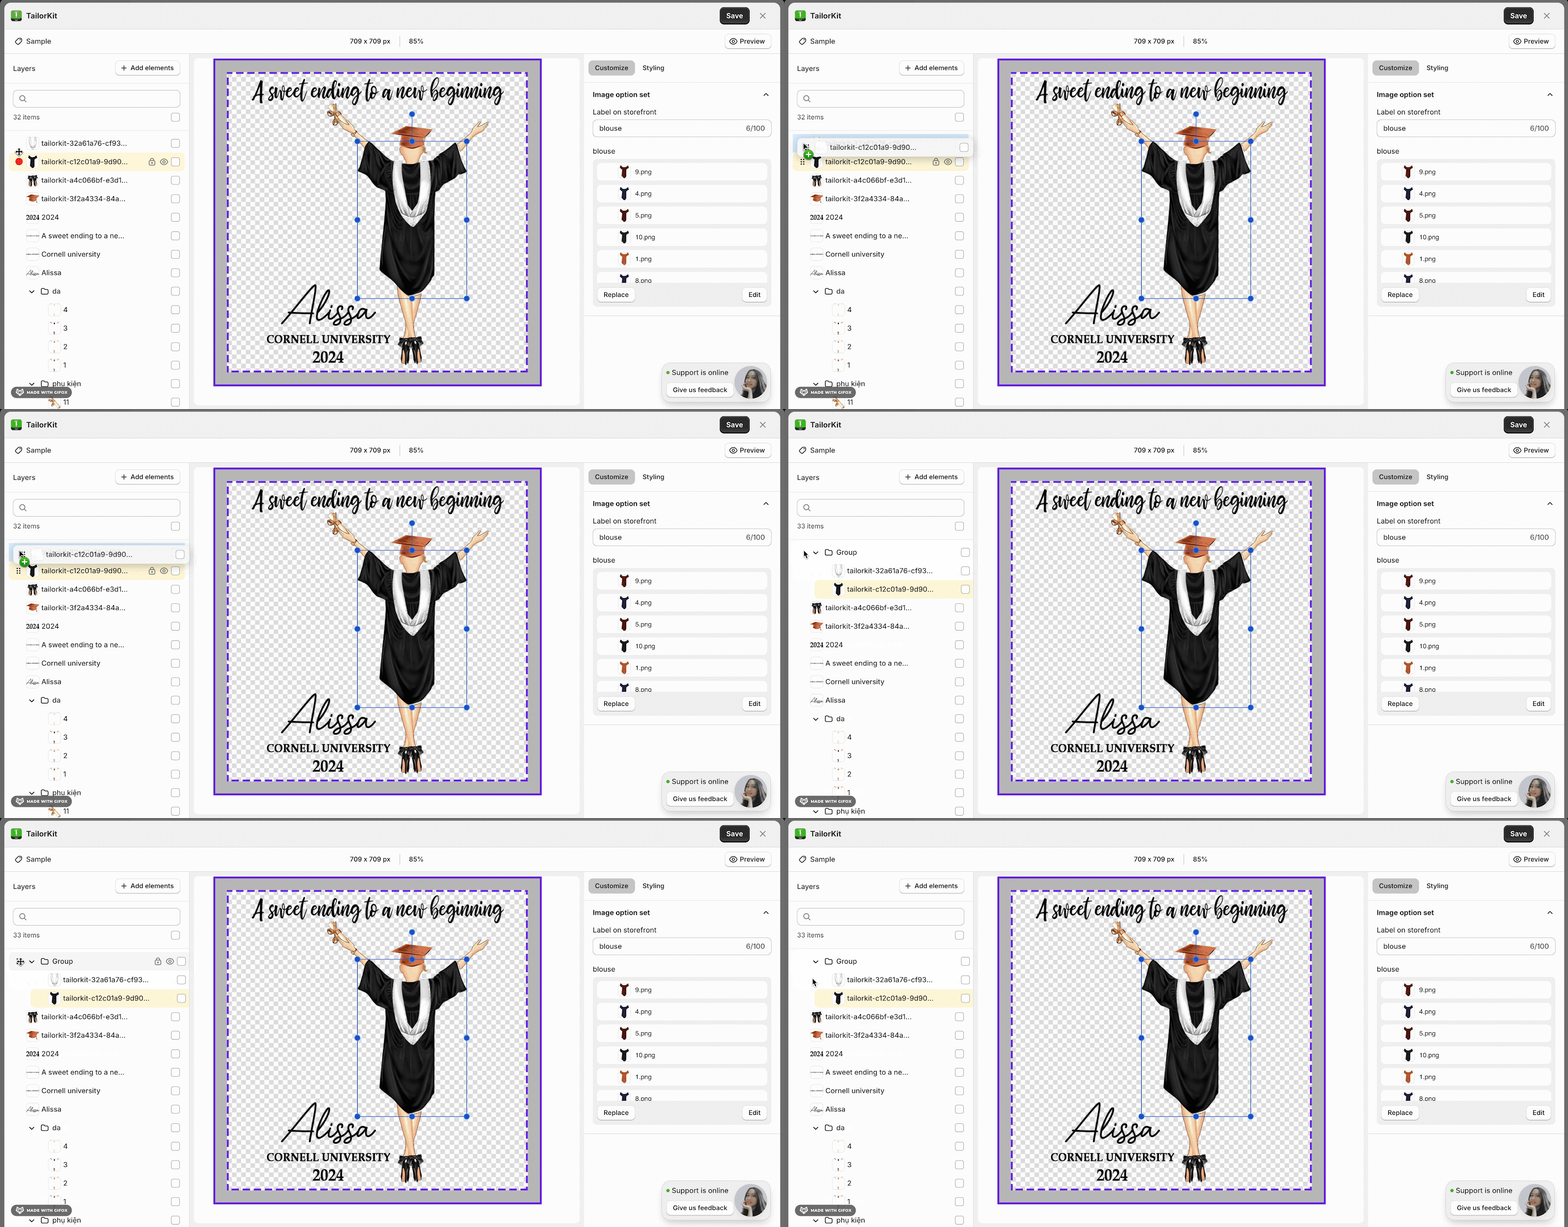
Then, you can Upload PSD and adjust the layers of this file.
Please follow the detailed instructions on this article.
Step 4: Create Image Option Set For Your Layers
Please follow the detailed instructions on this article
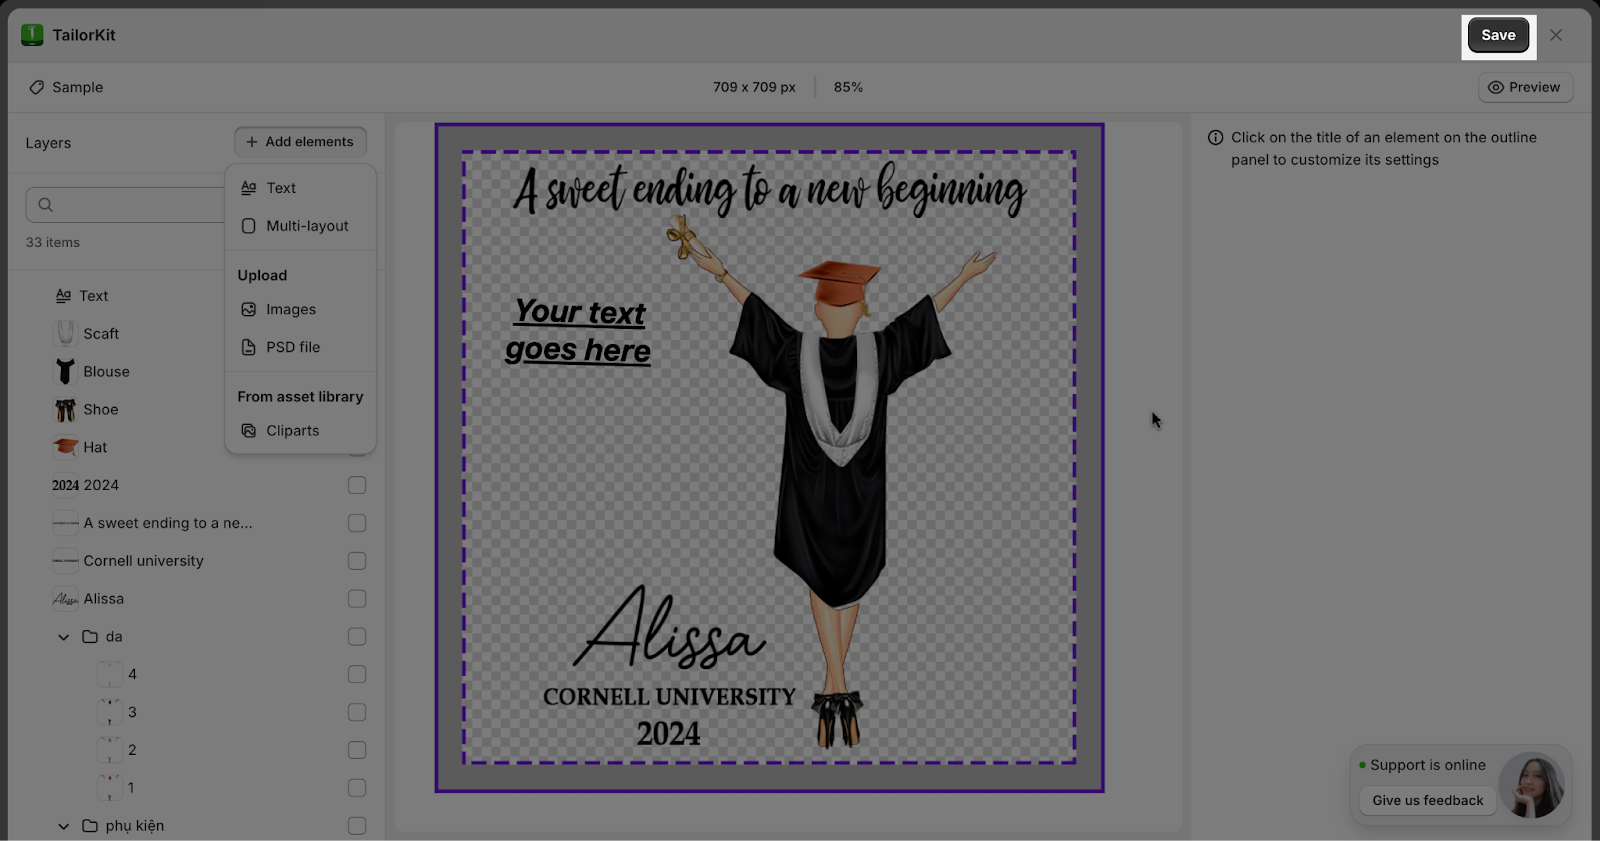
Step 5: Save The Template
When everything is done, click on the “Save” button to save the template.
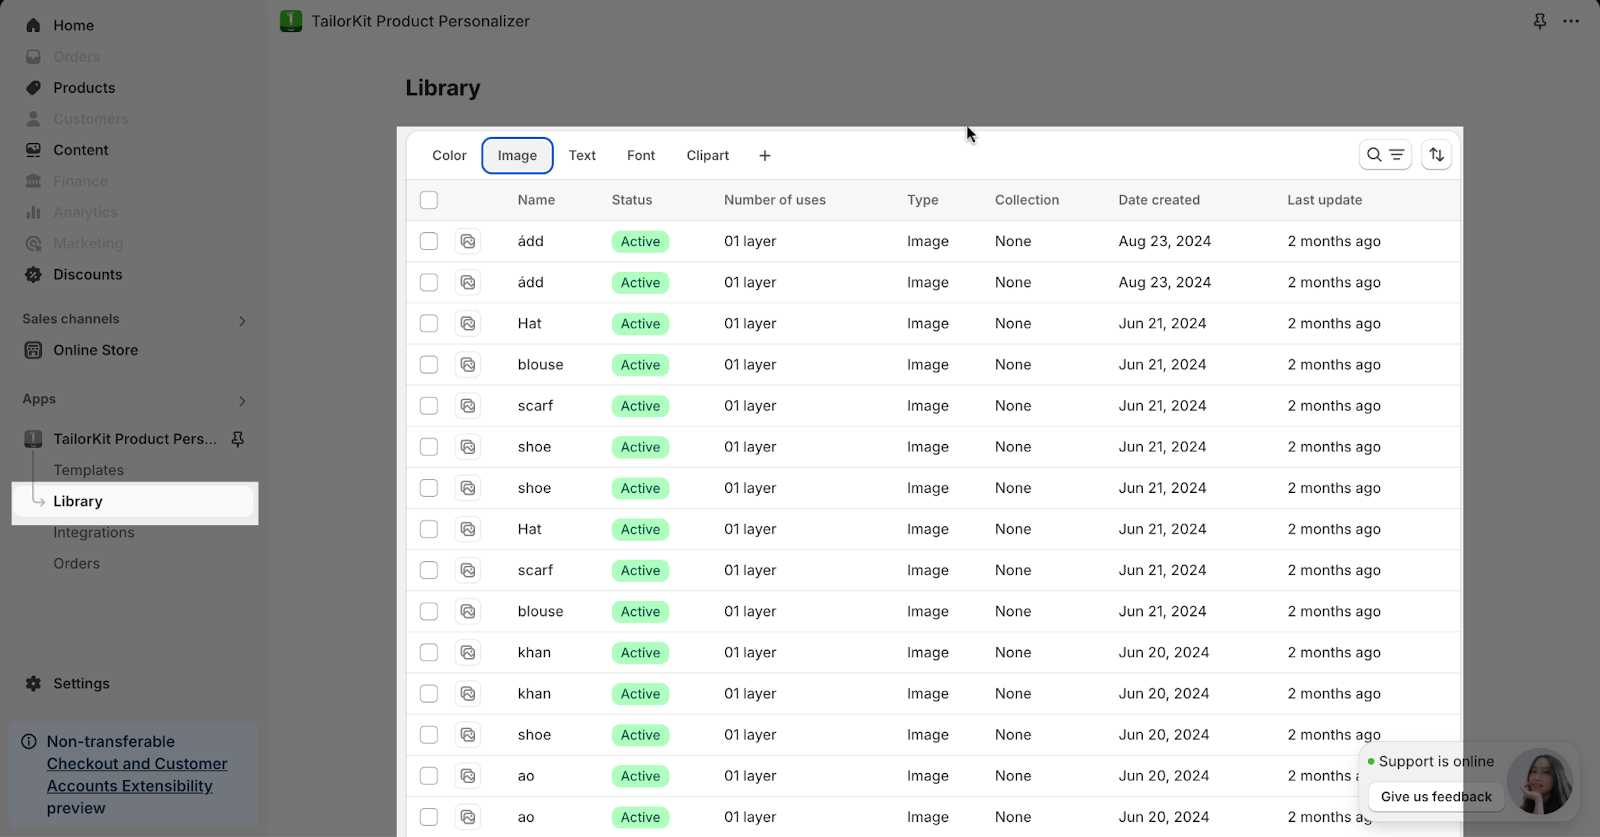
Step 6: Asset Library
After selecting the library from the app dashboard, you will be able to access the library option views: color, image, text, font, and clipart. You can also add more views if needed.
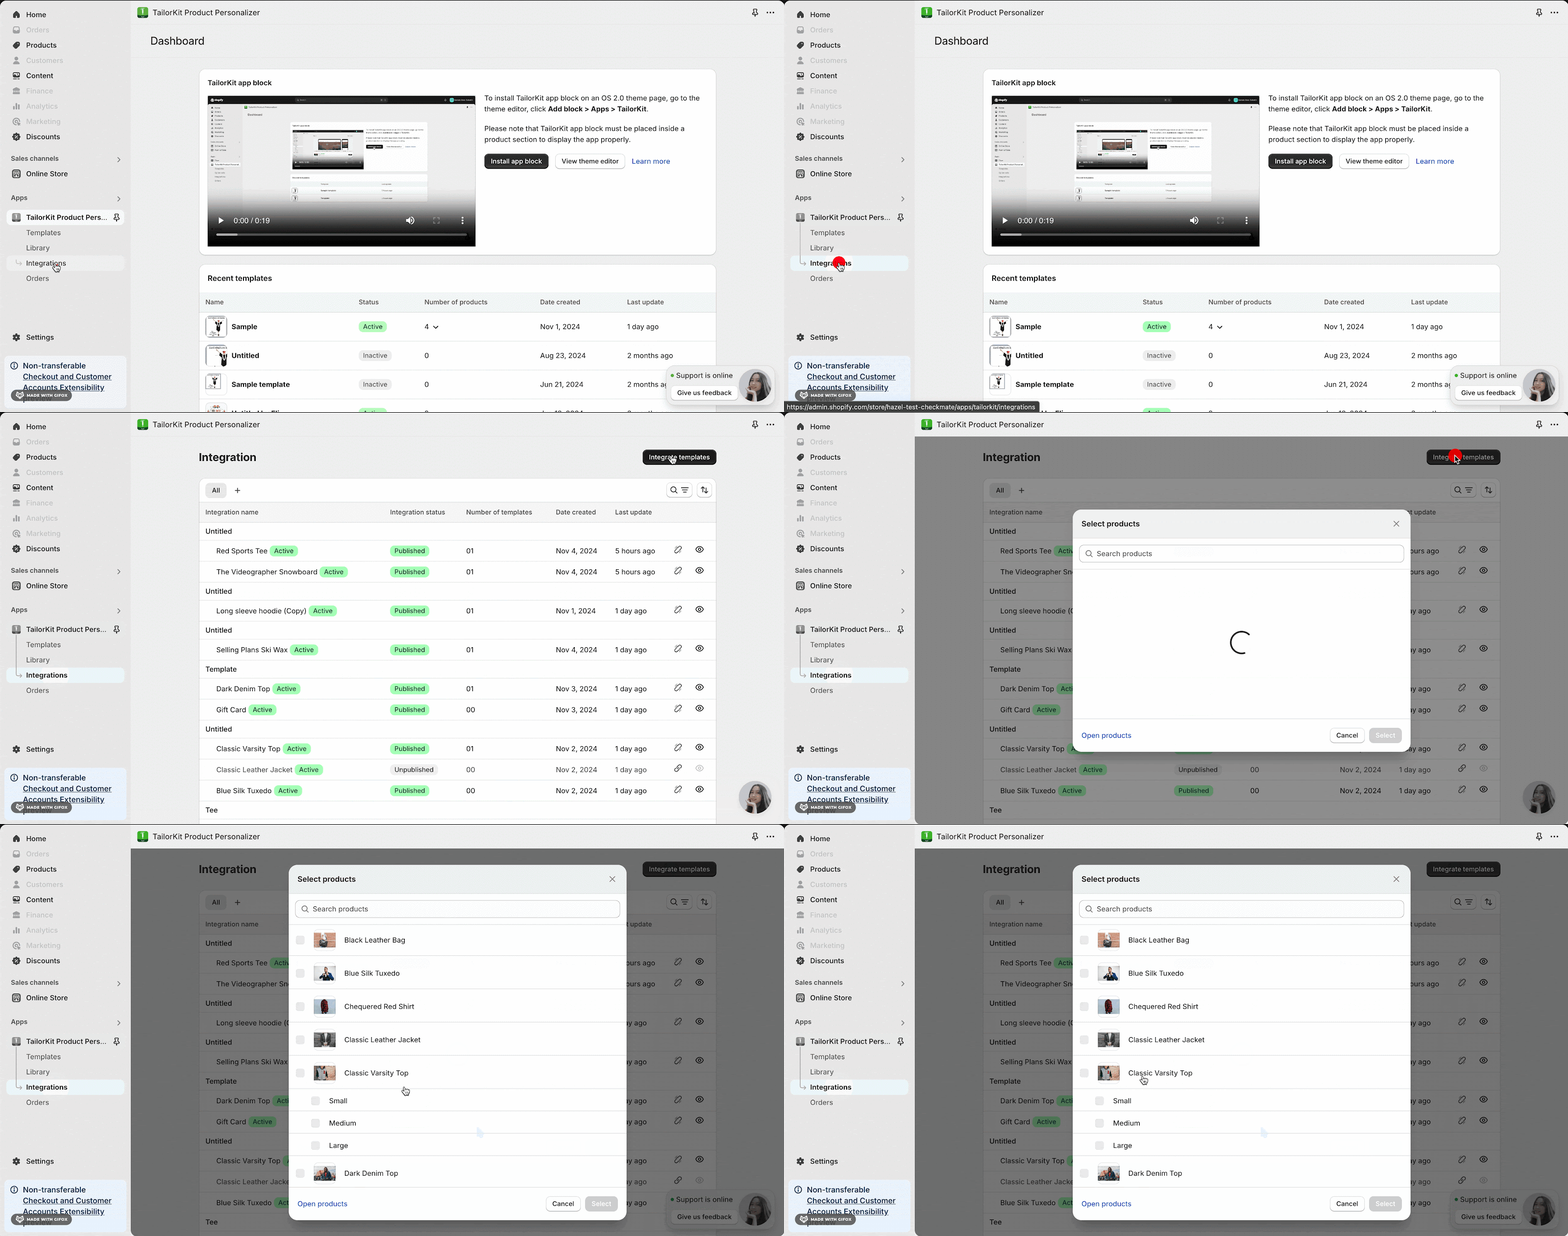
Step 7: Integrating Template With Products
After selecting the Integrations from the app dashboard, click the “Integrate template” button, select a product from the list, and click the “Save” button.
Step 8: Publish The Template
After saving, the “Publish” button will appear on the Print Area page. Click the “Publish” button to display the product with integrated templates on your storefront.
Step 9: Check And Receive Orders
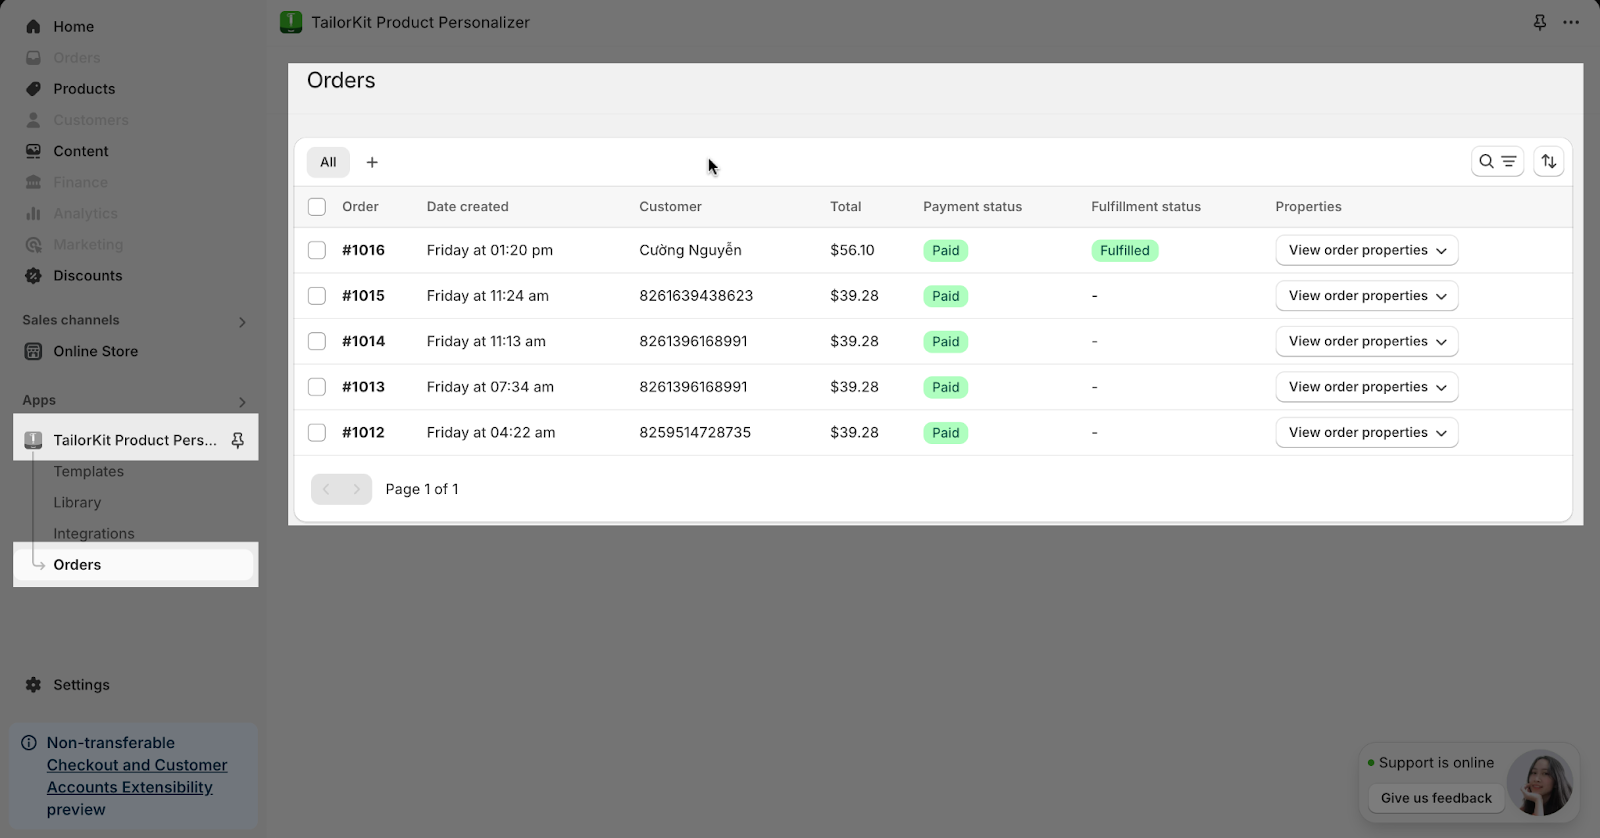
From the TailorKit dashboard, go to “Orders”. Here you can review and manage all orders placed after customers have customized their desired products. Learn more about How to check and receive orders in this article.
Frequently Asked Questions
1. How can I check the order was created?
From the TaylorKit dashboard, you can go to the Order section to check.
