Overview
On this page, you will be introduced to how you can create and customize your subscription in the Admin Portal. During the process, you will be able to have full control over pricing, frequency, and product items, this enables you to adjust strategies based on customer feedback or seasonal trends.
Requirements
- EverFlow App Installed: Make sure you have installed EverFlow app already installed in your Shopify store.
Access Subscription Page
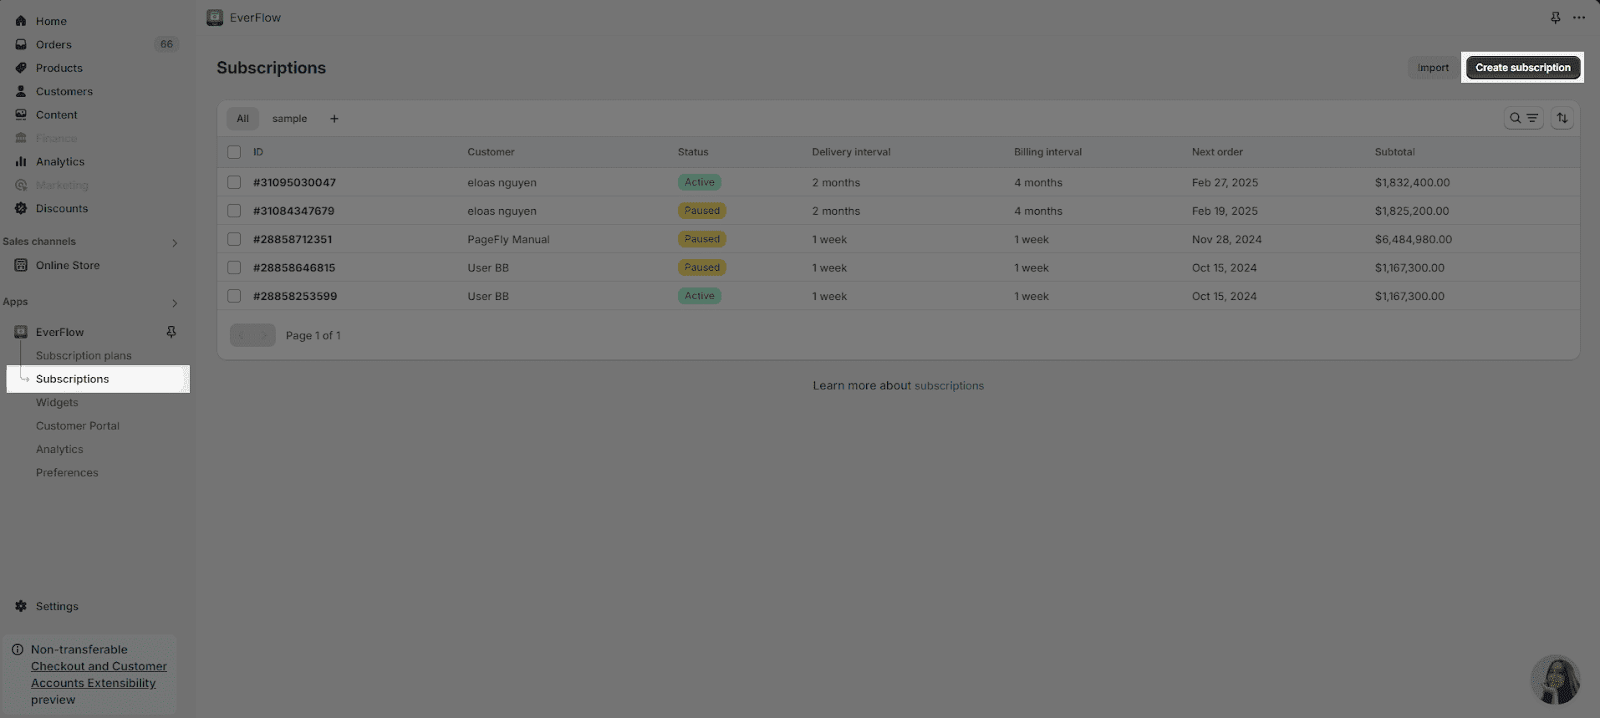
On the EverFlow Dashboard > Choose the Subscriptions page. Once you are in the page, press on the “Create subscription” button on the top right corner.
How To Create Subscriptions In Admin Portal
Step 1: Customize the Subscriptions
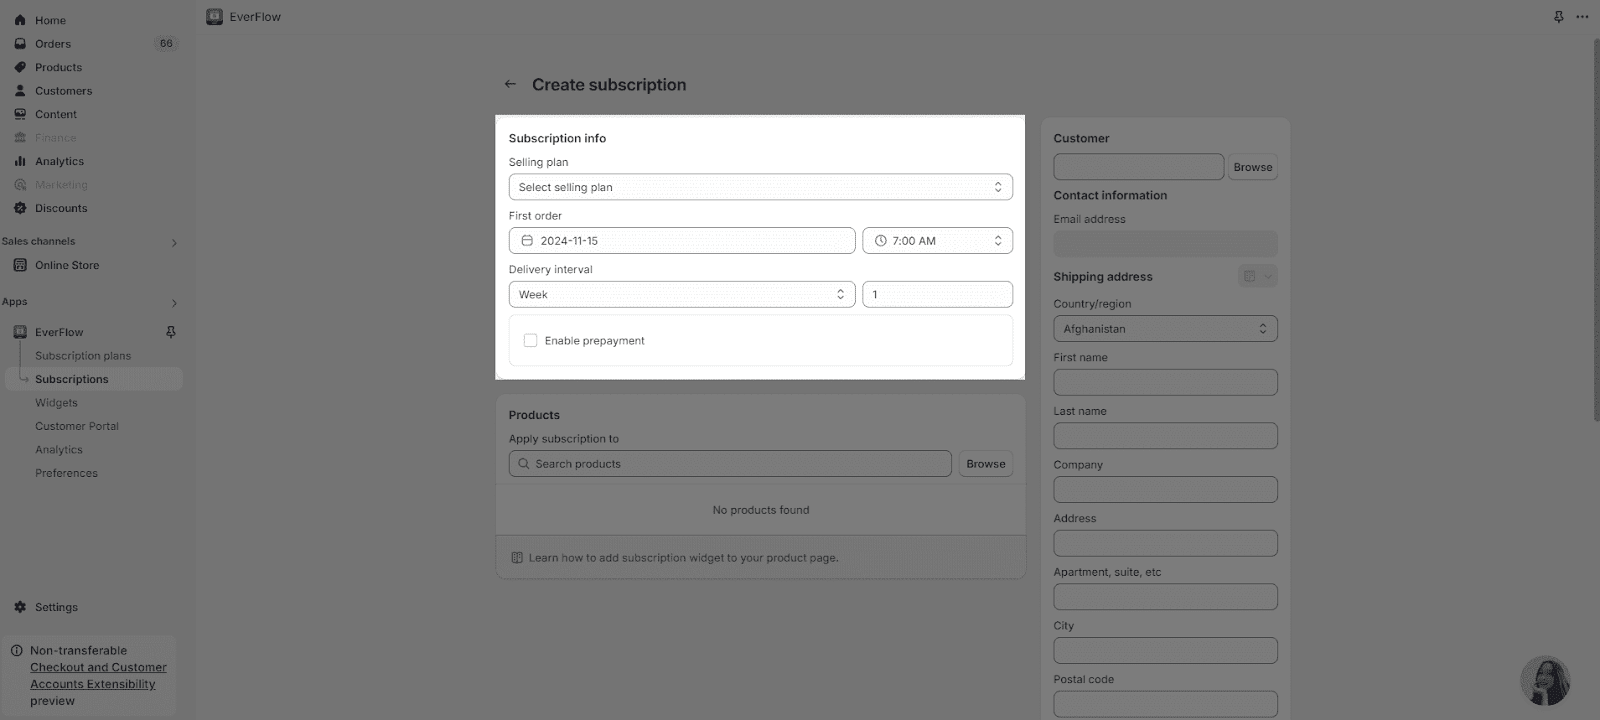
After you click on the button, you will be taken to a detailed page dedicated to the customization of your newly-created subscription. On this page, you can customize:
In this field, you will be able to edit the following:
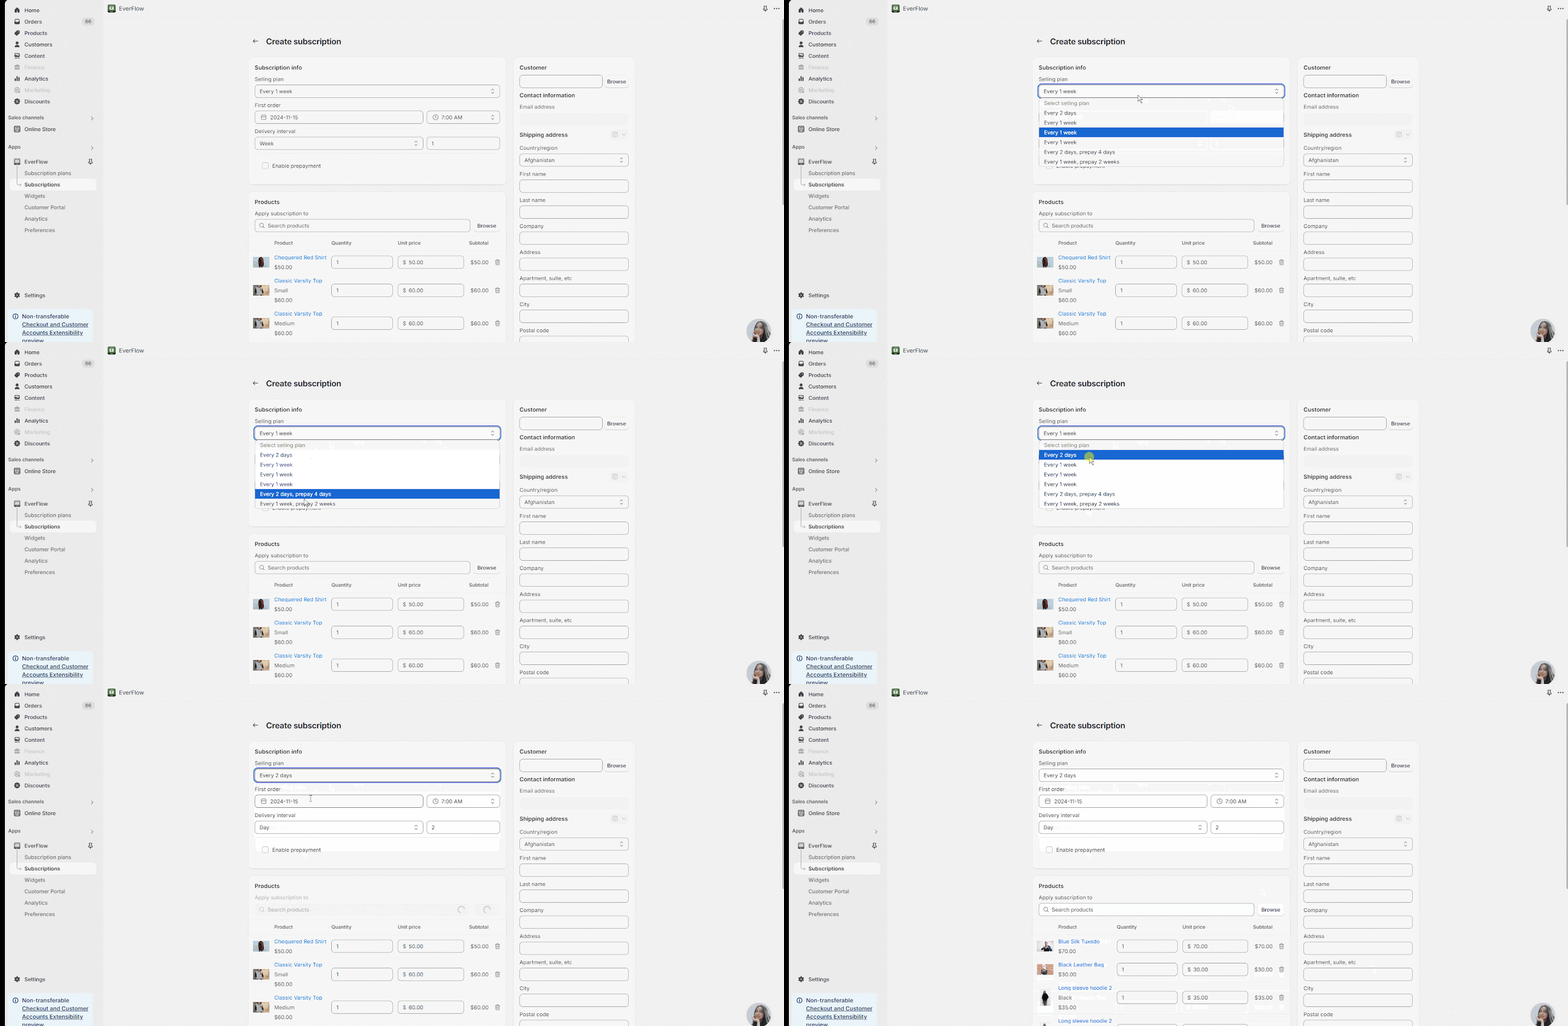
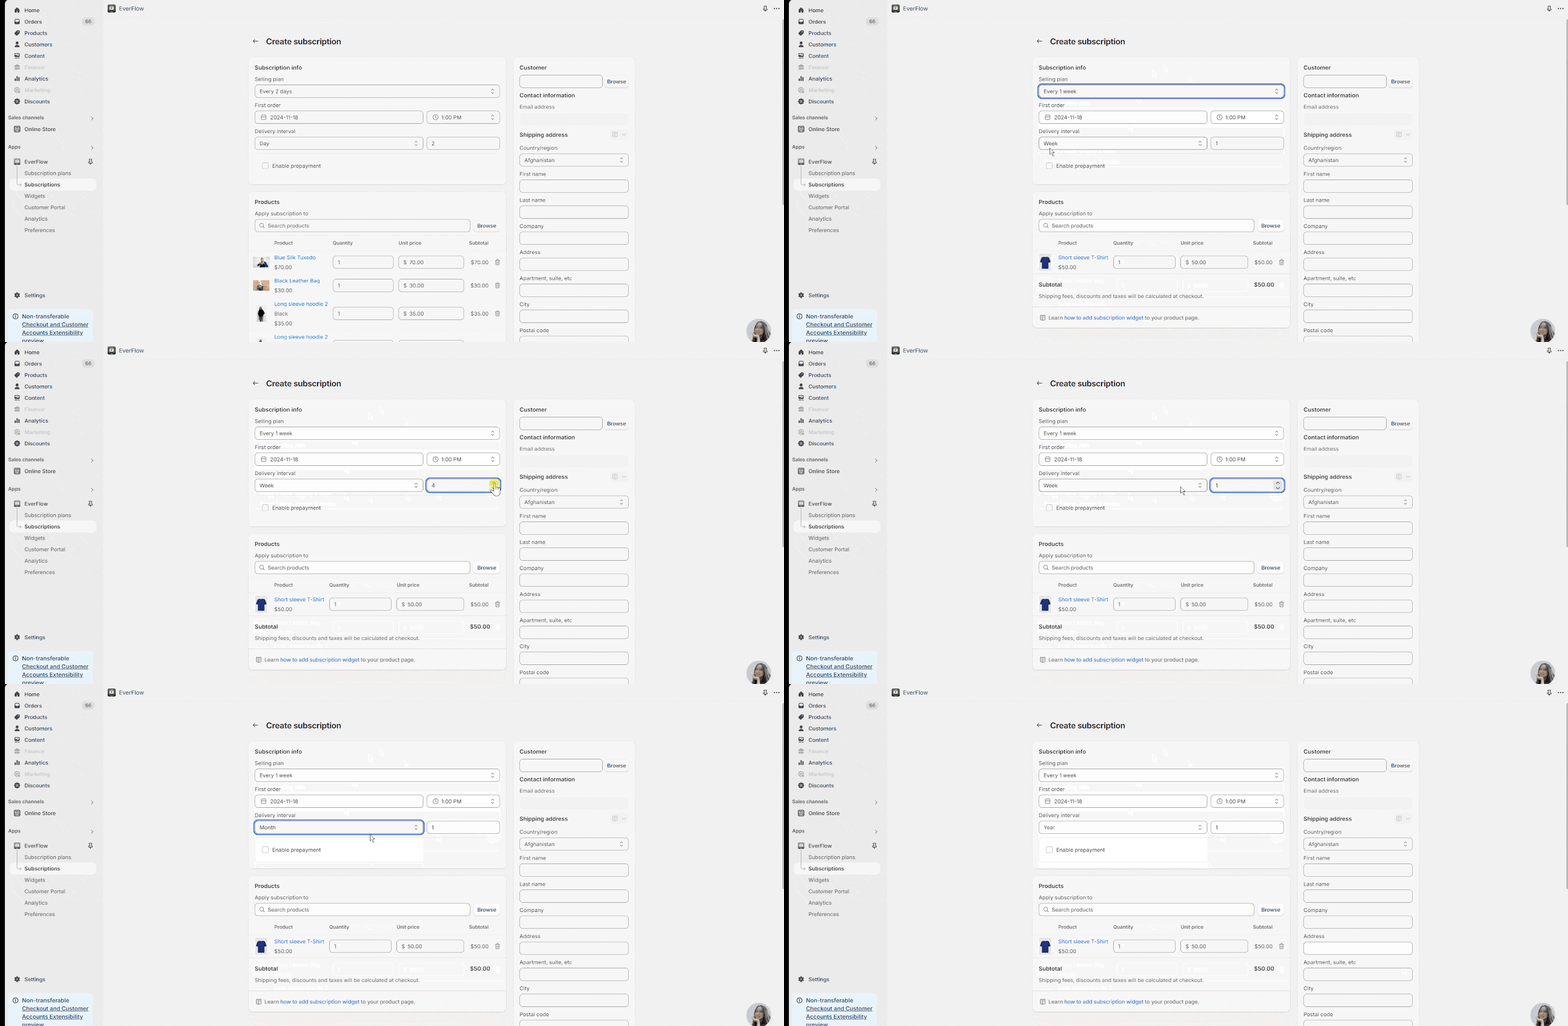
In this part, you can choose one selling plan that fits with your new Subscriptions. The options are based on the subscription plans that you have created via your Subscription Plans page.
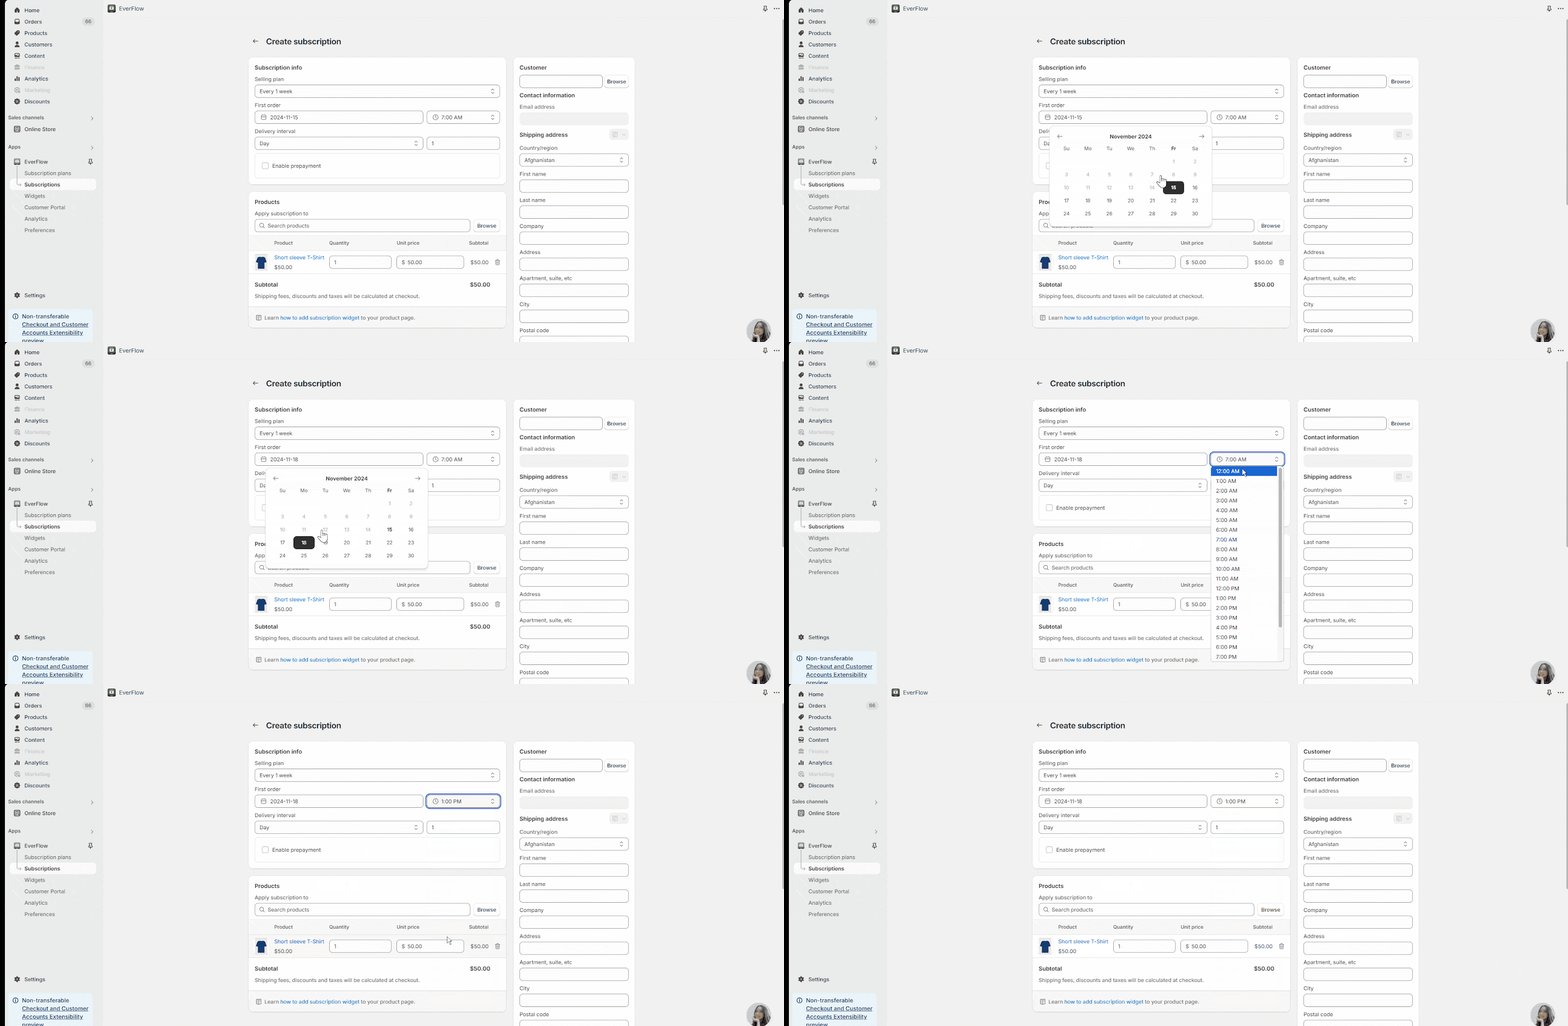
You can choose the date and time of the first order for your subscription.
The Delivery intervals options include Day, Week, Month and Year, depending on your specific strategy. Normally, the Delivery interval will automatically change in accordance with the selling plan. However, you can edit it in accordance with your preferred way.
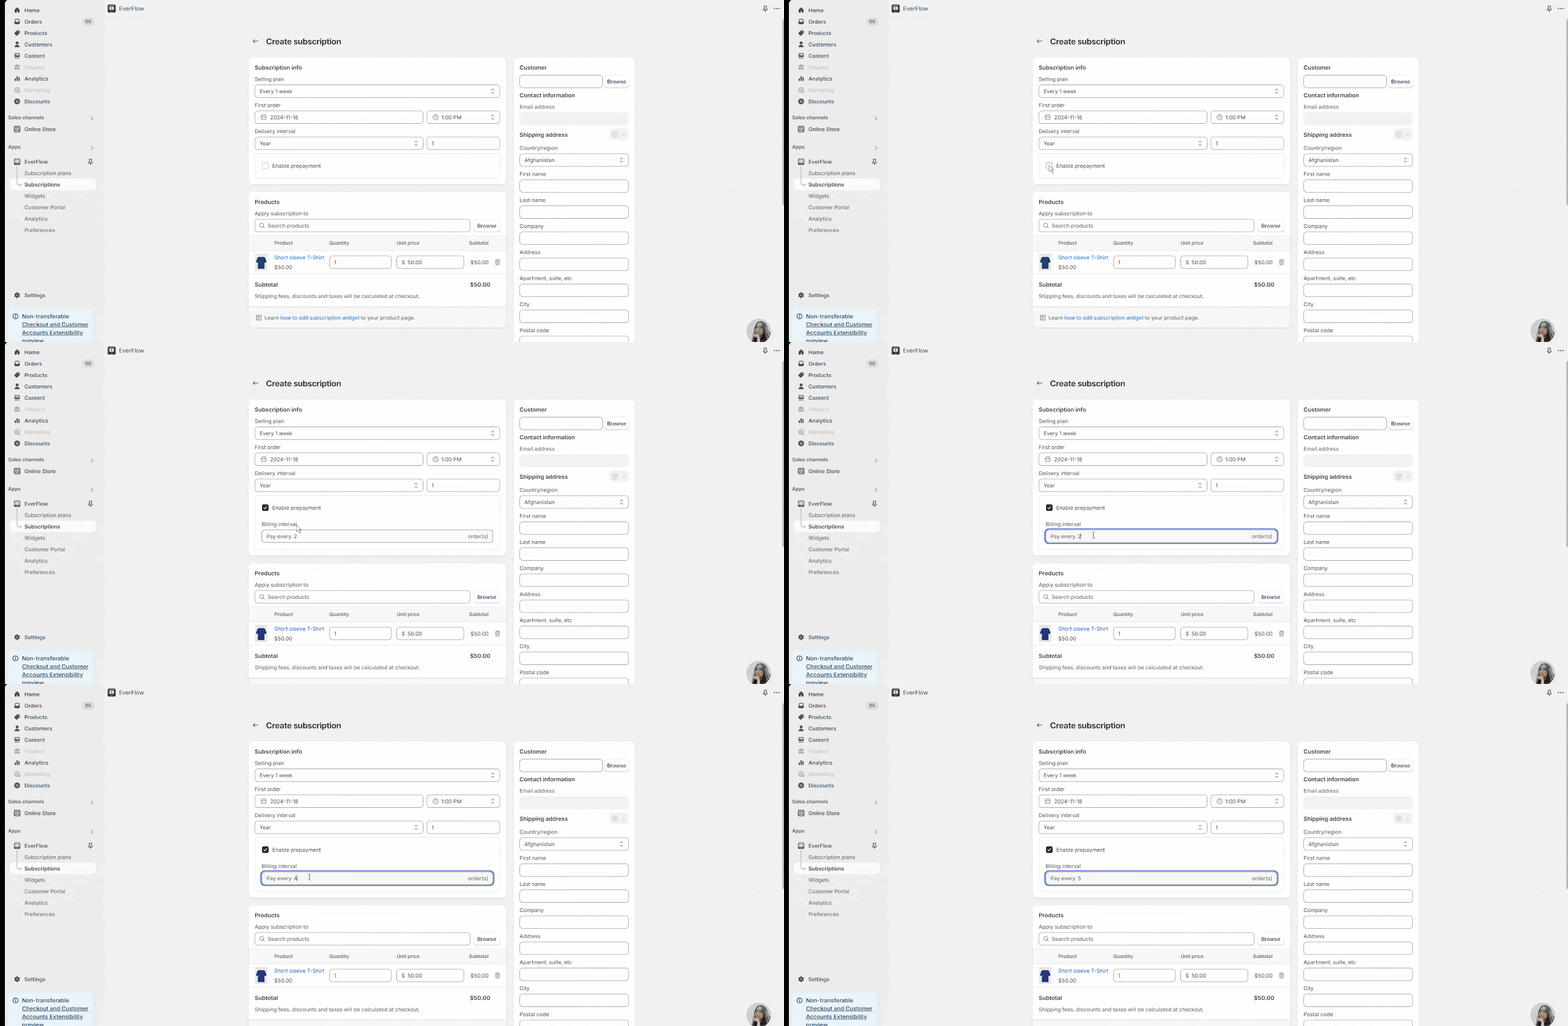
If you click on the “Enable prepayment” button, you will be able to decide the number of orders that you want to pay in advance.
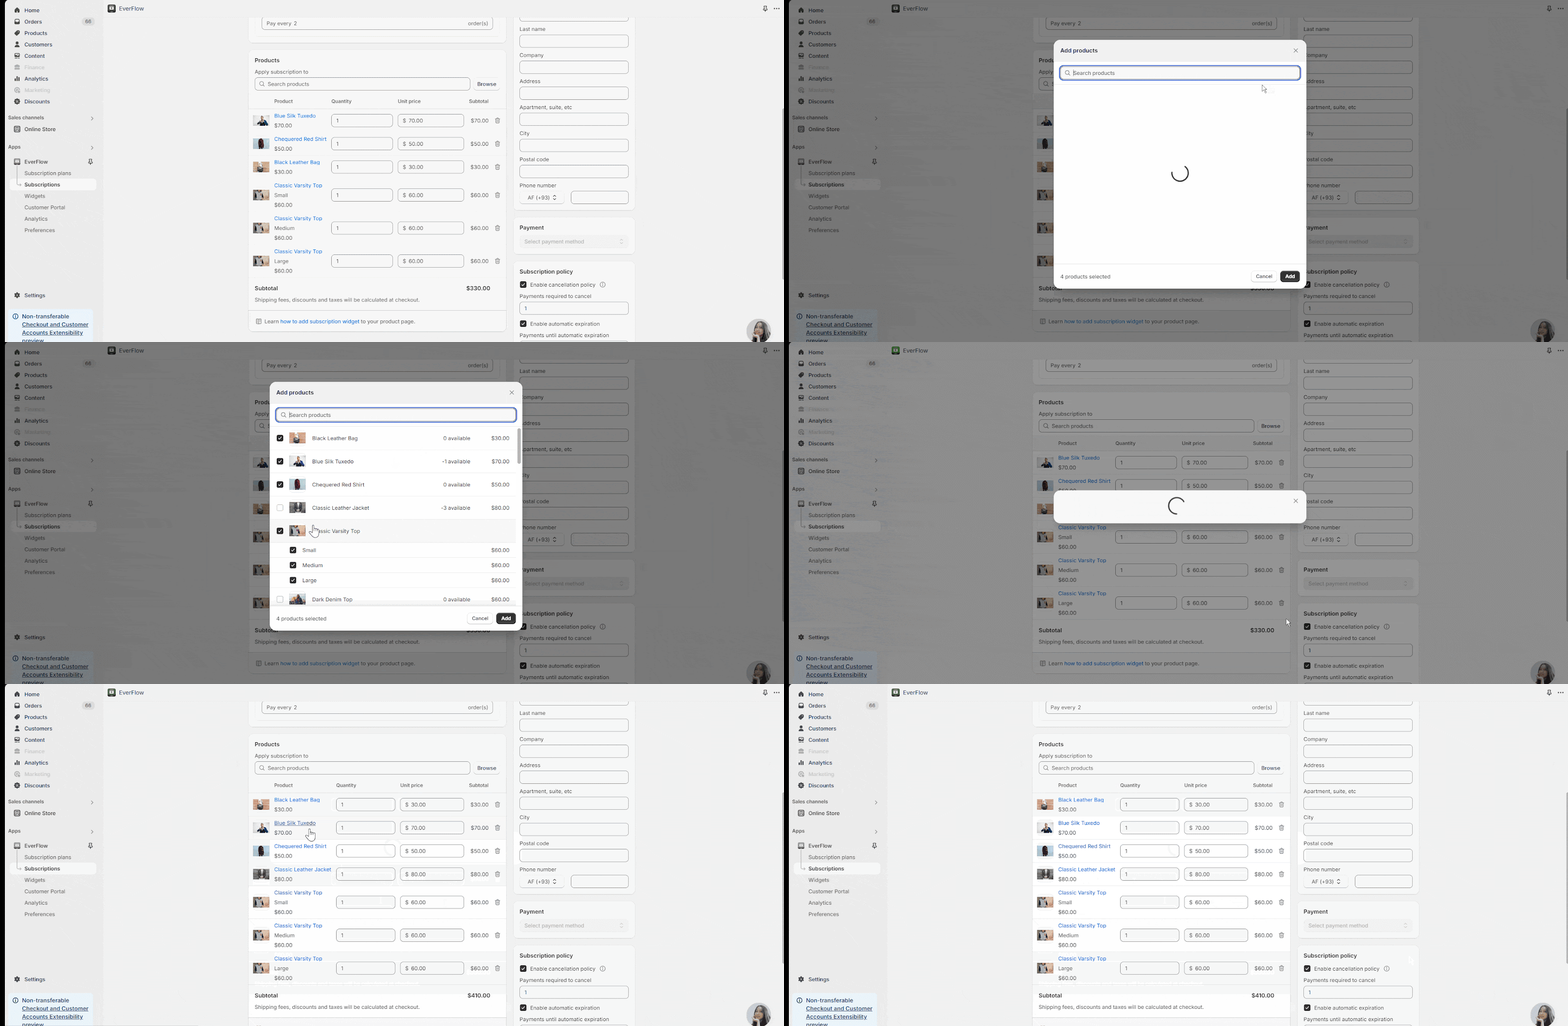
In this section, you will see the list of products that apply to the selling plans that you have previously chosen.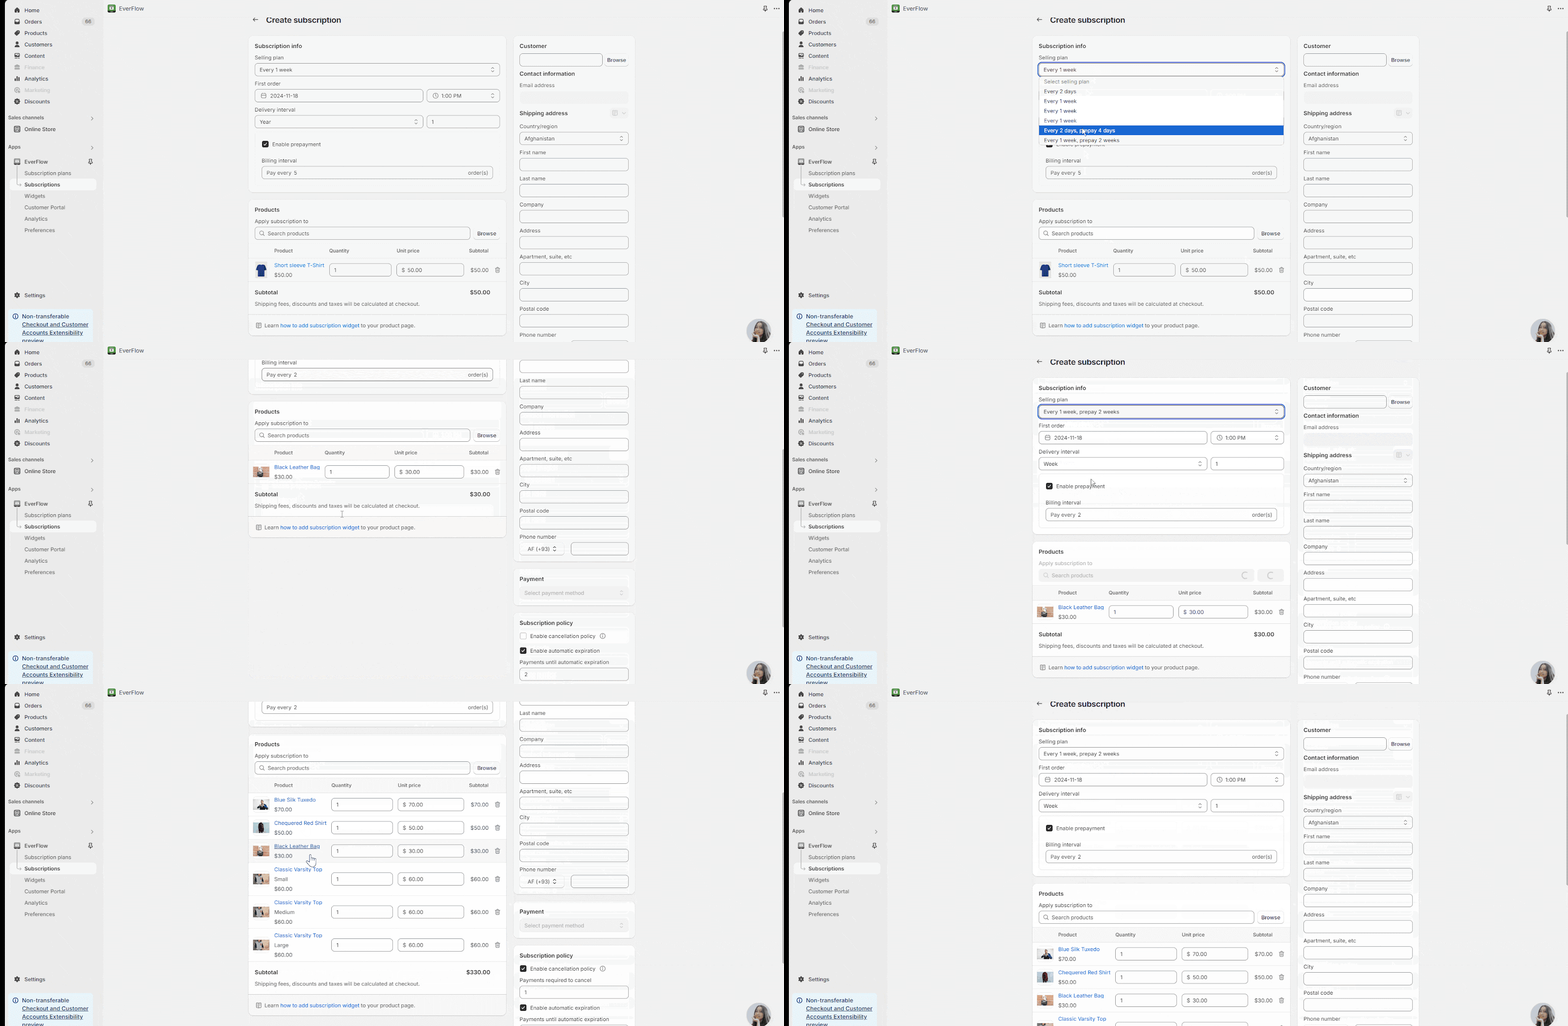
However, since you are creating a new subscription, you will be able to add other products to apply to the new subscription by clicking on the “Browse” button.
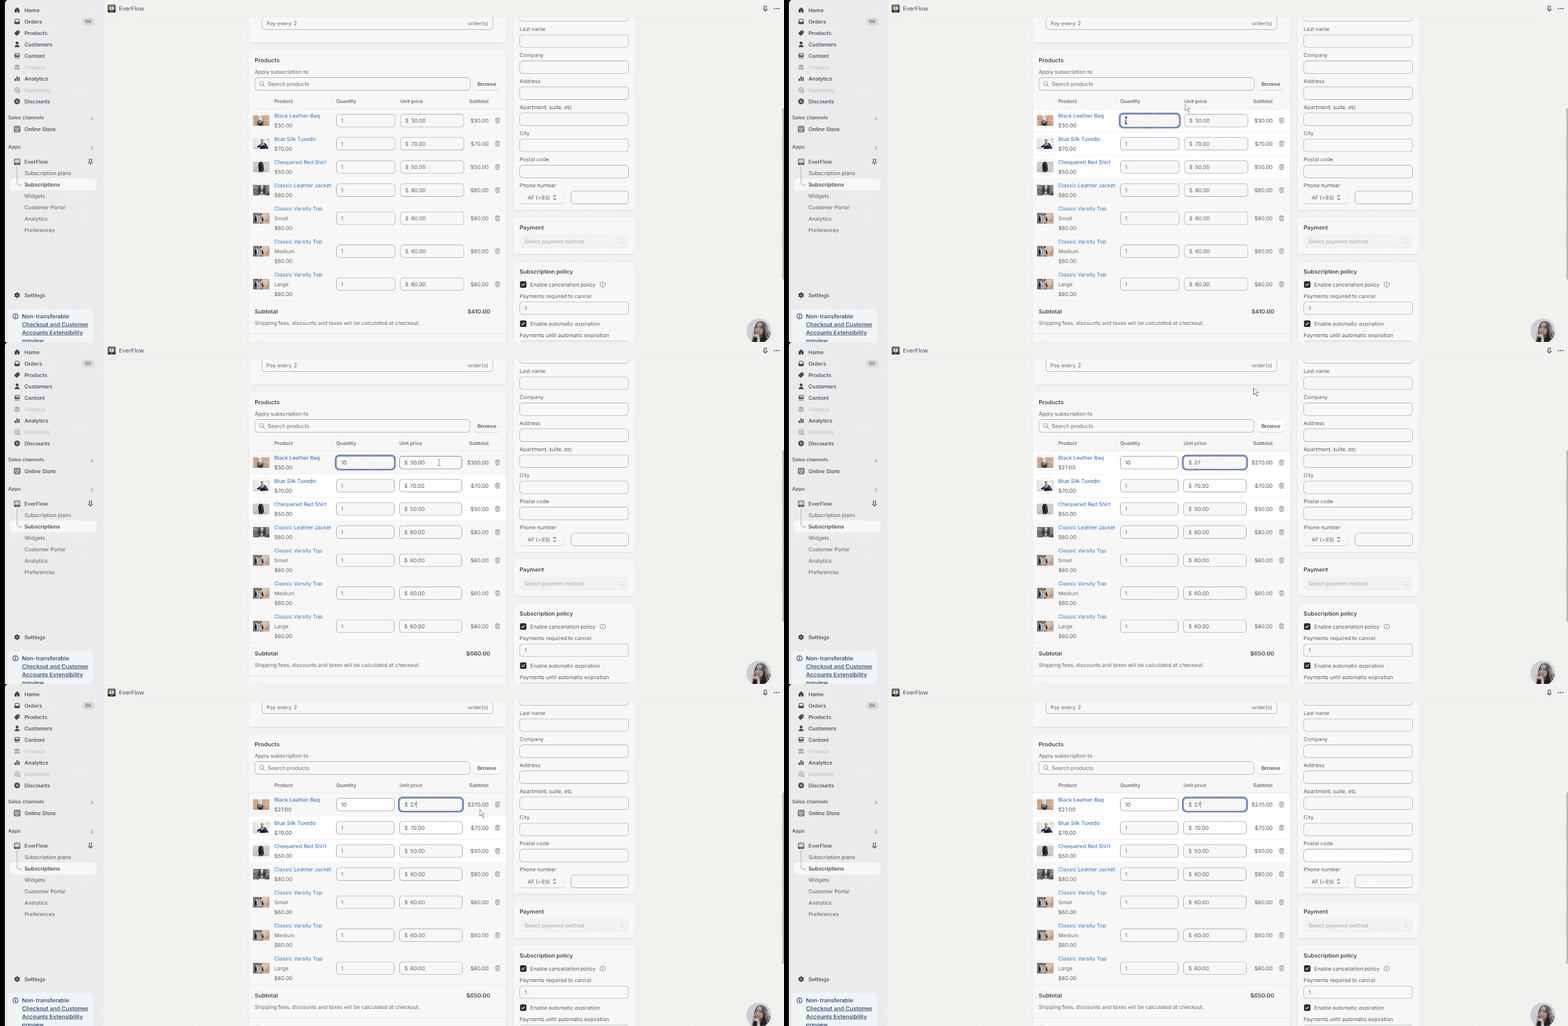
You can also customize the quantity, unit price of the products in your new subscription. You can see the subtotal amount after changing the unit price.
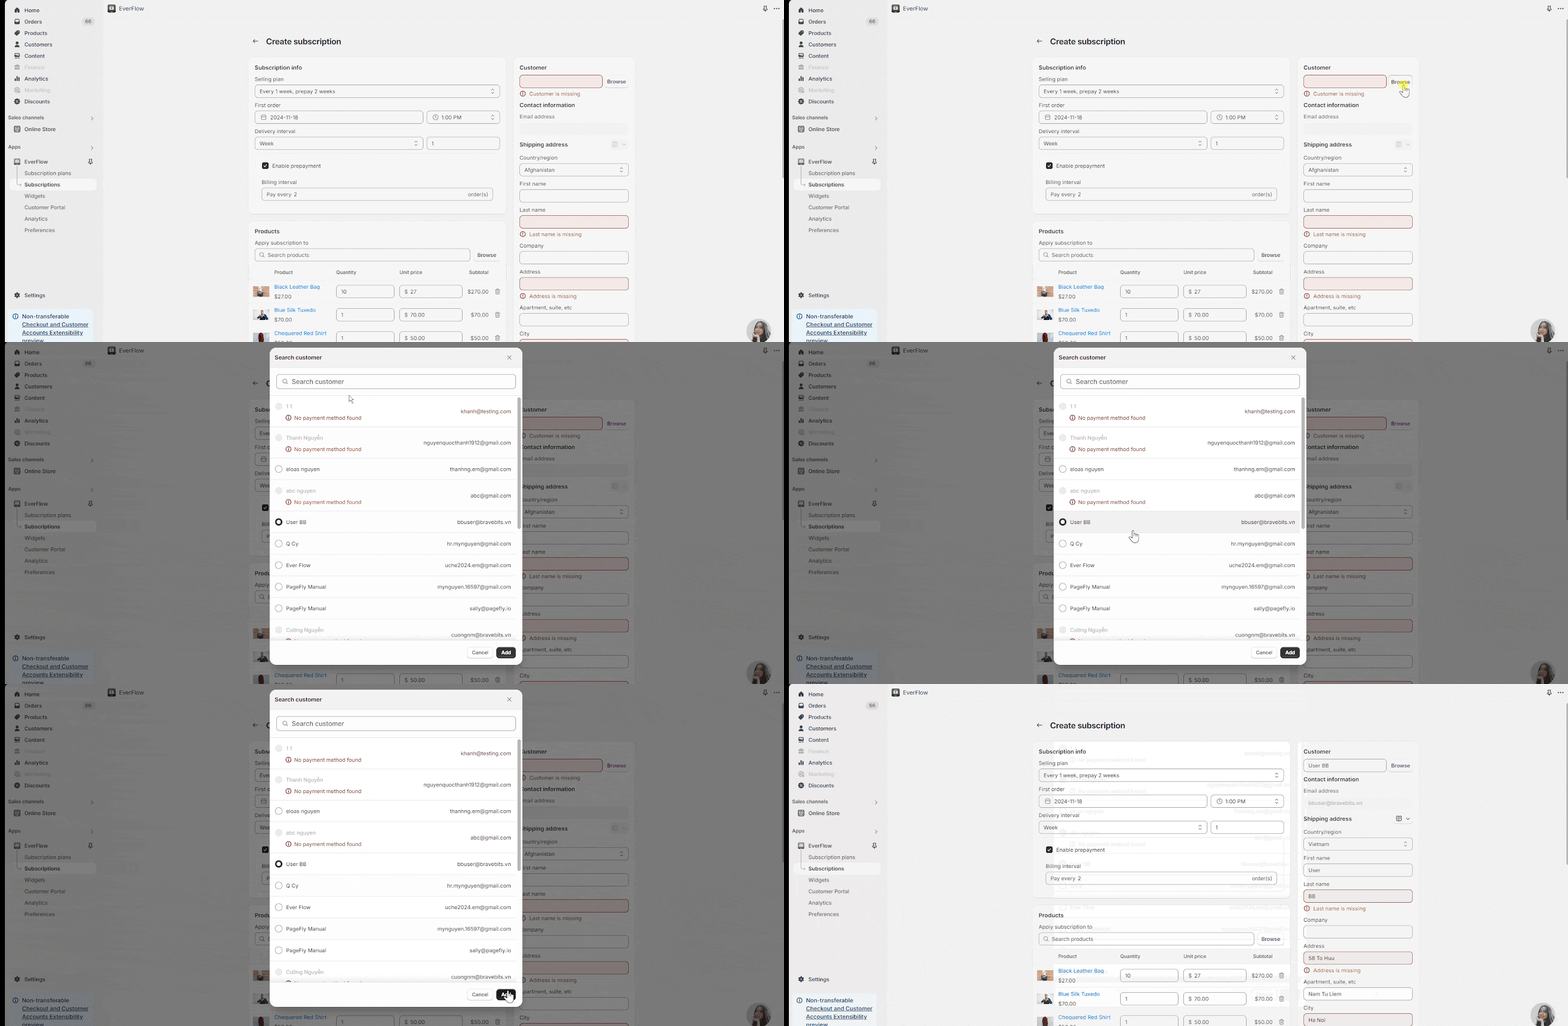
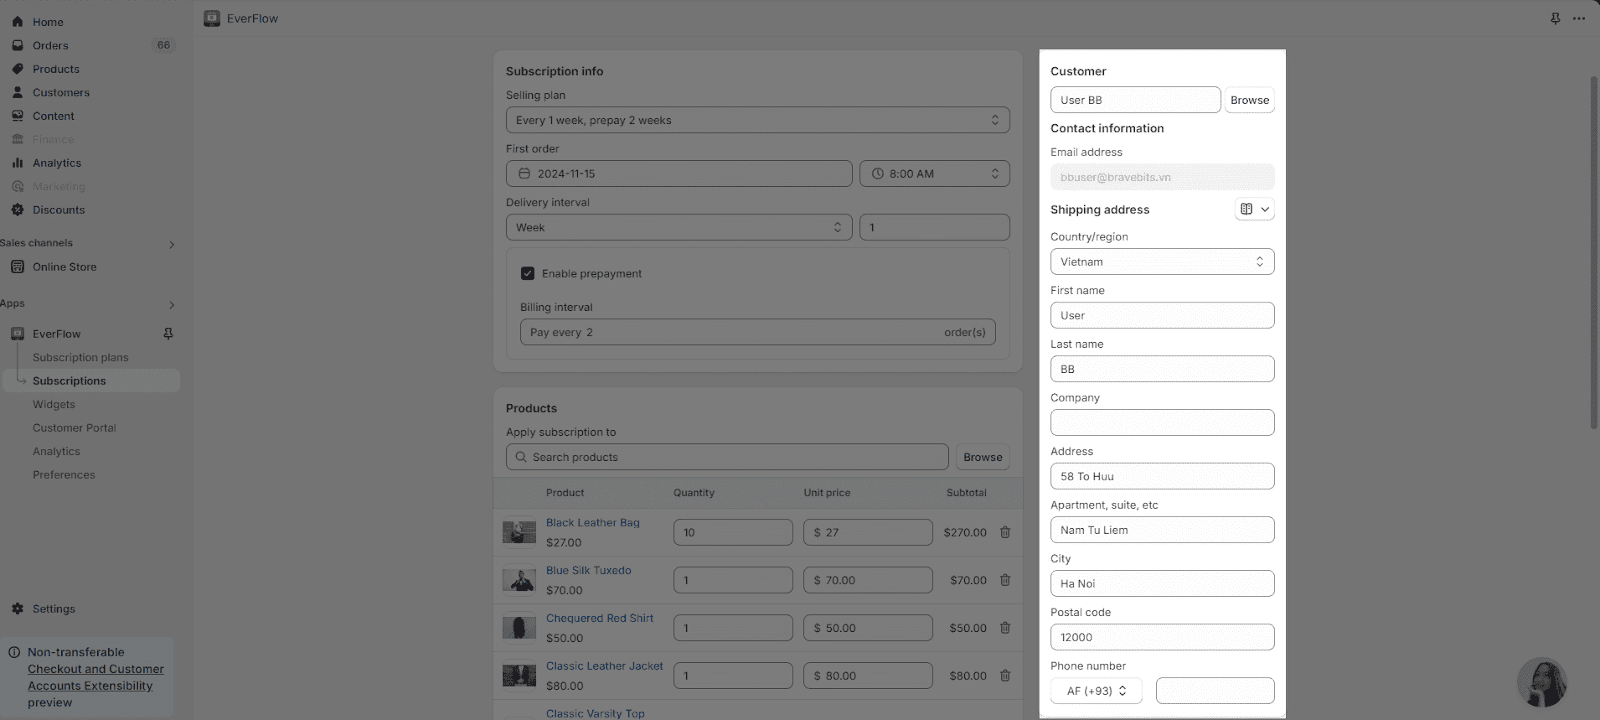
In this part, you can choose the customer whom the subscription will be applied to. Starting by choosing the customer, you need to hit the “Browse” button in order to find one.
After that, you will see other information of your customer have been automatically filled out. You can also change or customize them field by field.
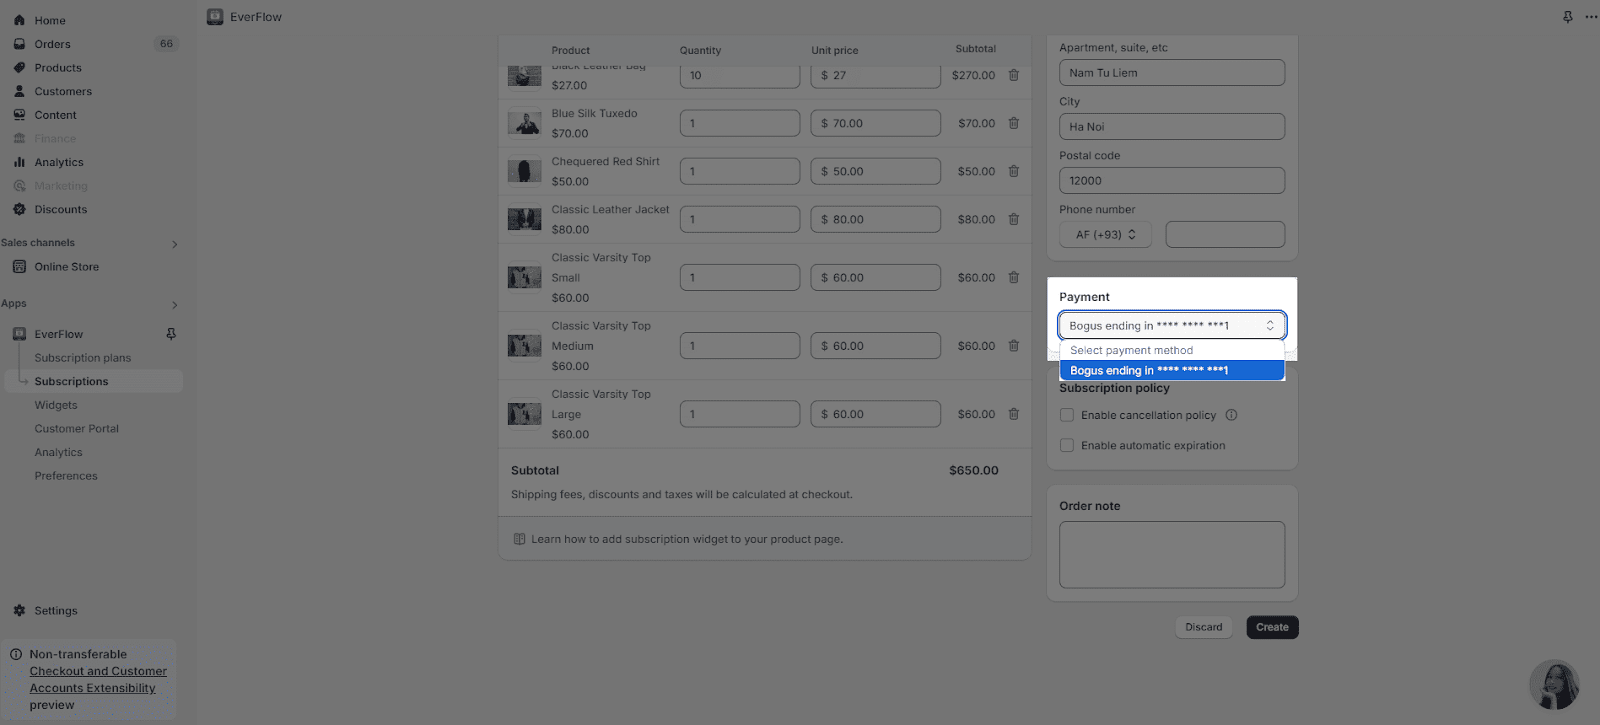
The next thing you need to do is to choose the payment method for your customer. Each customer will have the payment method that has been set up before.
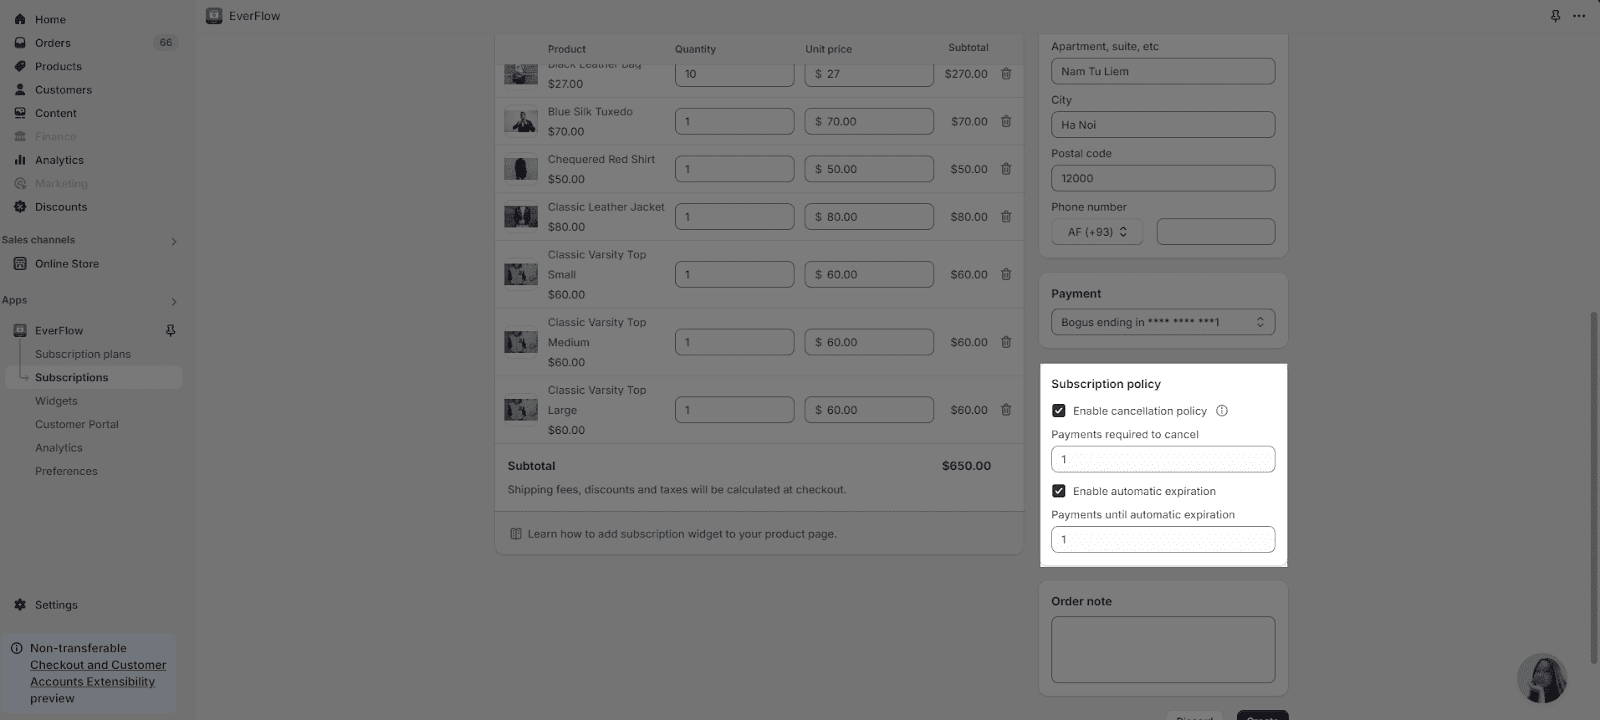
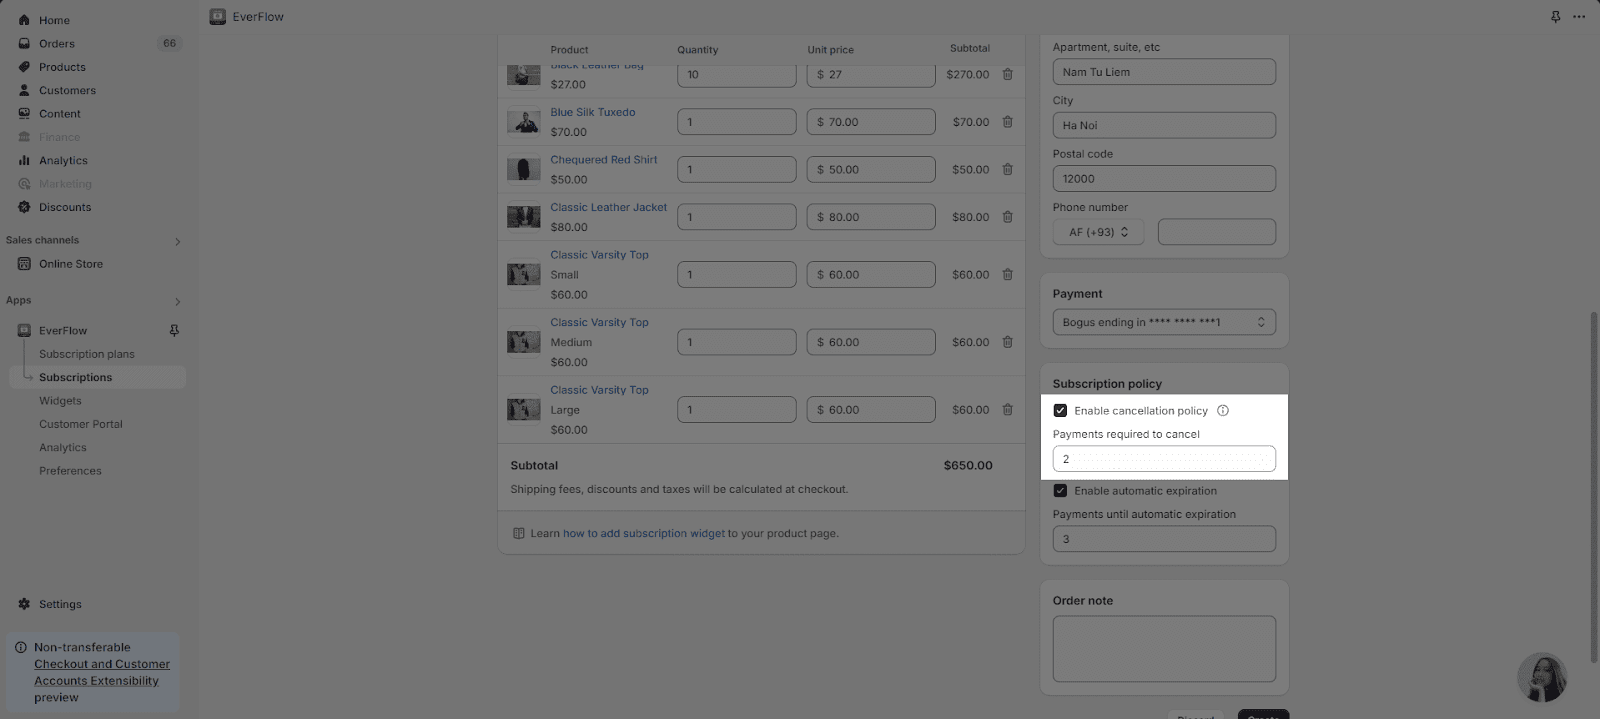
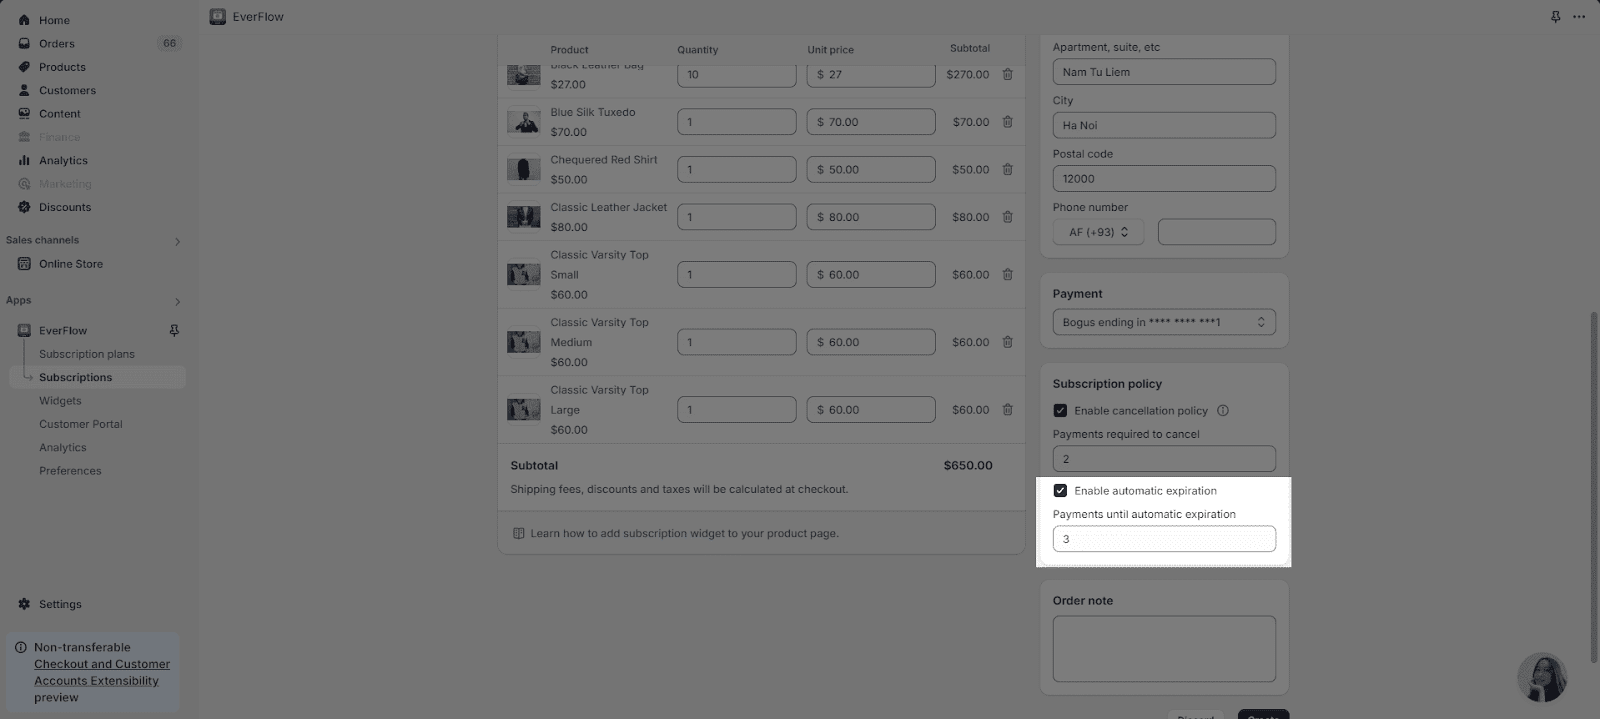
This part lets you choose whether or not to enable the Cancellation policy and the Automatic expiration policy.
For more information, please refer to our page of How to create subscription plans for your products (See step 5 – Cancellation Policy and Enable Automatic Expiration)
Please note: If customers are not allowed to cancel subscriptions, Cancellation policy will not be effective. Please check the Customer Portal permission.
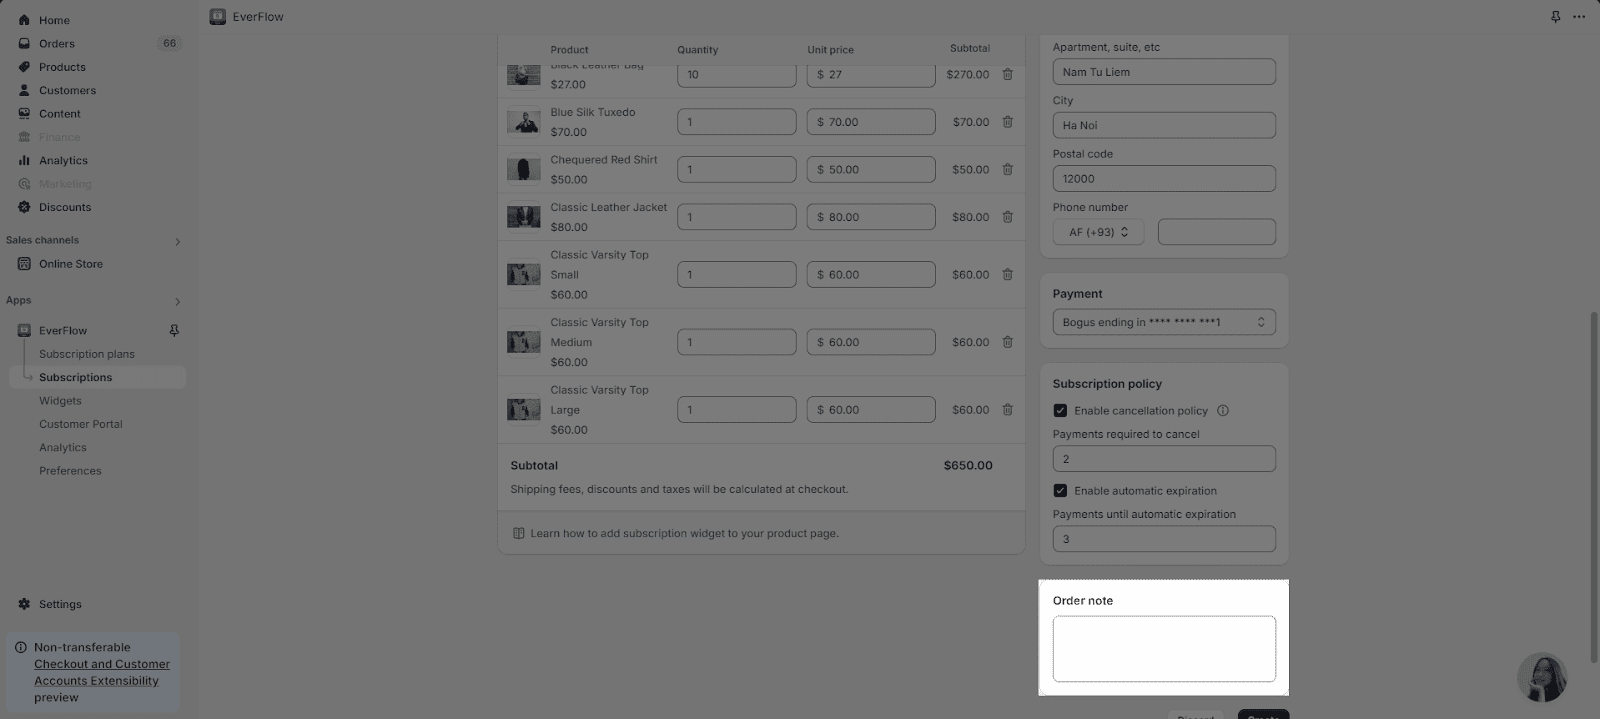
In this section, you can leave a note to your customer with a 5,000 characters limit allowed.
Step 2: Save the subscription.
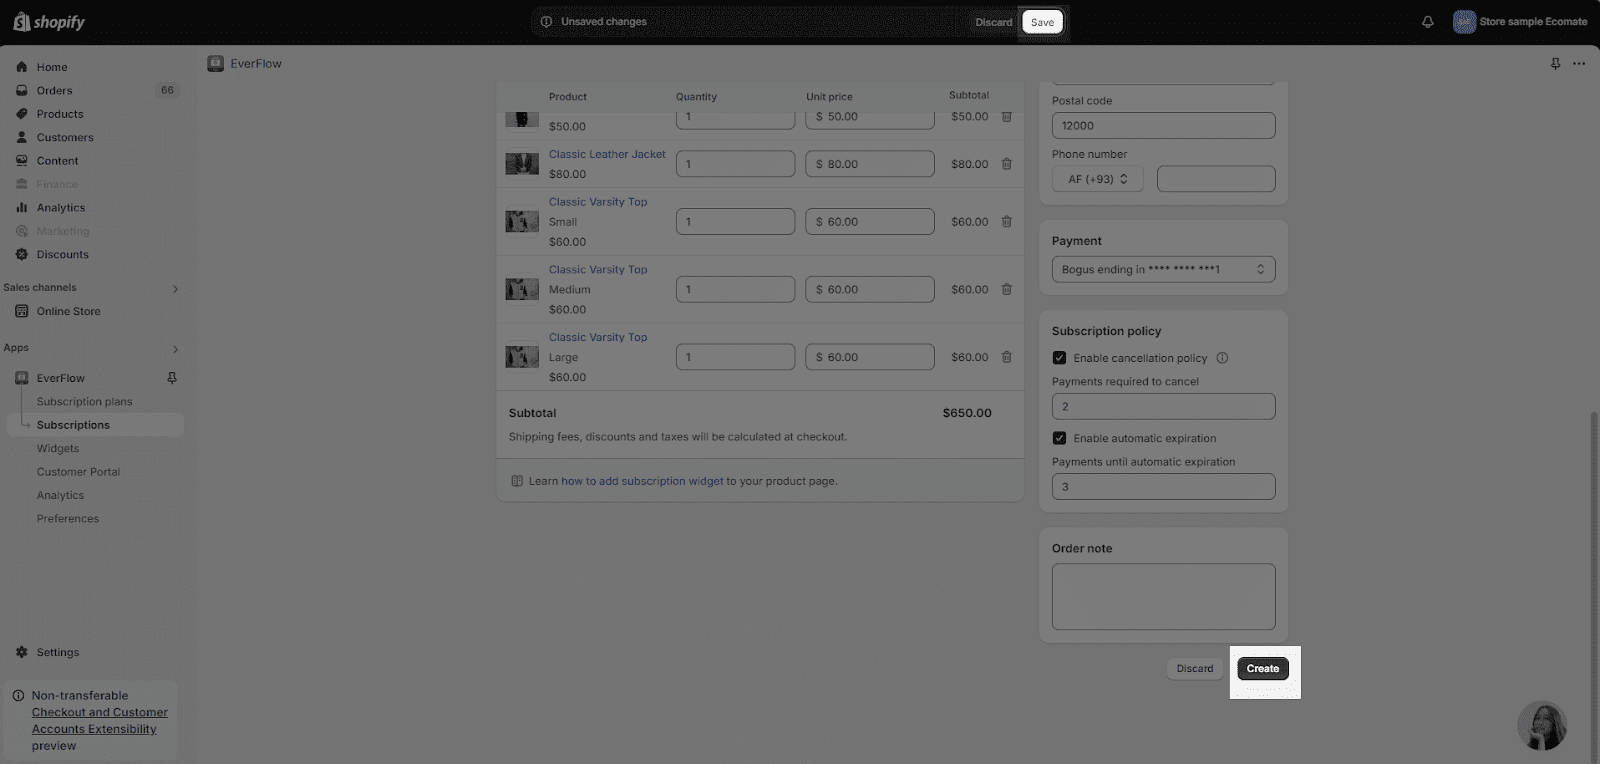
After you have finished customizing the subscription, click on the “Save” button or the “Create” button to save your new subscription.
View Details Of New Subscriptions
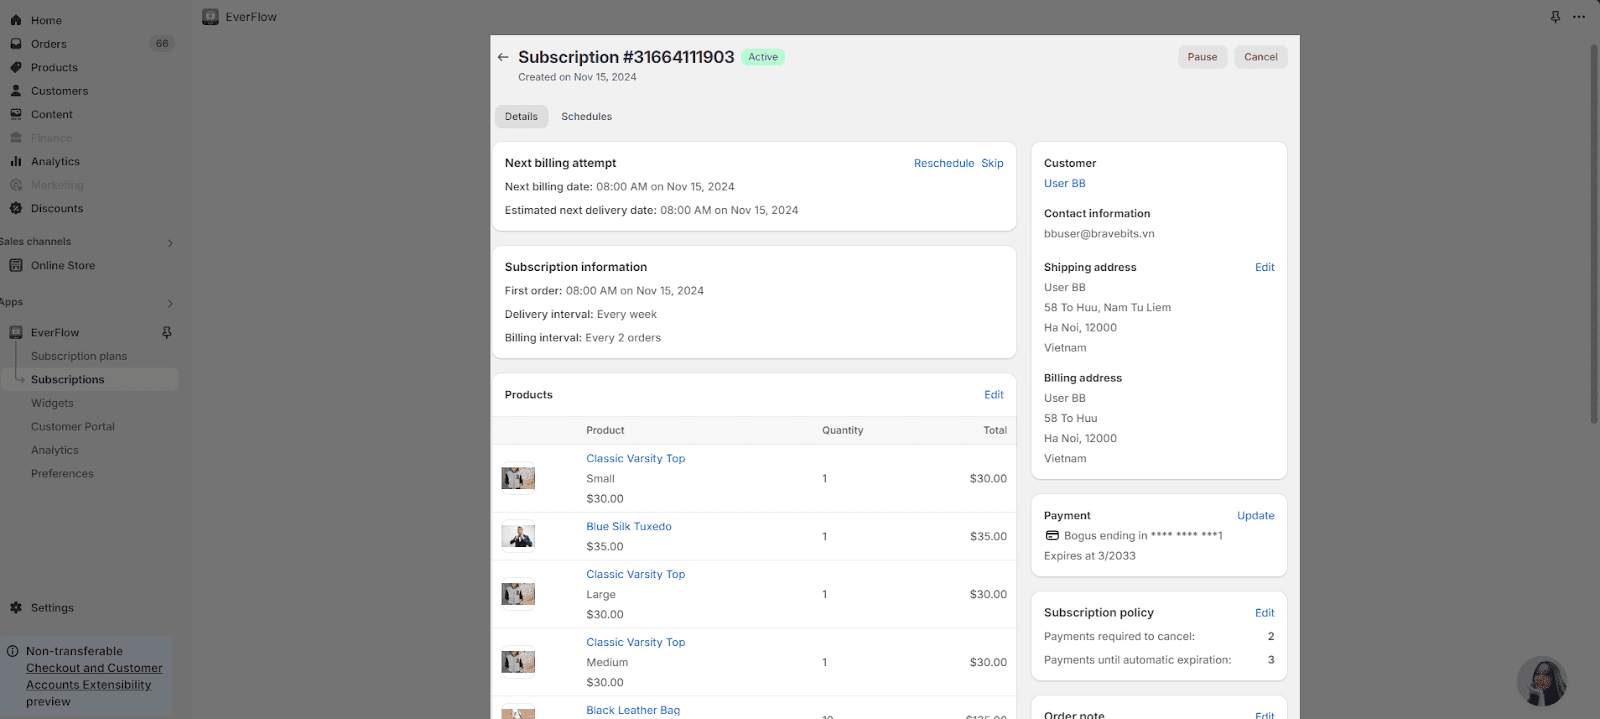
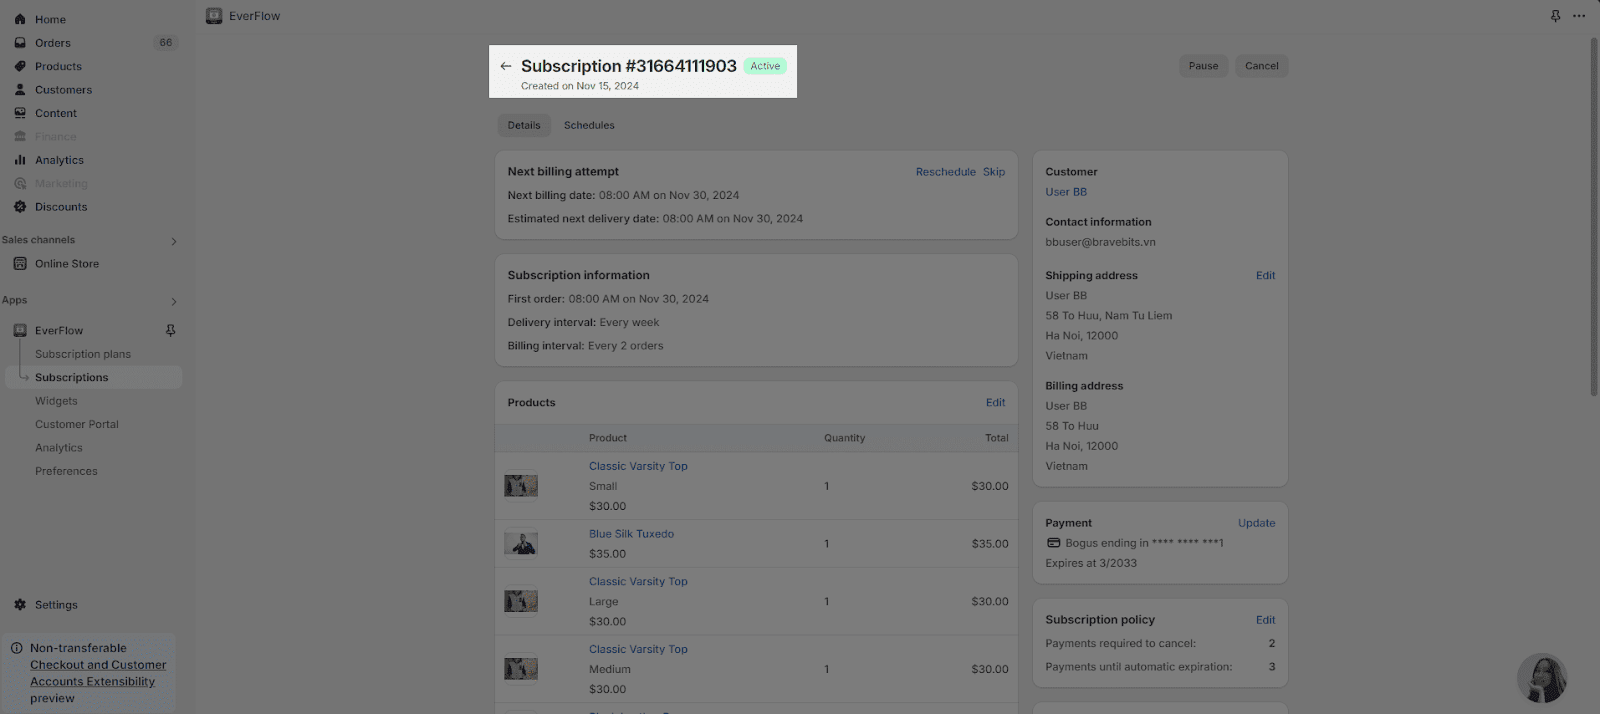
After customizing and saving the subscription, you will be taken to a page dedicated to all the details of your subscription. This page contains all the information that you have previously customized.
The default status of the subscription will be Active.
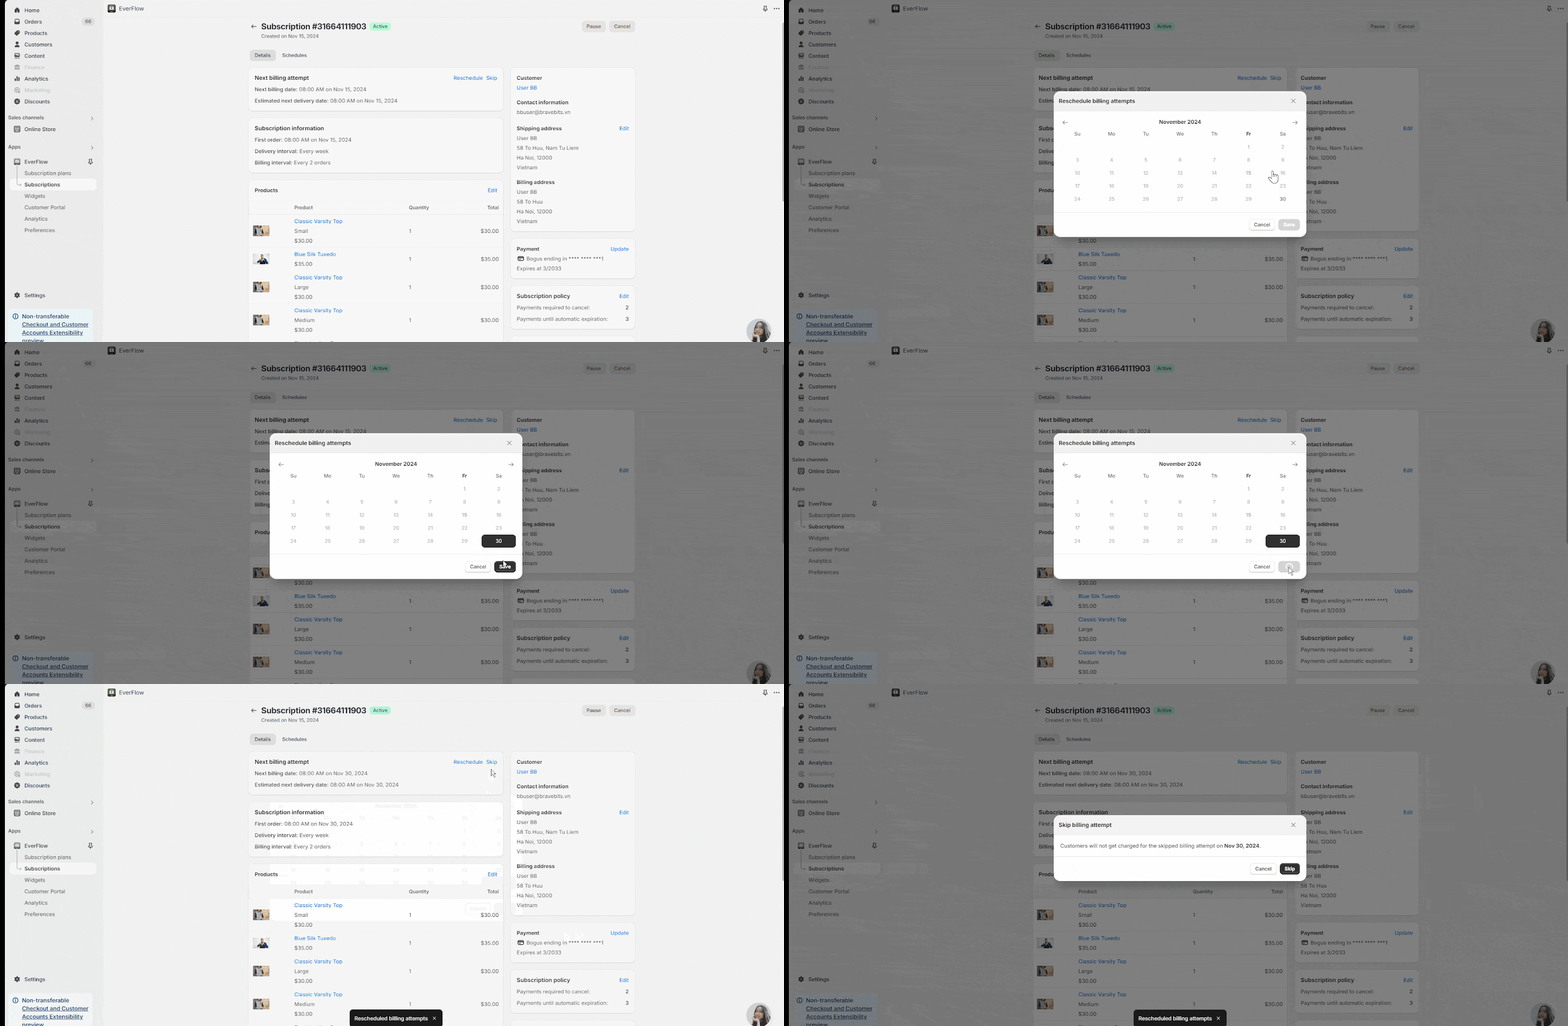
For the “Next billing attempt” part, you will see the next billing date of your subscription. With this information, you will be able to reschedule or skip the next billing date of your subscription.
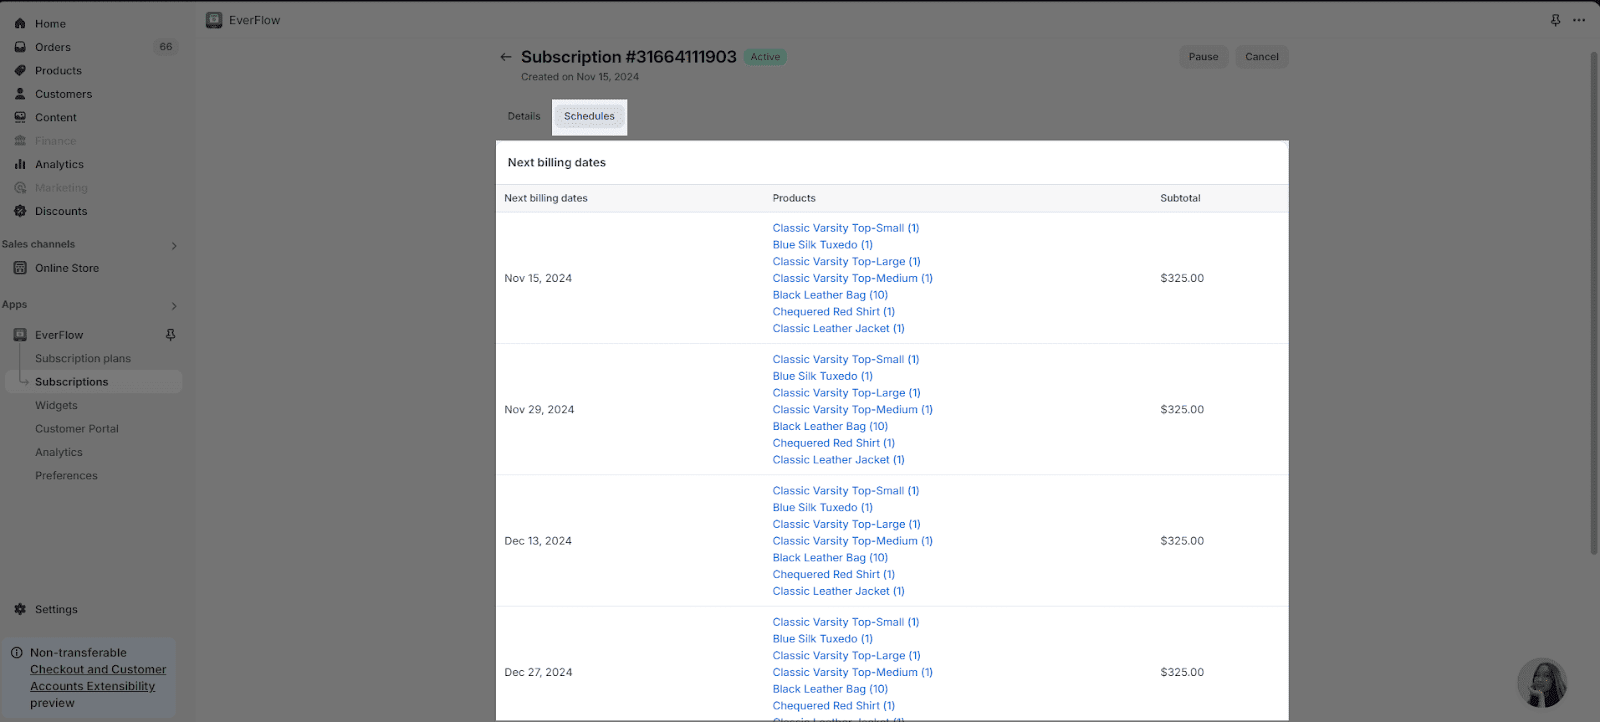
You can also view the Billing schedules if you click on the “Schedules” button. This will take you to the detailed sections of all the scheduled billing.
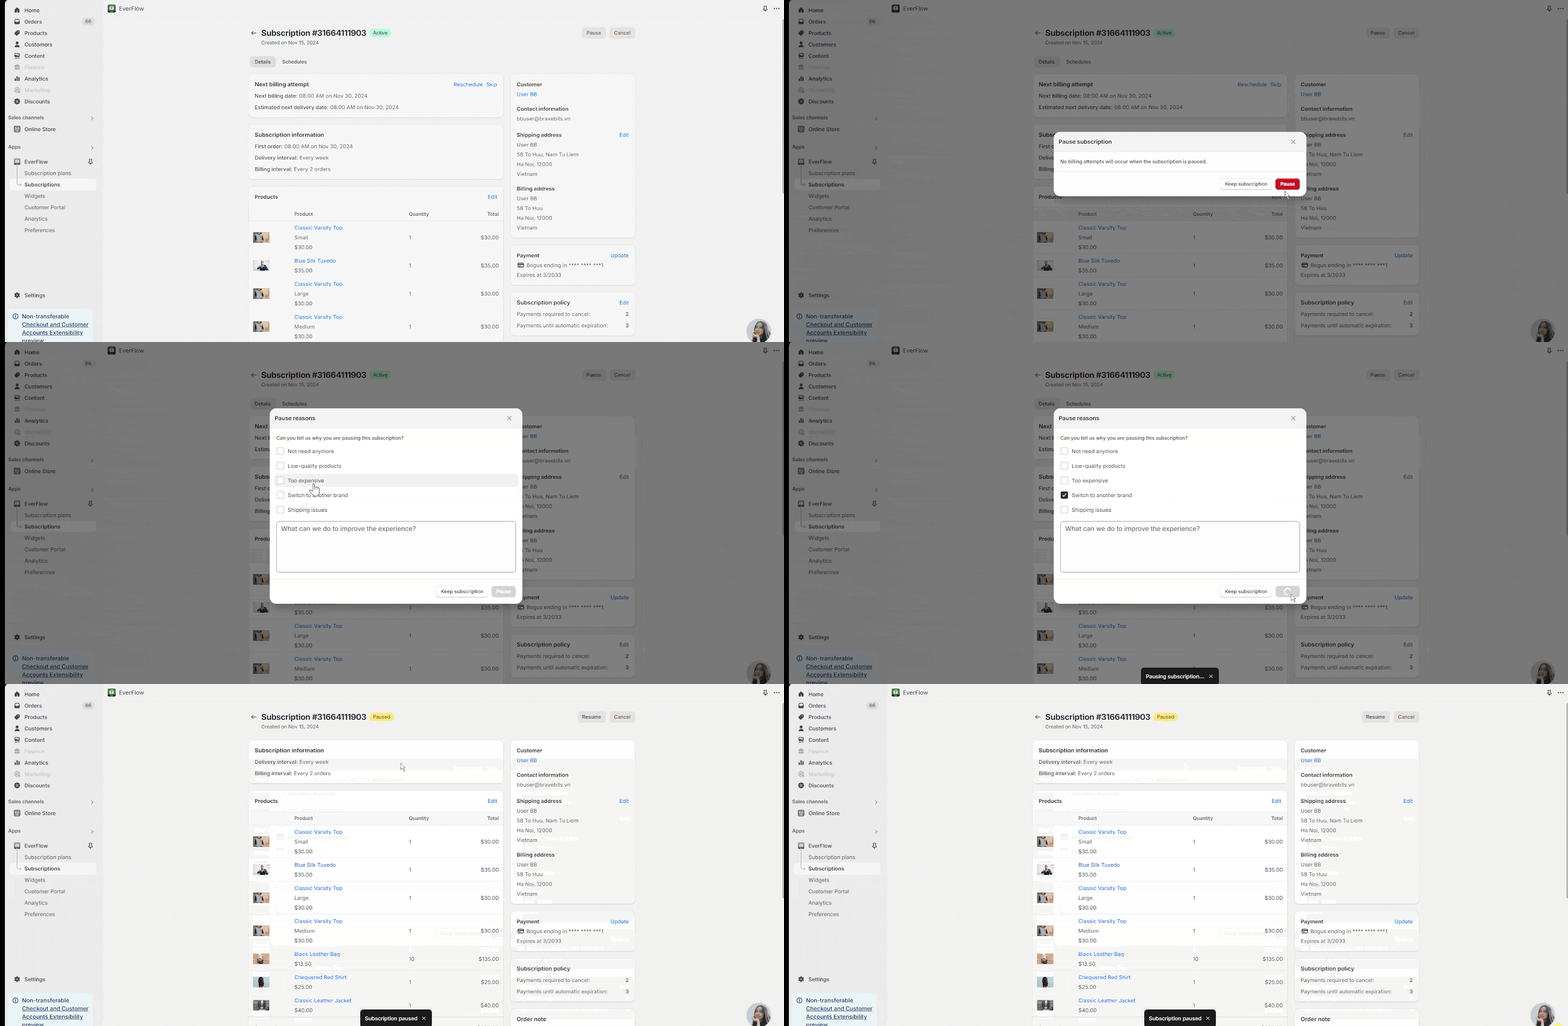
If you want to put it in Pause status, simply click on the “Pause” button and then answer the questions before clicking “Pause” to finalize.
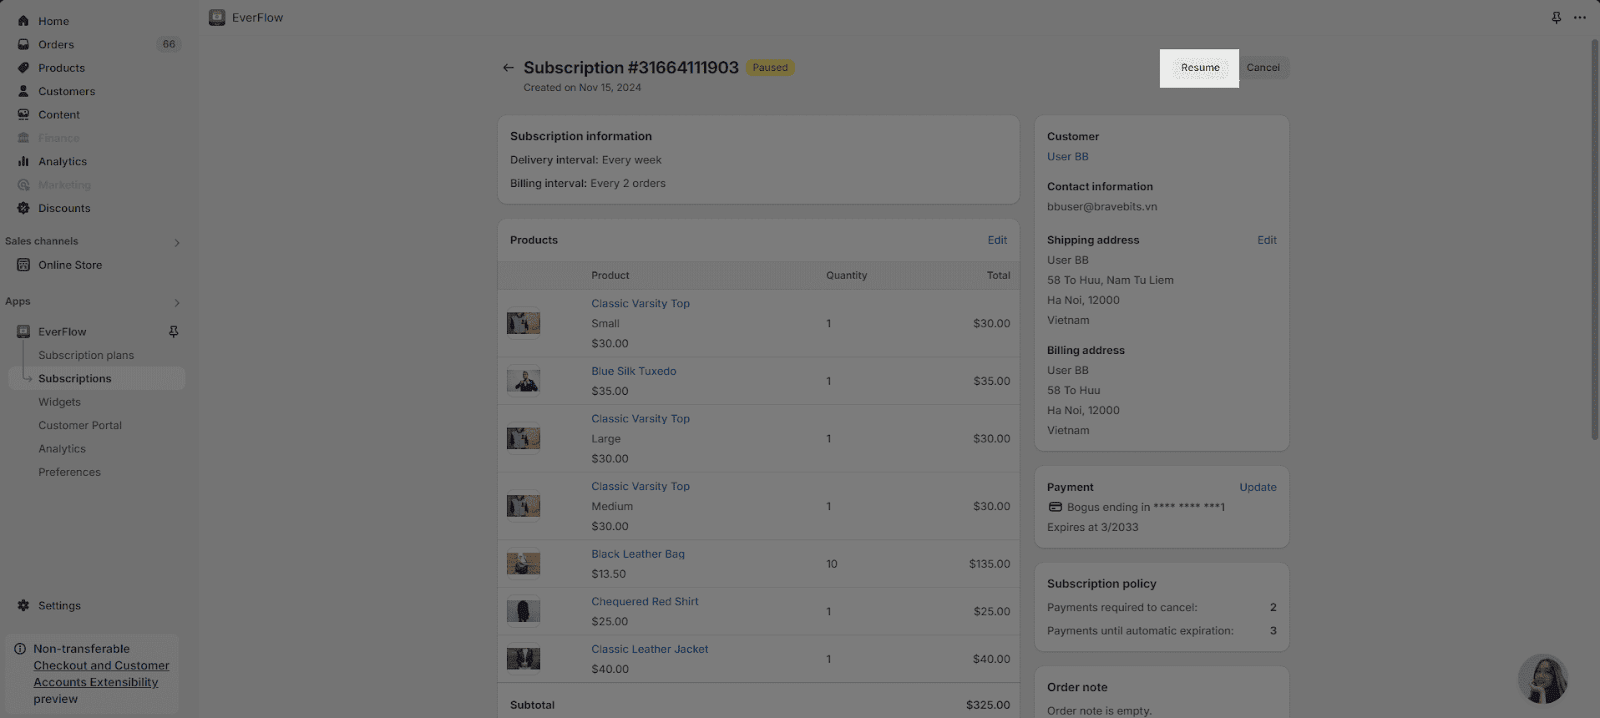
If you want to undo the Pause action, simply click on the “Resume” Button
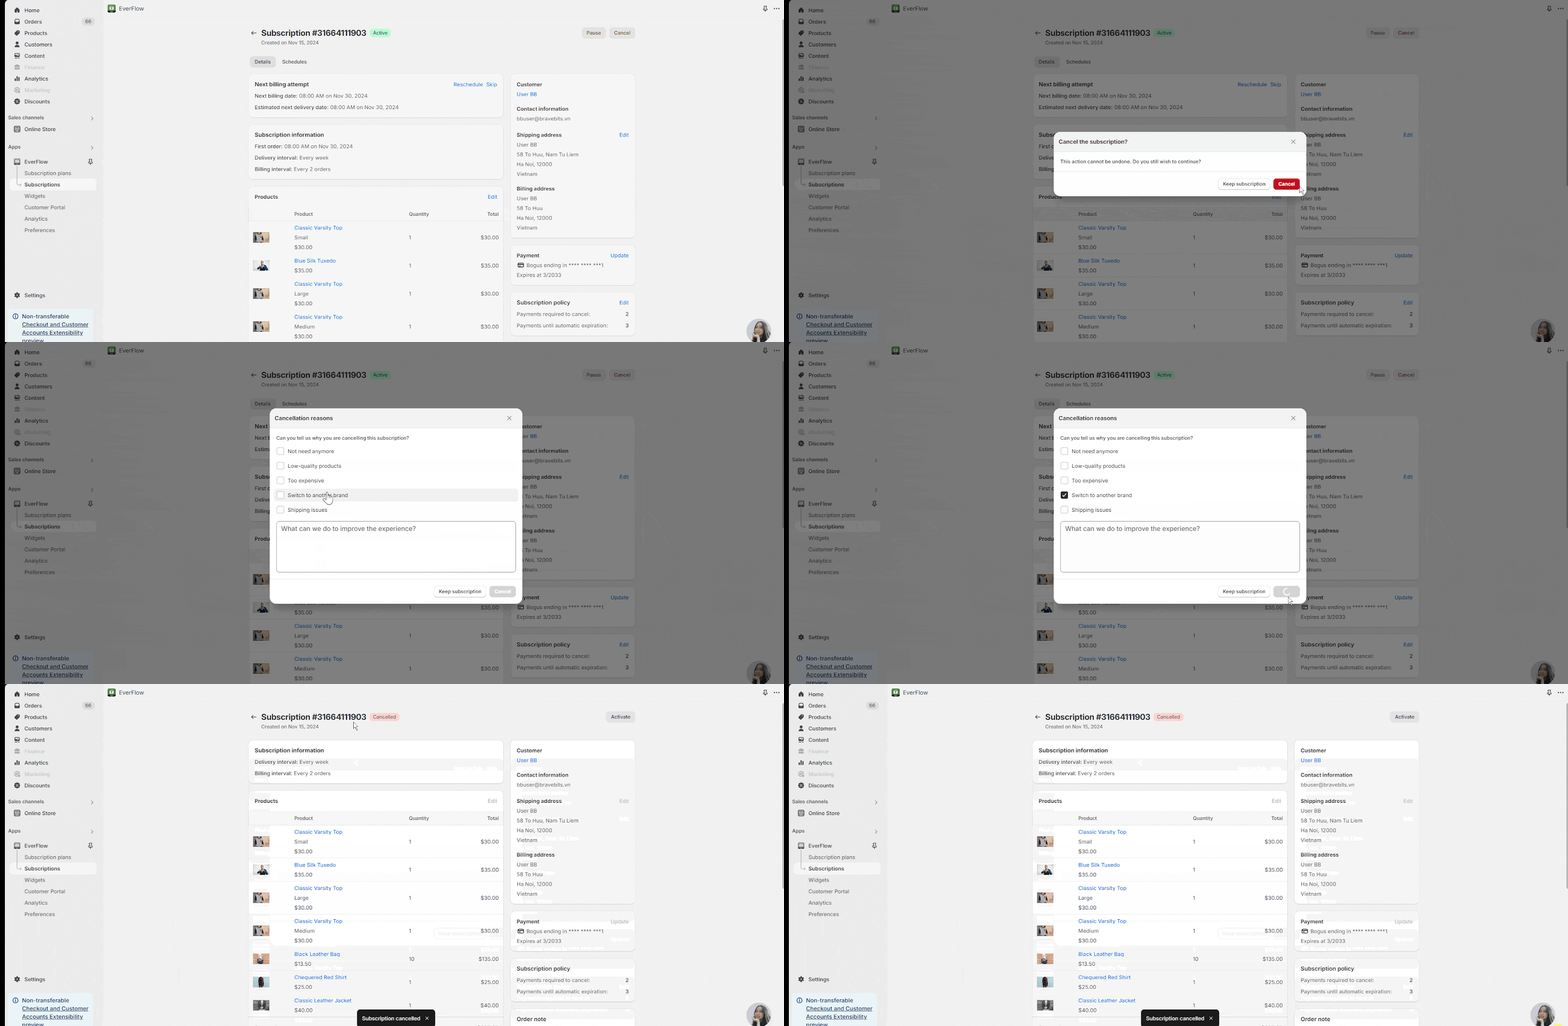
Also, if you want to cancel the subscription, click on the “Cancel” button and answer the required questions before clicking “Cancel” to finalize.
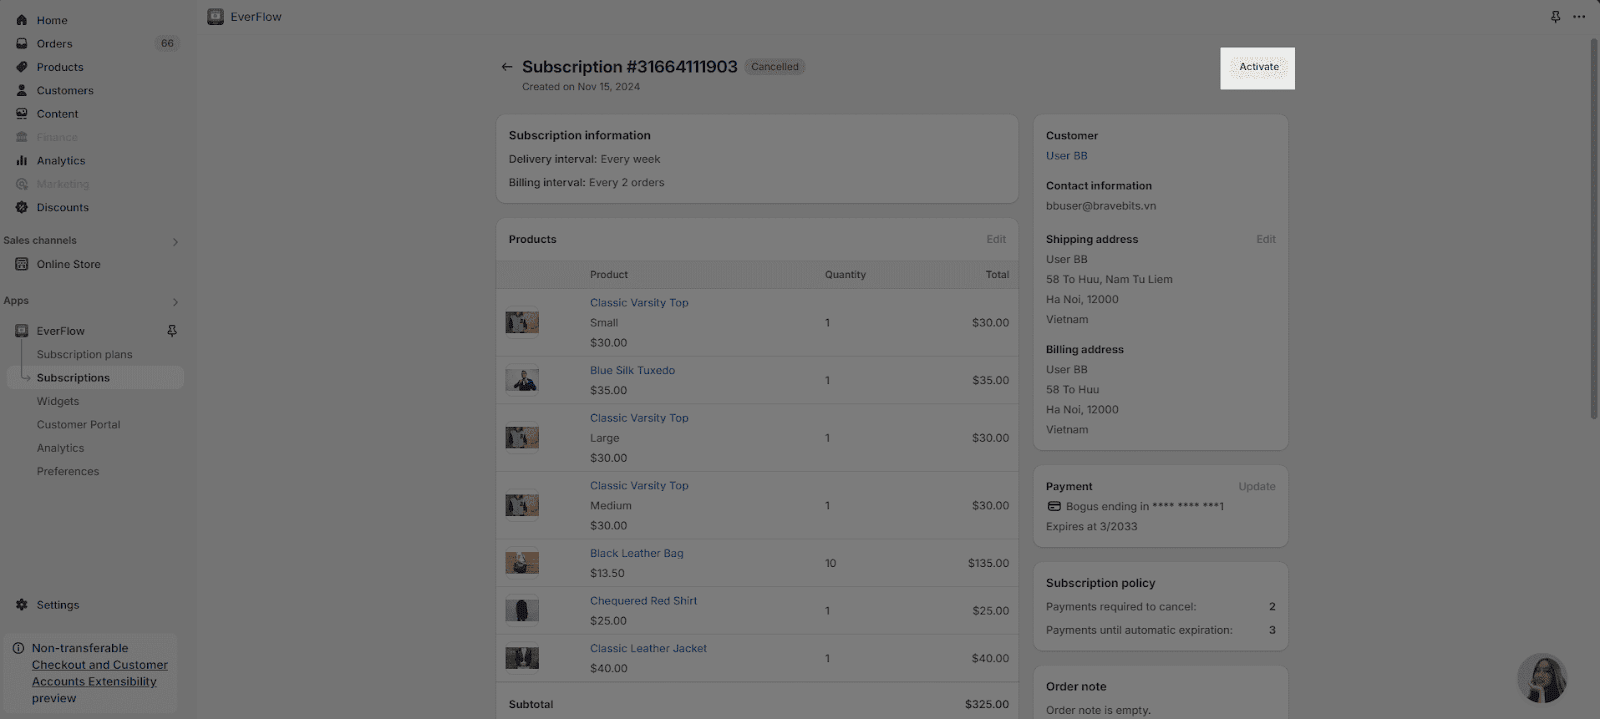
If you want to undo the Cancel action, simply click on the “Activate” button.
Frequently Asked Questions
1. Can I reschedule the billing day sooner than the dates set up before?
No. You can not reschedule the dates to be sooner than those that have been set up before. You can only reschedule the dates further, not backwards.
2. If I forgot to add more products to the subscription, do I have to create a new one to make up for it?
You don’t have to create a new subscription if you forgot to add or customize the products or any information of the subscription. After creating the subscription, in the detailed page, you can choose to add more products or edit the information of your subscription.
3. Why couldn’t I click on Enable cancellation policy?
You did turn off the feature Customers can cancel their subscriptions. To turn it on, go to EverFlow app > Customer Portal > Customer Portal Permissions. Then, when creating or editing a subscription, you can customize this policy.
4. After selecting a selling plan, I make many updates on the delivery interval, product items,… Will these updates automatically apply to that selling plan?
No, these updates will apply to this subscription only, not affecting the selected selling plan.
