What Is OneTick?
OneTick is a powerful app designed to help Shopify merchants increase average order value (AOV) and drive customer engagement through strategic upselling and cross-selling.
By adding customizable checkboxes directly to your product pages, collections, and even your homepage, you can seamlessly offer relevant add-ons and encourage customers to add more items to their cart before checkout.
In this article, we will cover:
OneTick Main Features
Add Multiple Checkboxes To The Product
With OneTick, you can create checkboxes for a single product to upsell and cross-sell. For example, you can offer various add-ons for each product, from shipping insurance, and gift wrapping to complementary accessories.
Aside from that, you can easily add checkboxes to each product directly on the homepage, product pages, or collection pages.
This lets customers personalize their purchases and upgrade their carts, ultimately leading to higher average order value (AOV).
Customize Content Of The Checkbox
You can personalize the content of your checkboxes with:
- Heading
- Description
- Image
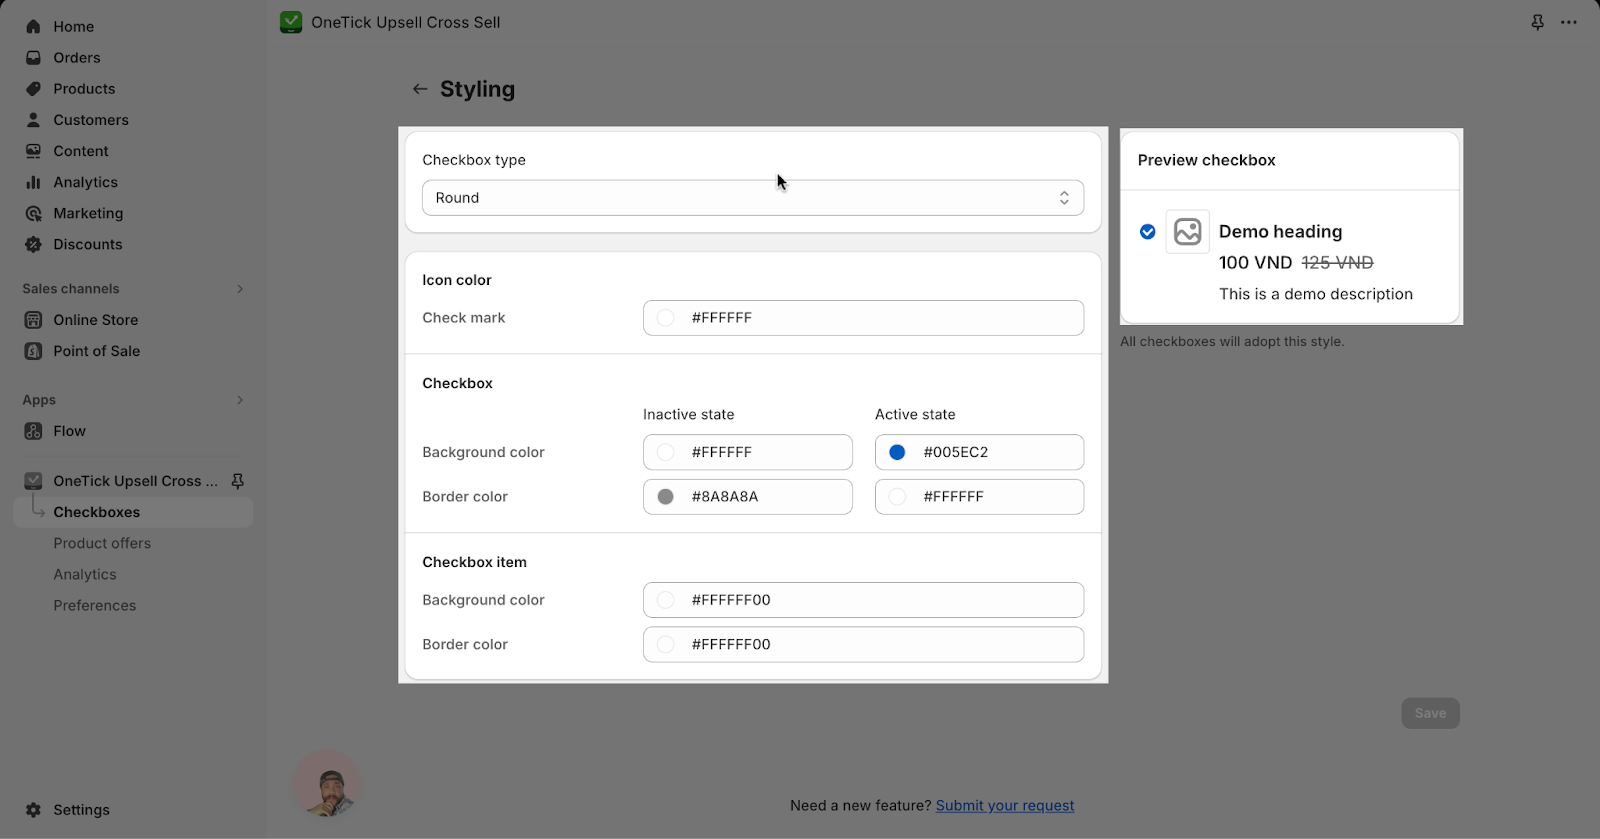
Customize Style For The Checkbox
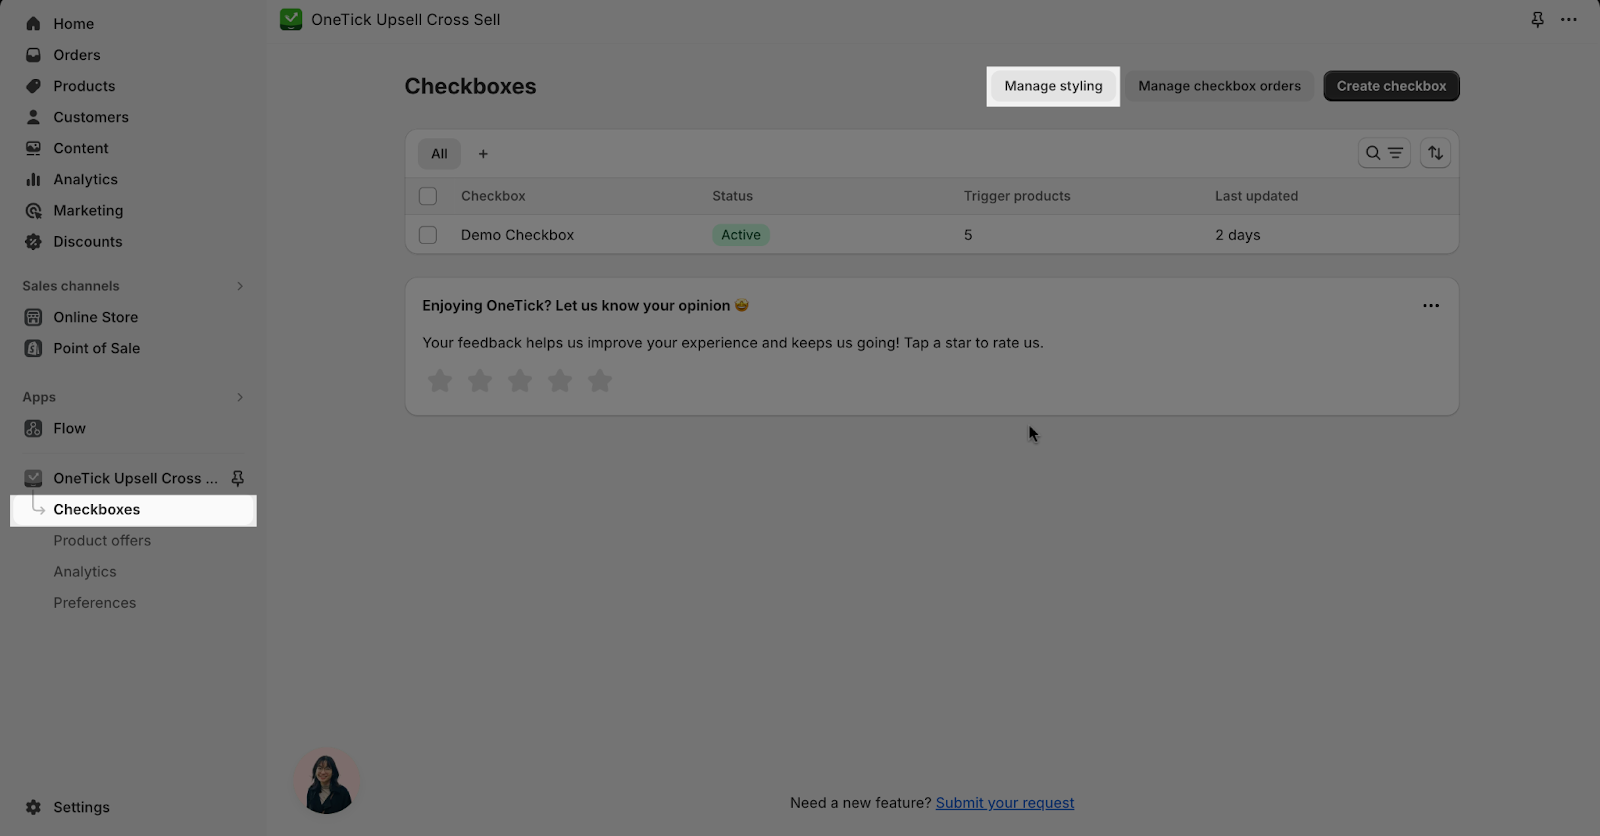
In order to go to the checkbox styling manager, click on Checkboxes > Manage Styling.
On this page, you can style your checkboxes to match your store’s design in Styling page:
- Checkbox Type
- Icon color check mark
- Checkbox background color
- Checkbox border color
- Checkbox Item background color
- Checkbox border background color
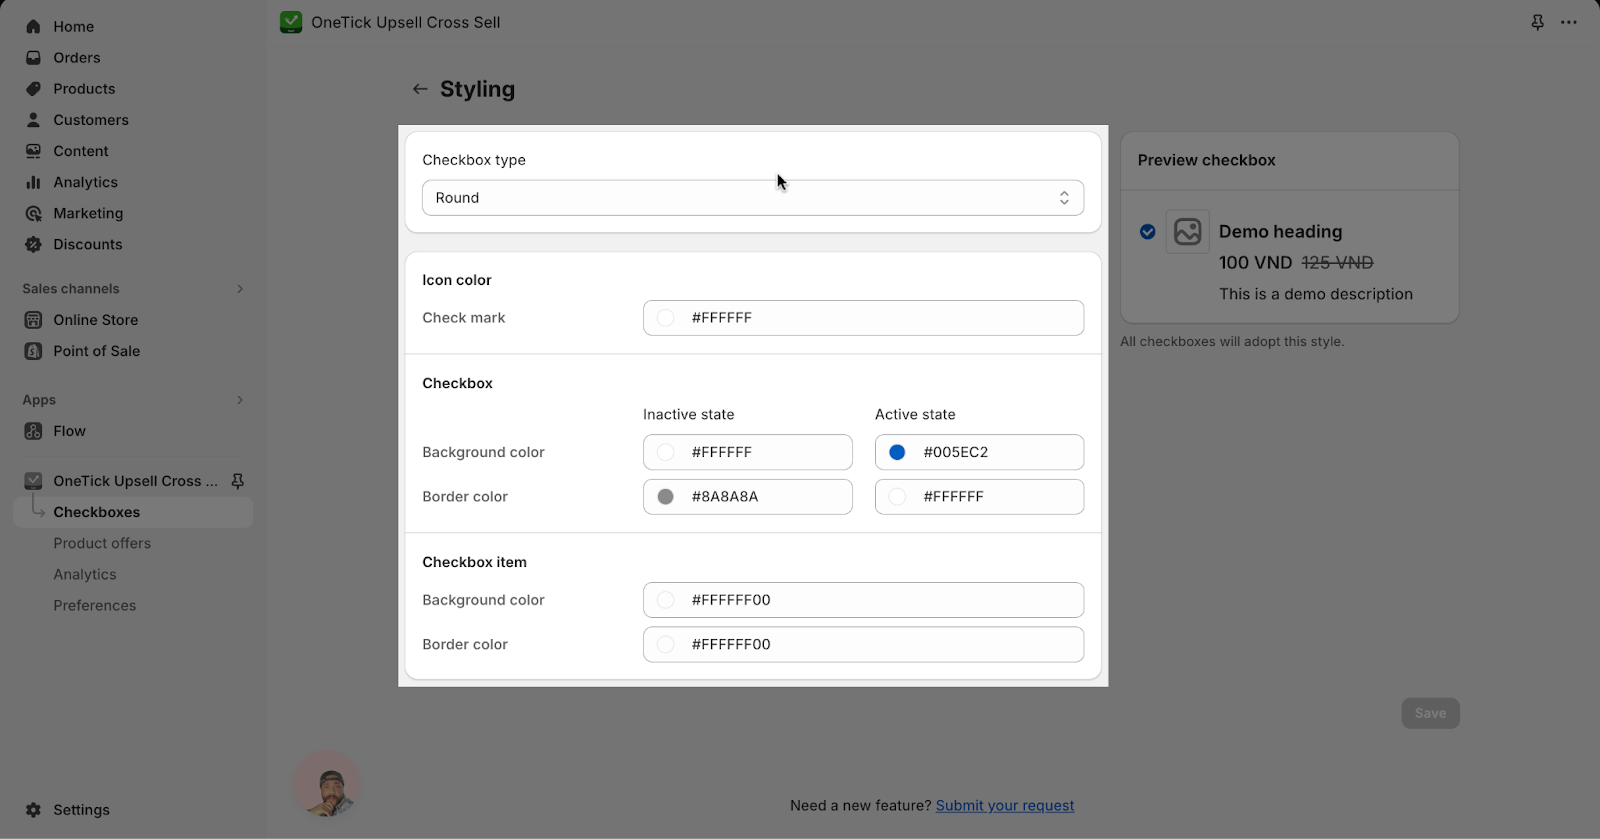
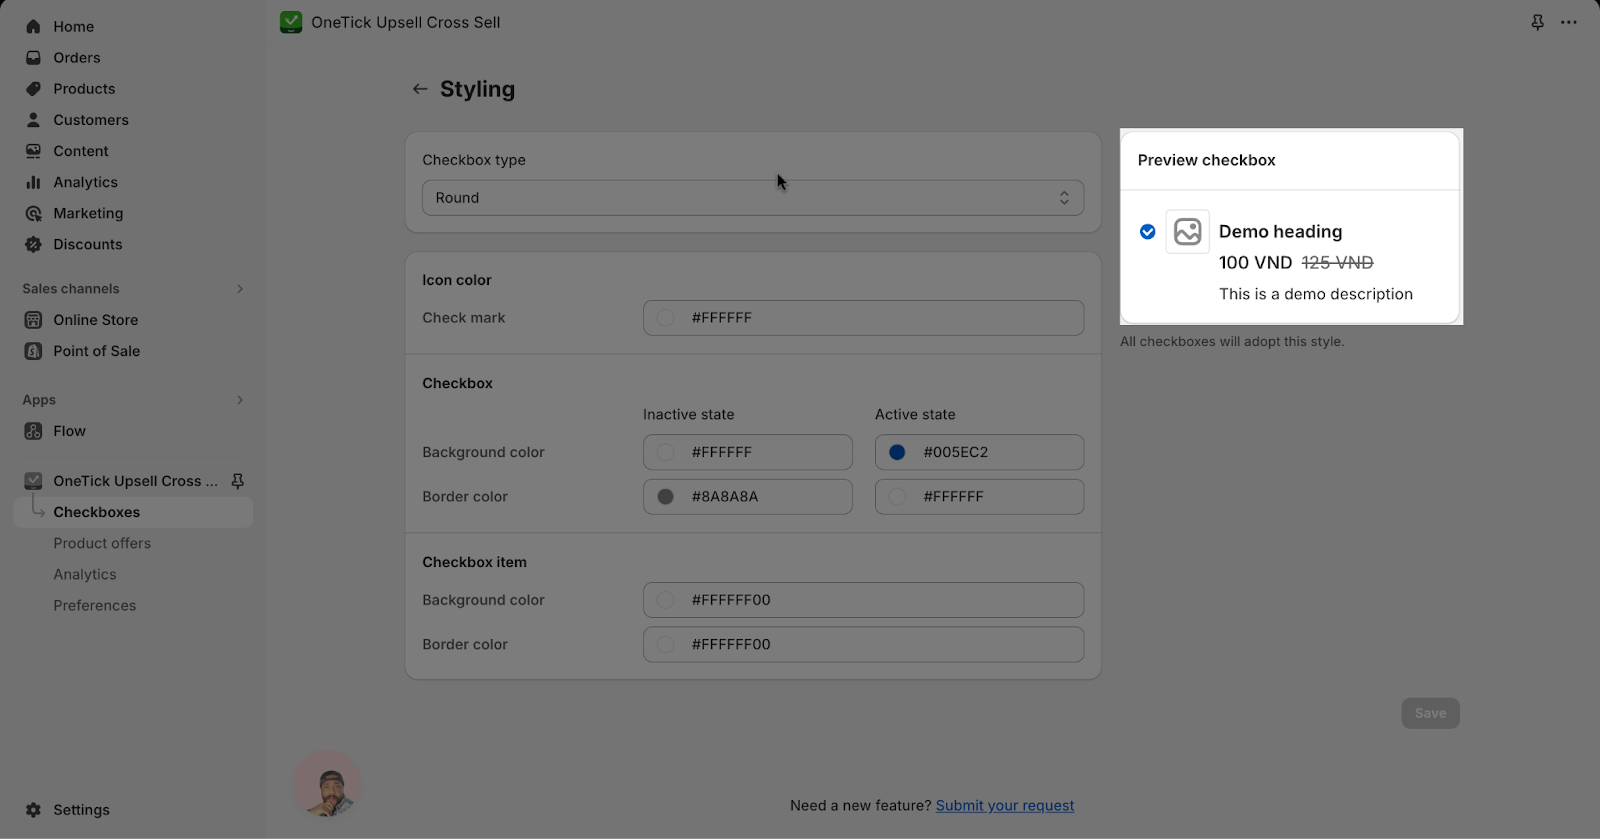
You can also see preview of the checkboxes after customization:
Create Product Offers
A product offer allows you to add 1 offer on your Cart page. It will automatically show below the added items in the Cart.
To go to Product Offer page, from the Dashboard, click the “Product offers” button.
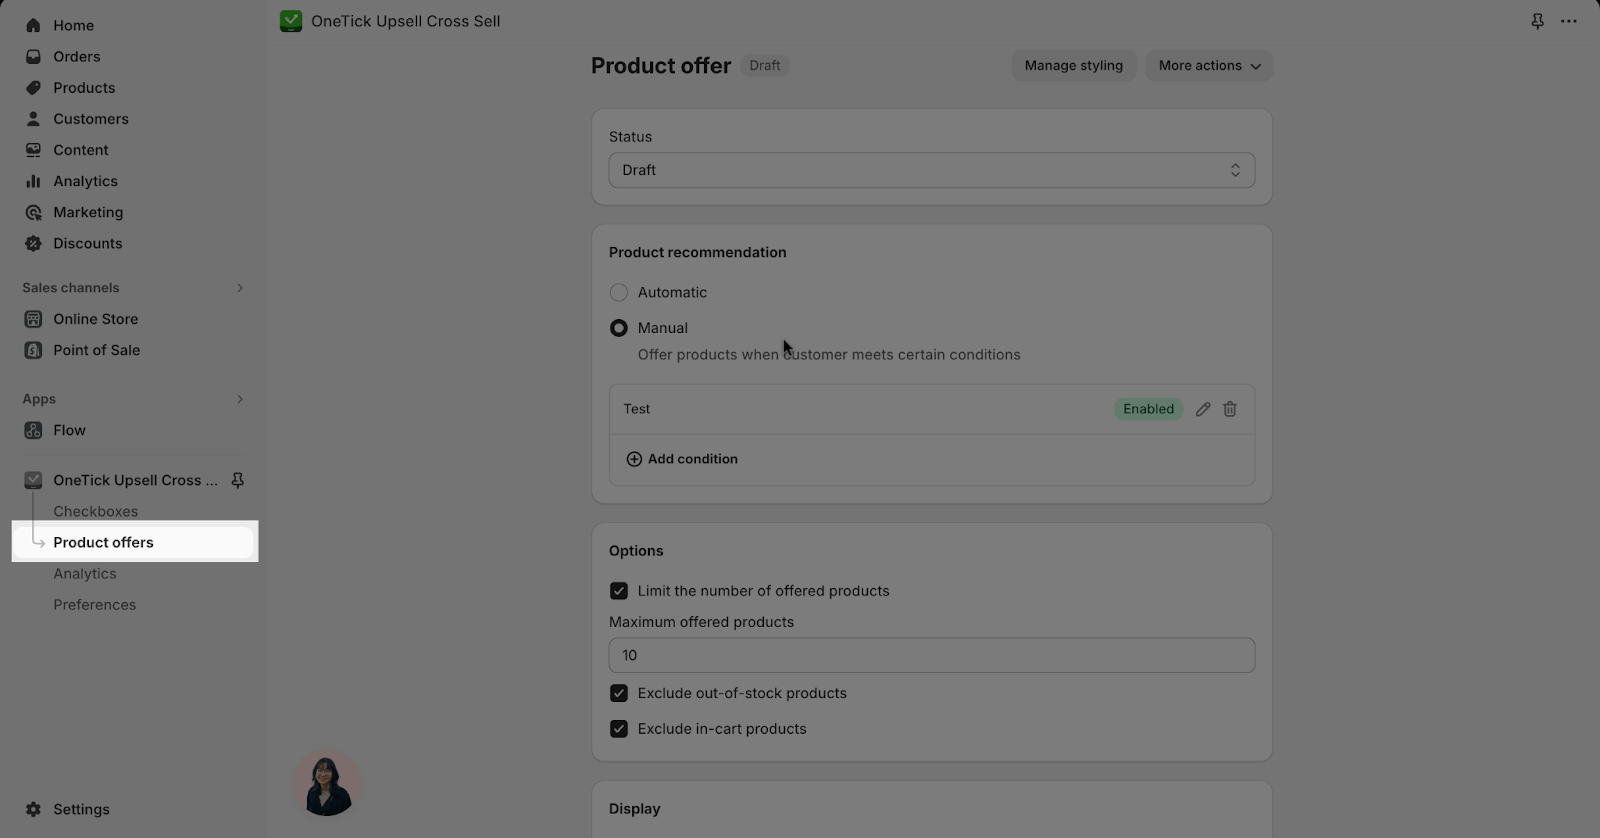
On this page, you can customize elements such as:
- Status
- Product recommendation
- Options
- Display
For more informations regarding how to work on Product Offers page, please refer to our detailed manual of How to create product offer with OneTick
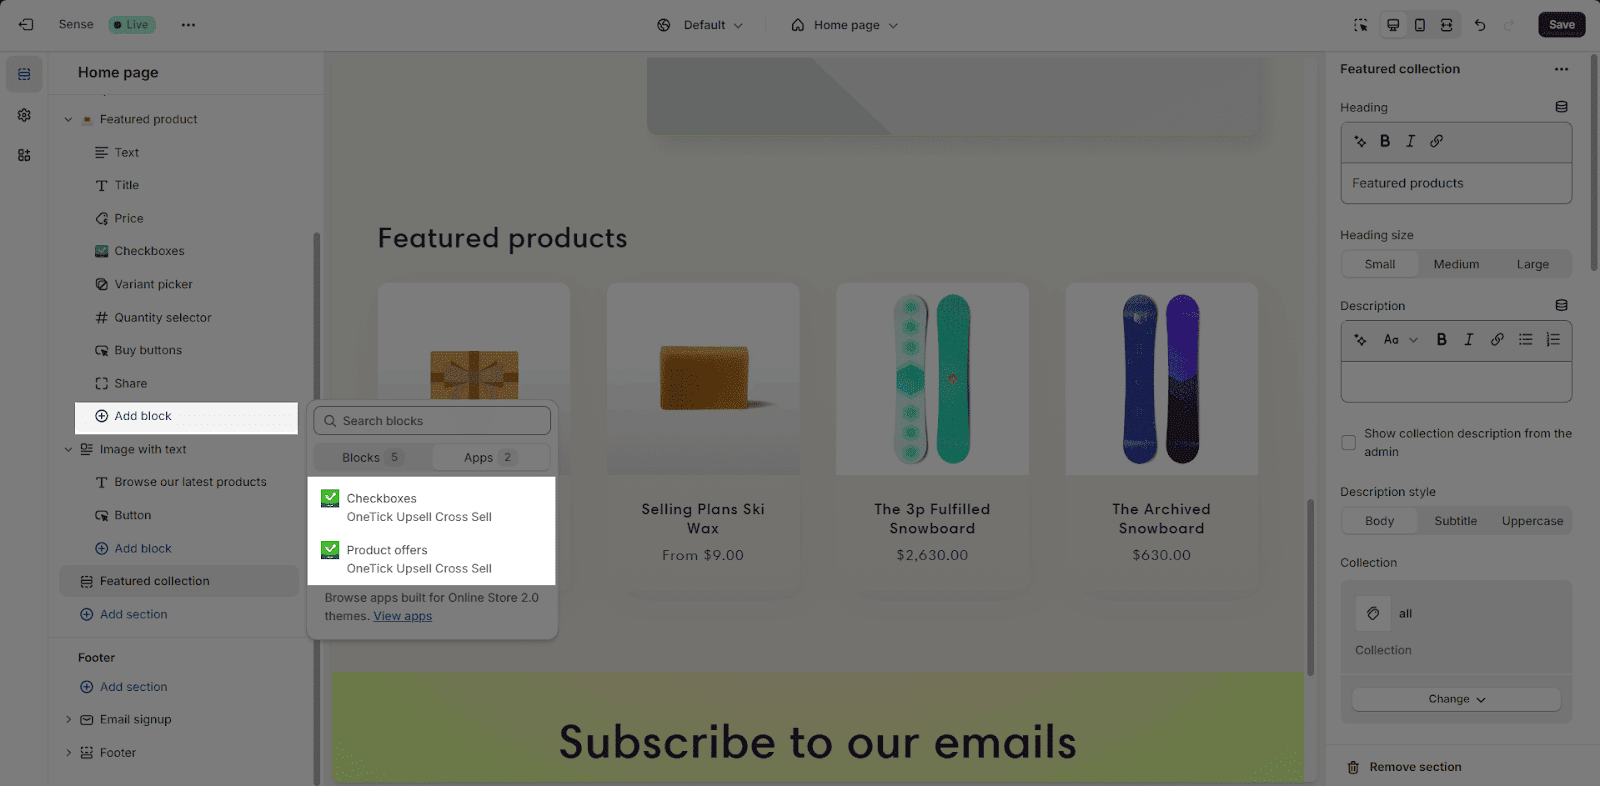
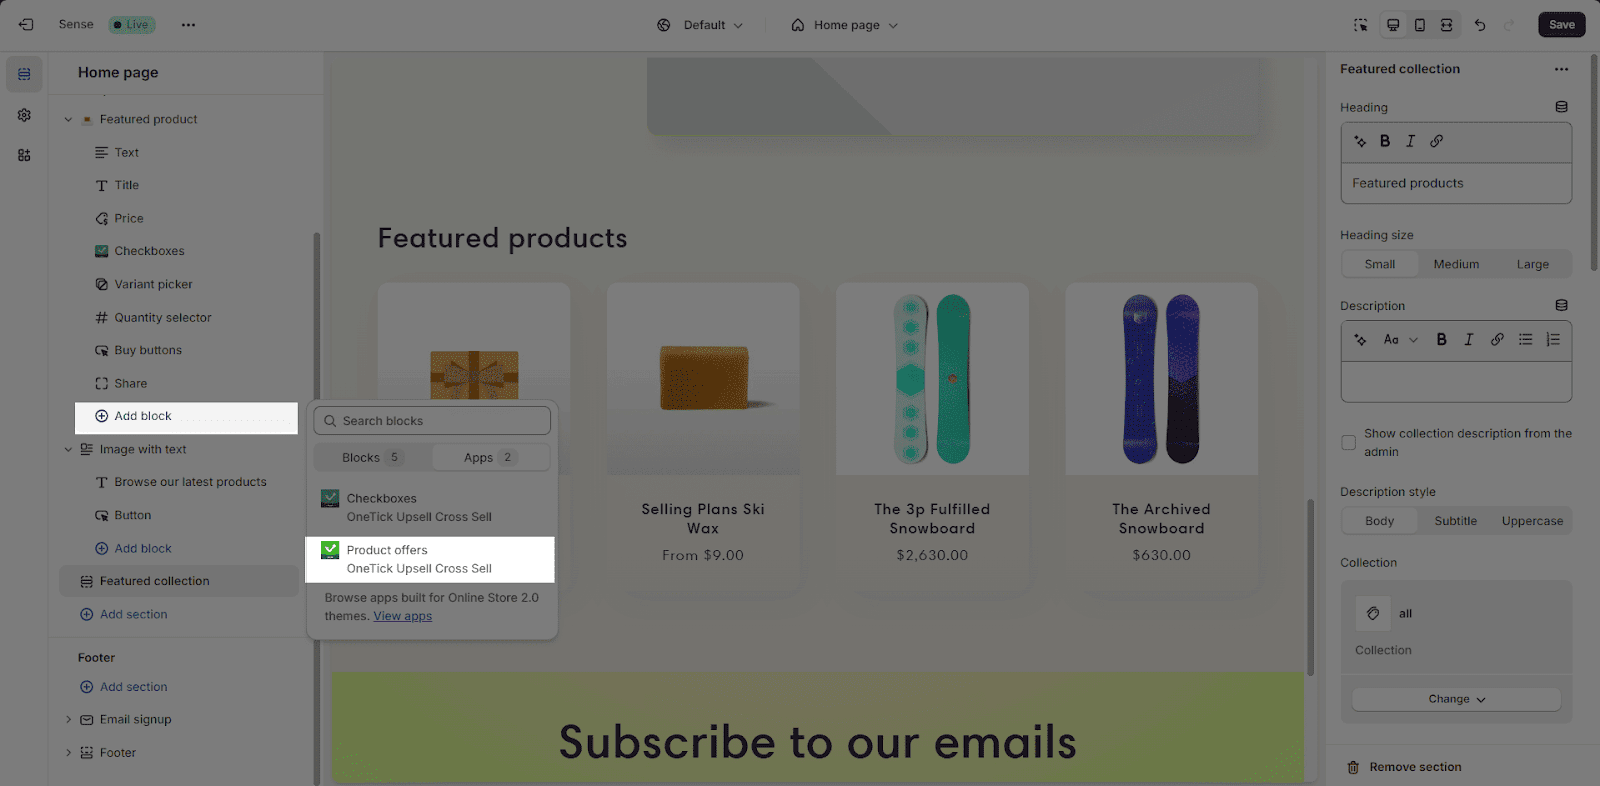
Display The Checkbox On Your Store With No Code
OneTick empowers you to place checkboxes anywhere in your theme using app blocks. Showcase them on product pages, collections, or homepage to capture customer interest at key touch points throughout their shopping journey.
Track Your Offer Performance
With OneTick’s built-in analytics, you gain valuable insights into the performance of your upsell and cross-selling offers. You can track revenue generated from each checkbox, allowing you to identify what’s working and refine your strategy for maximum impact.
Mobile Responsive Interface
OneTick ensures a smooth experience across all devices, especially on mobile. Your checkboxes will adapt beautifully to any screen size.
Getting Started With OneTick
Step 1: Download The OneTick App
Find OneTick on the Shopify App Store and install it in your store.

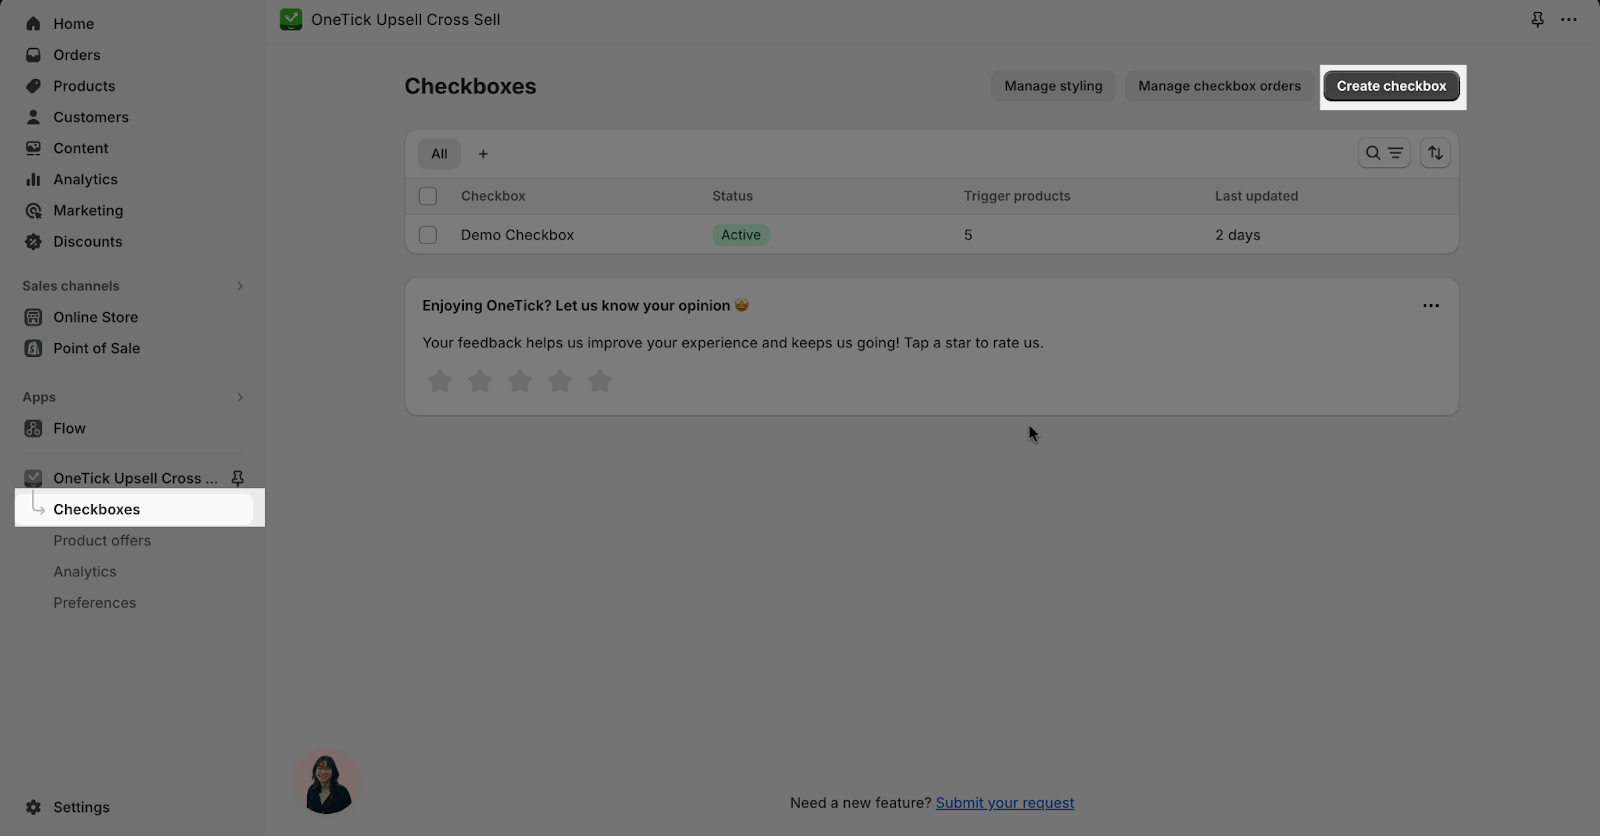
Step 2: Create Your First Checkbox
From Dashboard, go to Checkboxes and click on “Create checkbox”.
Step 3: Customize The Look And Feel Of The Checkbox
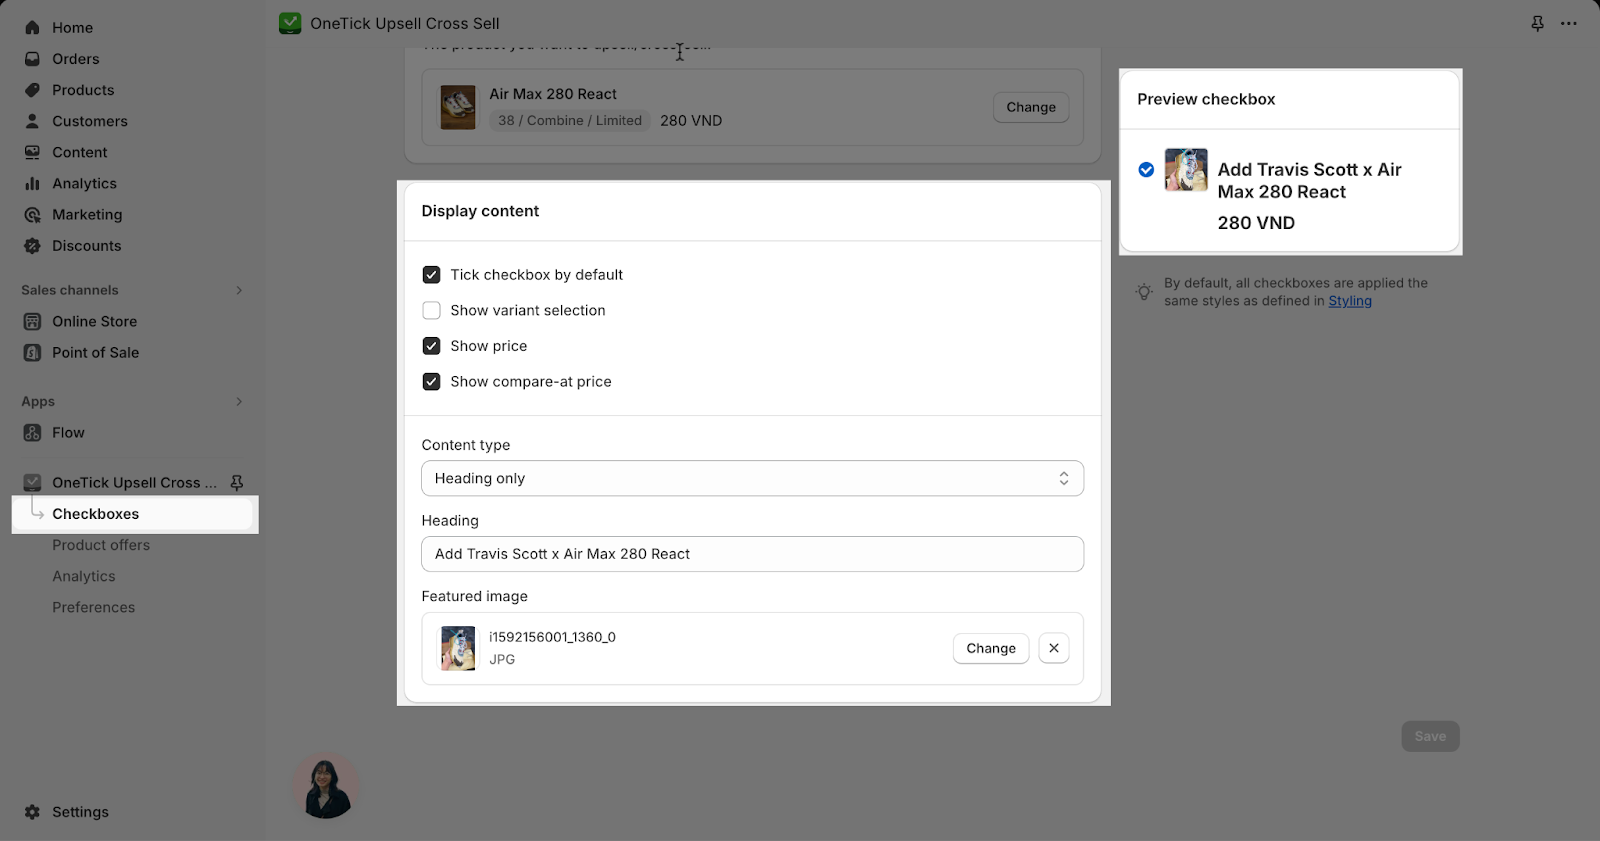
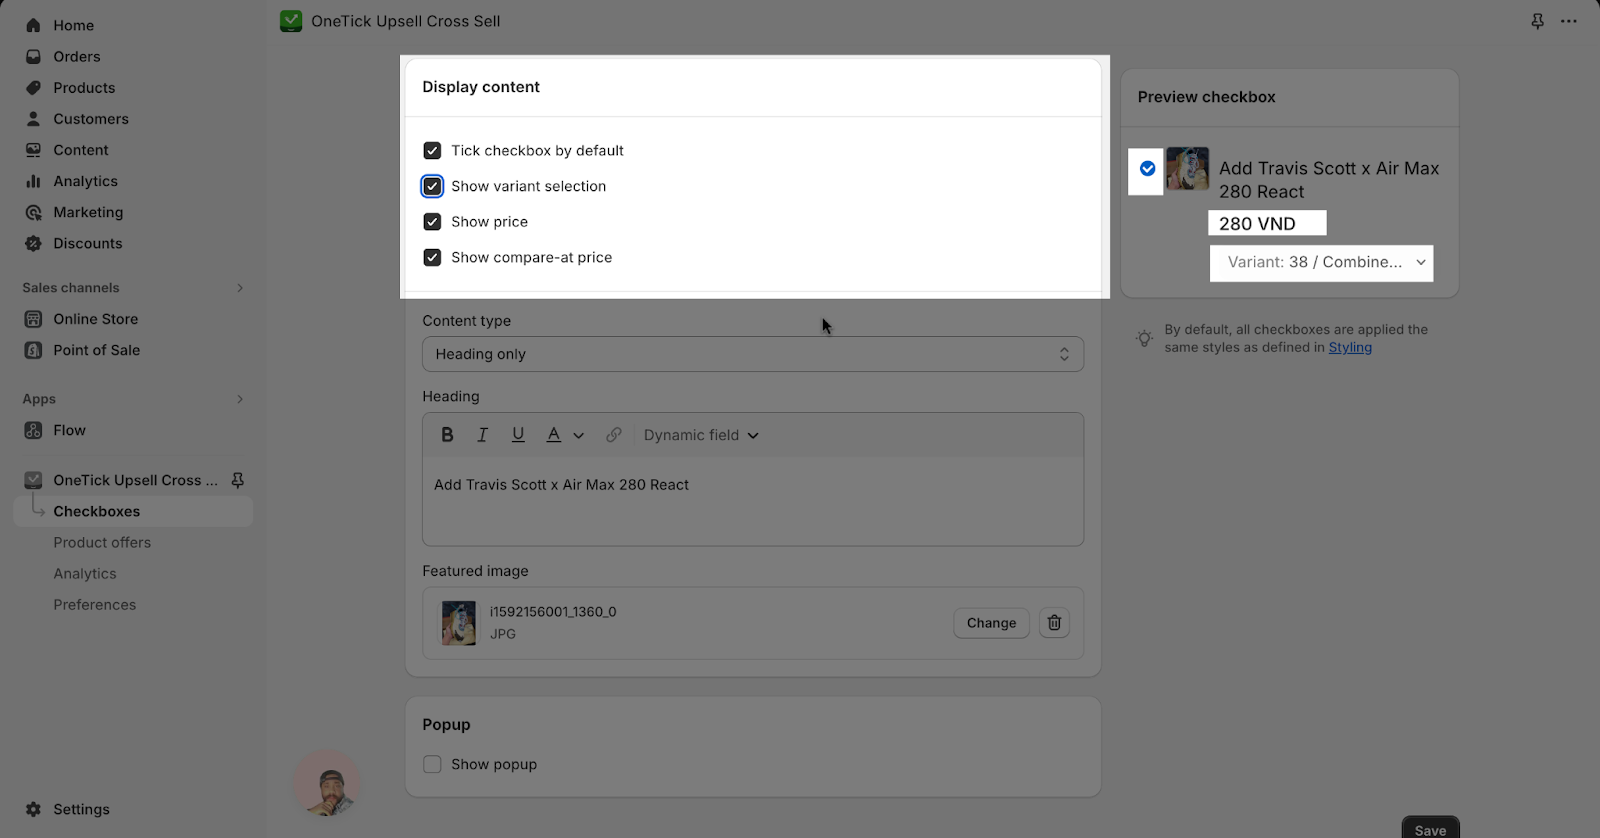
In the Checkboxes editing page, scroll down to Display Content, you can adjust the content to show with the checkbox. You can choose to show Heading, Description or both content for the checkbox. You can also see the preview checkbox that shows the contents you have customized.
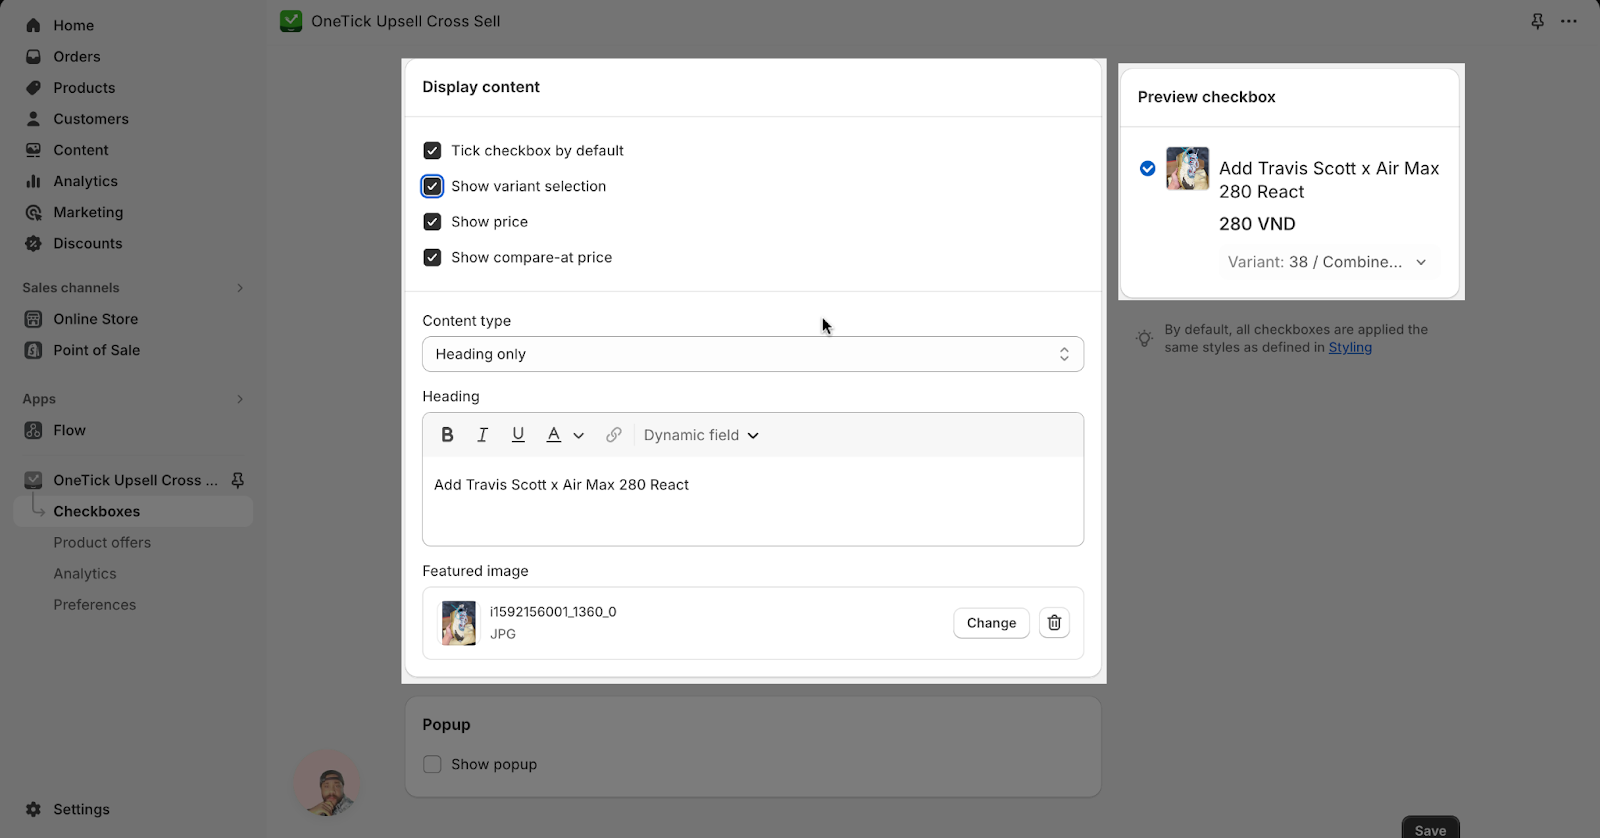
Under Content placeholder, you can also add an image to your checkbox by clicking the “Add featured image” button. The image will be displayed next to the checkbox icon.
Along with the Heading, Description and Image, there are 4 options for displaying in the checkbox:
- Tick checkbox by default
- Show variant selection
- Show price
- Show compare-at price
On the Styling page, you can style your checkboxes to match your store’s design in Styling page:
- Checkbox Type
- Icon color check mark
- Checkbox background color
- Checkbox border color
- Checkbox Item background color
- Checkbox border background color
You can also see the preview of your checkboxes after customizing.
Step 4: Enable “OneTick Checkbox Upsell” In Theme Editor
Ensure you’ve turned on “OneTick Upsell Cross Sell” in your theme editor > App embeds for optimal functionality.

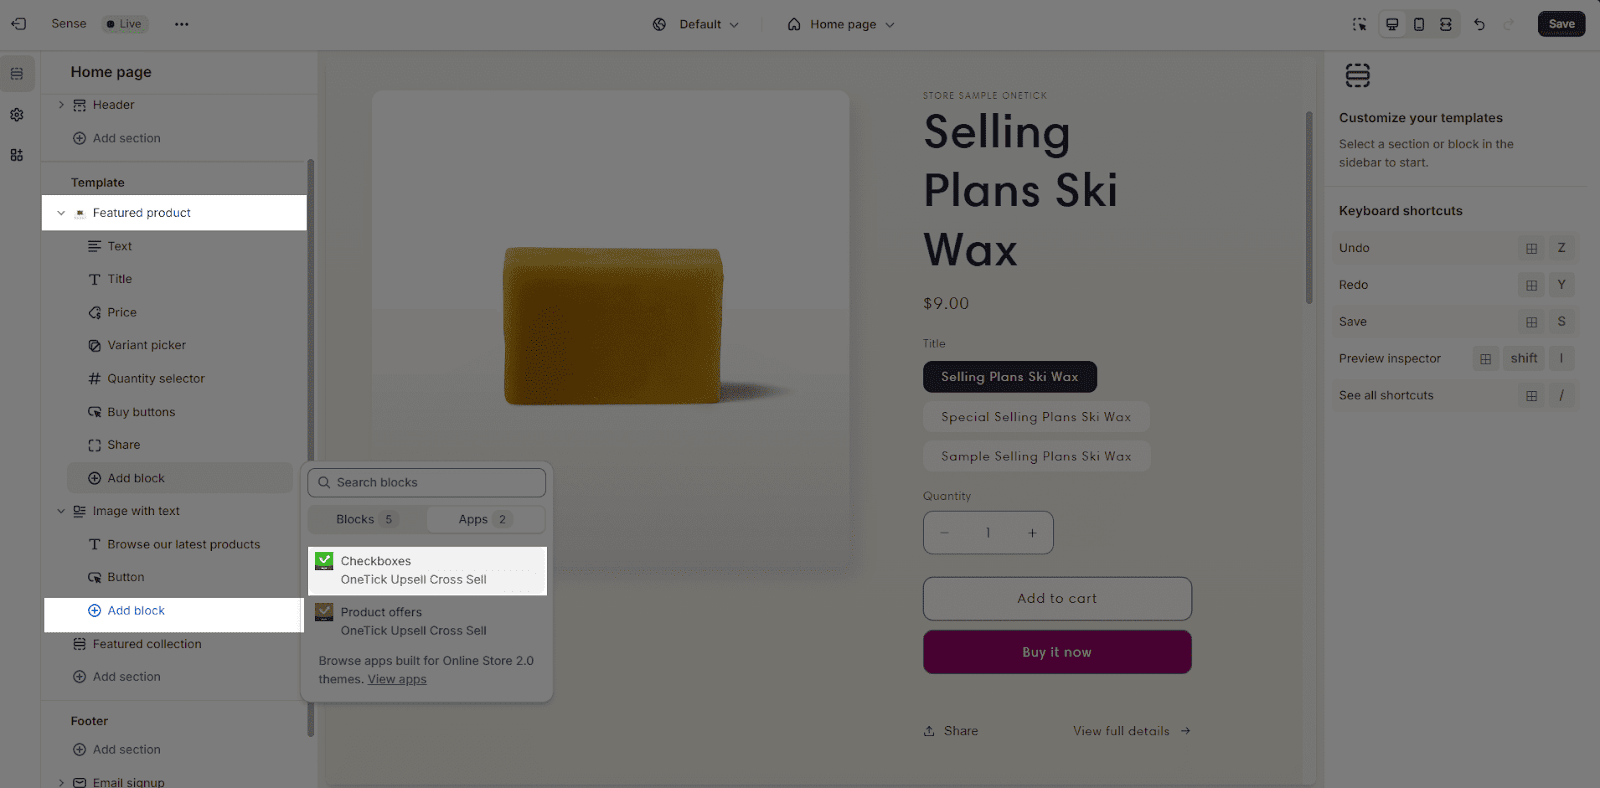
Step 5: Add Checkbox
In the theme editor, click on the “Add block” button to install the checkbox app block to your section. After that, all the active checkboxes will be displayed on the page. You can change the order of the checkboxes within the OneTick app.
Step 6: Add Product Offer
You can choose the option of adding Product offer in order to boost sales for your products. For more detailed information on how to create a Product offer, please refer to our manual of How to create product offer with OneTick.
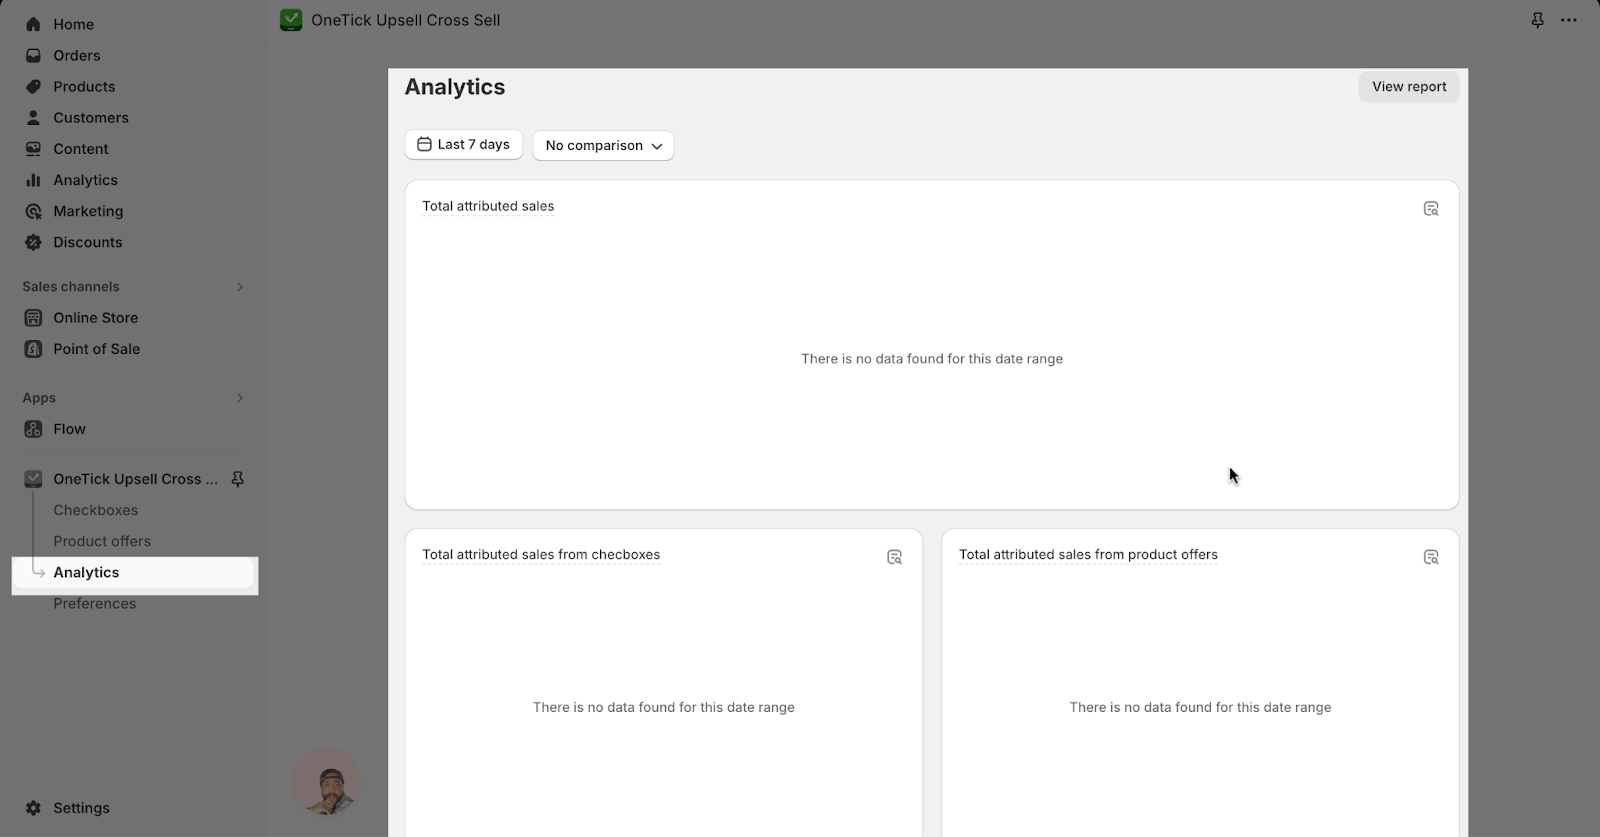
Step 7: Track Your Results
Monitor the performance of your checkboxes using OneTick’s built-in analytics to see how they impact your sales and engagement.
The data includes:
- Total attributed sales: Gross sales generated from OneTick checkboxes and product offers (plus taxes and duties) minus discounts and returns.
- Total attributed sales from checkboxes: Gross sales generated from checkboxes (plus tax and duties) minus discounts and returns
- Total attributed sales from product offers: Gross sales generated from product offers (plus tax and duties) minus discounts and returns
Frequently Asked Questions
1. Where can I display the checkboxes on OneTick?
You can show checkboxes on product pages, collections, and even your homepage.
2. Can I customize the appearance of the Checkboxes on OneTick?
Yes, you can customize the heading, description, image, shape, and colors to match your store design.
3. What are the pricing plans on OneTick?
OneTick is currently offering a free plan for all users to use to increase sales and boost the effectiveness of their storefronts.