Overview
Summary: This article covers common issues users face when trying to add OneTick add-on products to their cart on Shopify stores. Four common scenarios include missing theme helper activation, out-of-stock add-on products, conflicts with third-party apps that modify the default “Add to Cart” button, and incompatibility with subscription products.
After reading, users will be able to troubleshoot the problem of not being able to add add-on products when using OneTick functionality on Shopify pages.
In this article:
- Overview
- Why Issue Cannot Add Add-on Product To Cart Happens?
- How To Fix Issue Cannot Add Add-on Product To Cart?
- Tips & Best Practices
How To Fix Issue Cannot Add Add-on Products To Cart?
Why Issue Cannot Add Add-on Product To Cart Happens?
1st Scenario: Users Haven’t Enabled The Theme Helper for OneTick
The theme helper is crucial to make the checkbox work properly because OneTick’s JS codes only run when users turn on the theme helper.
2nd Scenario: The Add-on Product Is Sold Out
If the add-on product is sold out, the checkbox is still shown but customers cannot add them to cart.
The way OneTick works on your page is that the app would query the default ATC button to trigger the atc event of the add-on product. In some cases, users use 3rd-party apps that override their default ATC button, which results in the add-on product not being able to atc.
How To Fix Issue Cannot Add Add-on Product To Cart?
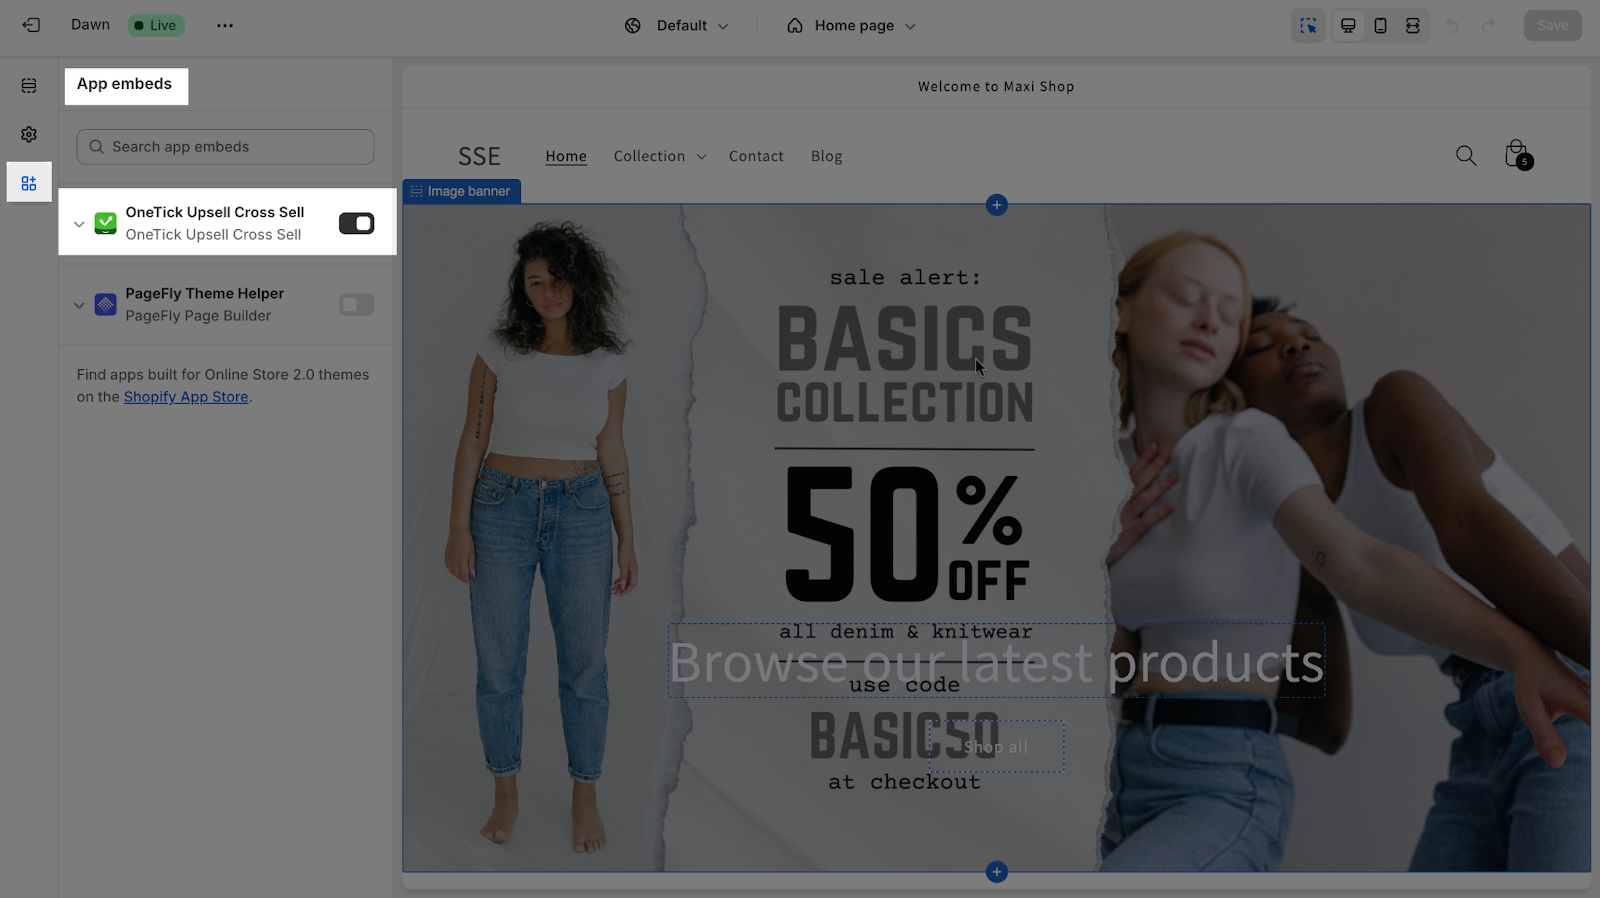
1st Scenario: Users Haven’t Enabled The Theme Helper for OneTick
The theme helper is crucial to make the checkbox work properly because OneTick’s JS codes only run when users turn on the theme helper. Please follow this steps to enable the Theme Helper for OneTick:
- Step 1: Access OneTick App
In Shopify home menu, go to App > Search and select app “OneTick”
- Step 2: Enable “OneTick Upsell Cross Sell” In Theme Editor
In Shopify home menu, goto Online store > Theme > Current theme > Customize > App embeds > Enable OneTick.
2nd Scenario: The Add-on Product Is Sold Out
Users need to add stock or select “Continue selling when out of stock”.
Add Stock:
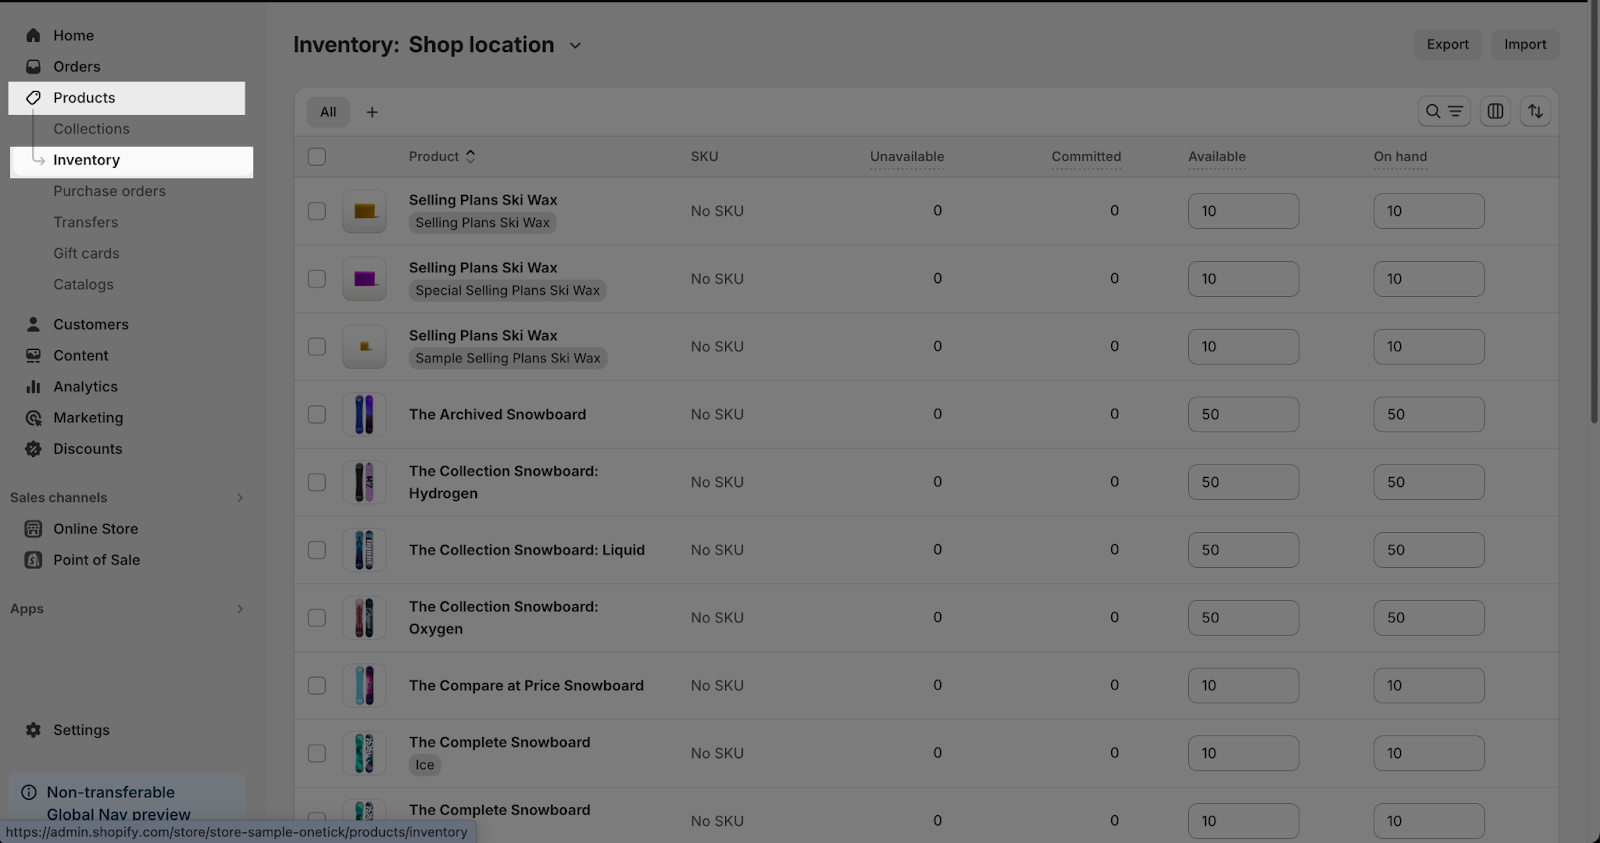
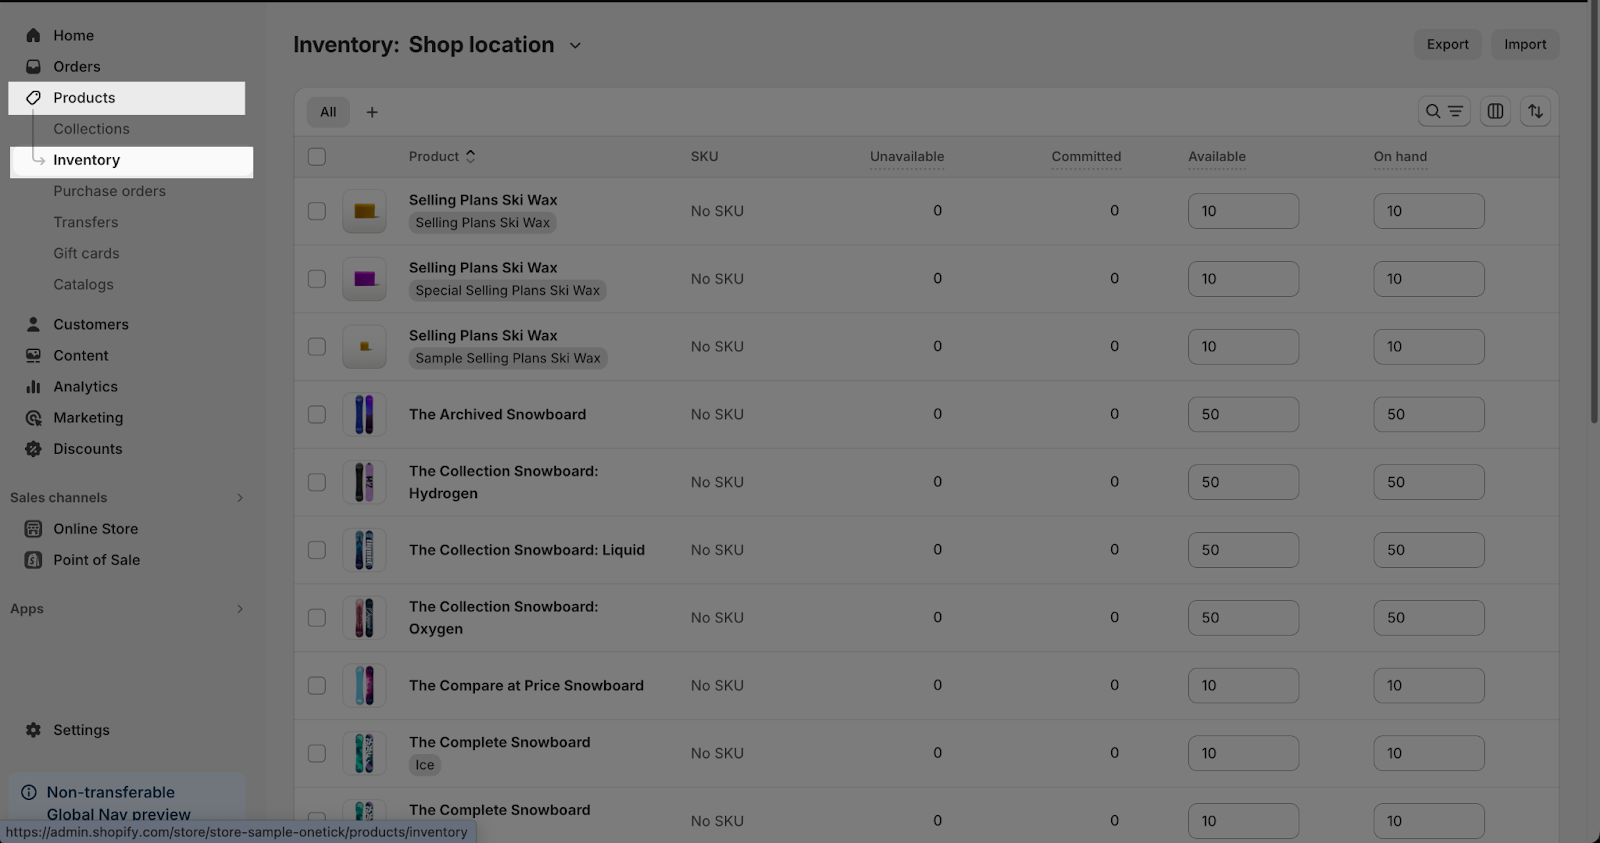
- Step 1: In the Shopify admin, go to Products > Inventory.
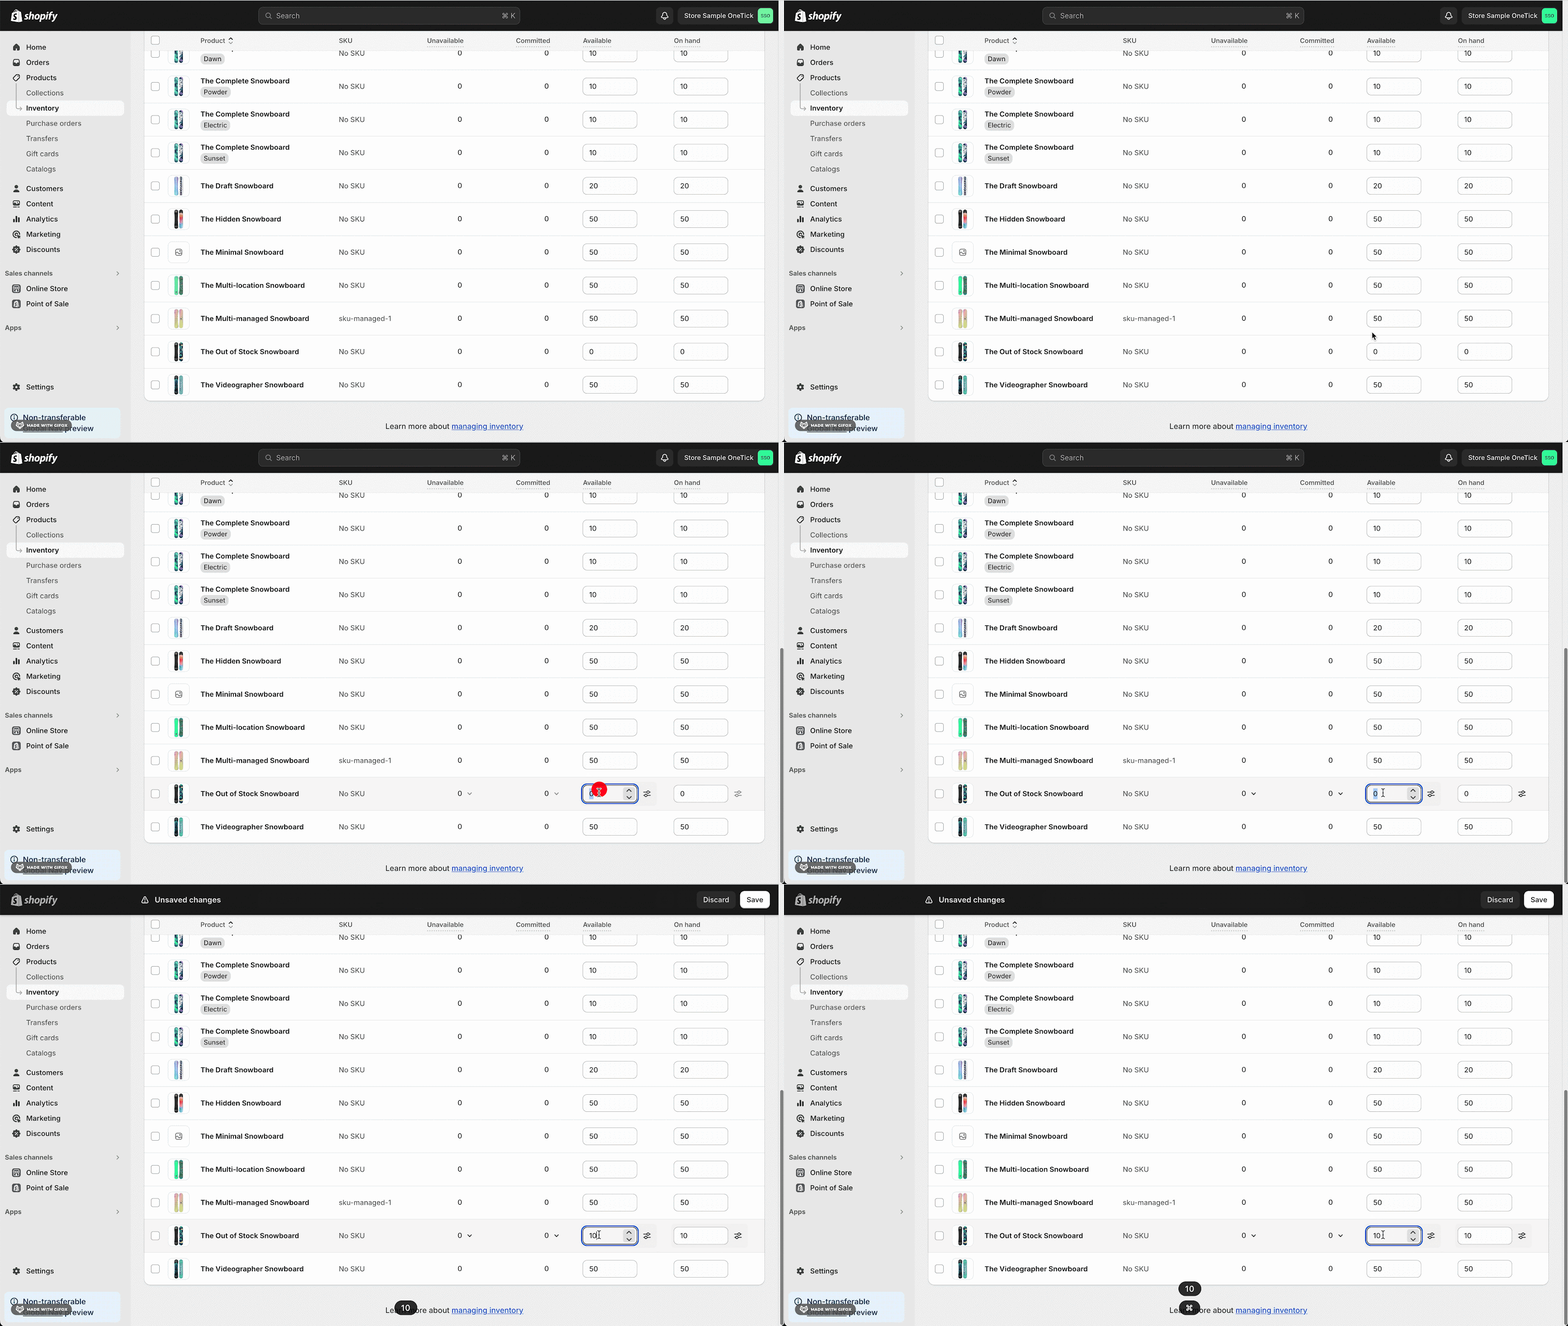
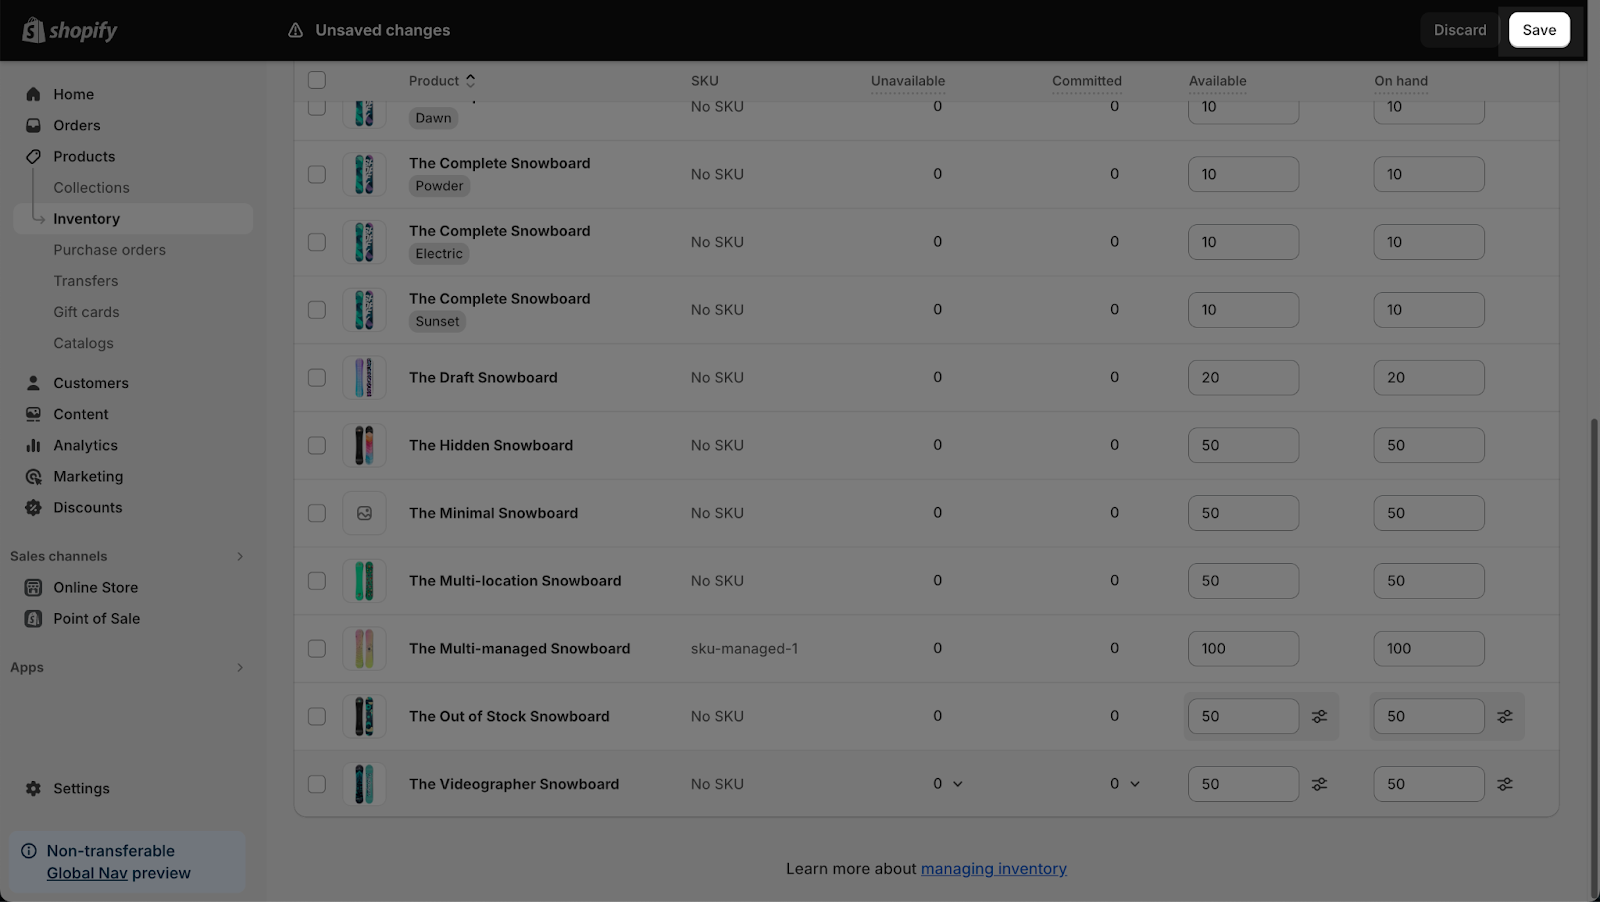
- Step 2: Select the product you want to add stock. You can adjust the On hand or Available quantity of a single variant or multiple variants by the same amount. To adjust a single variant, enter the quantity in the On hand or Available column of the variant that you want to adjust.
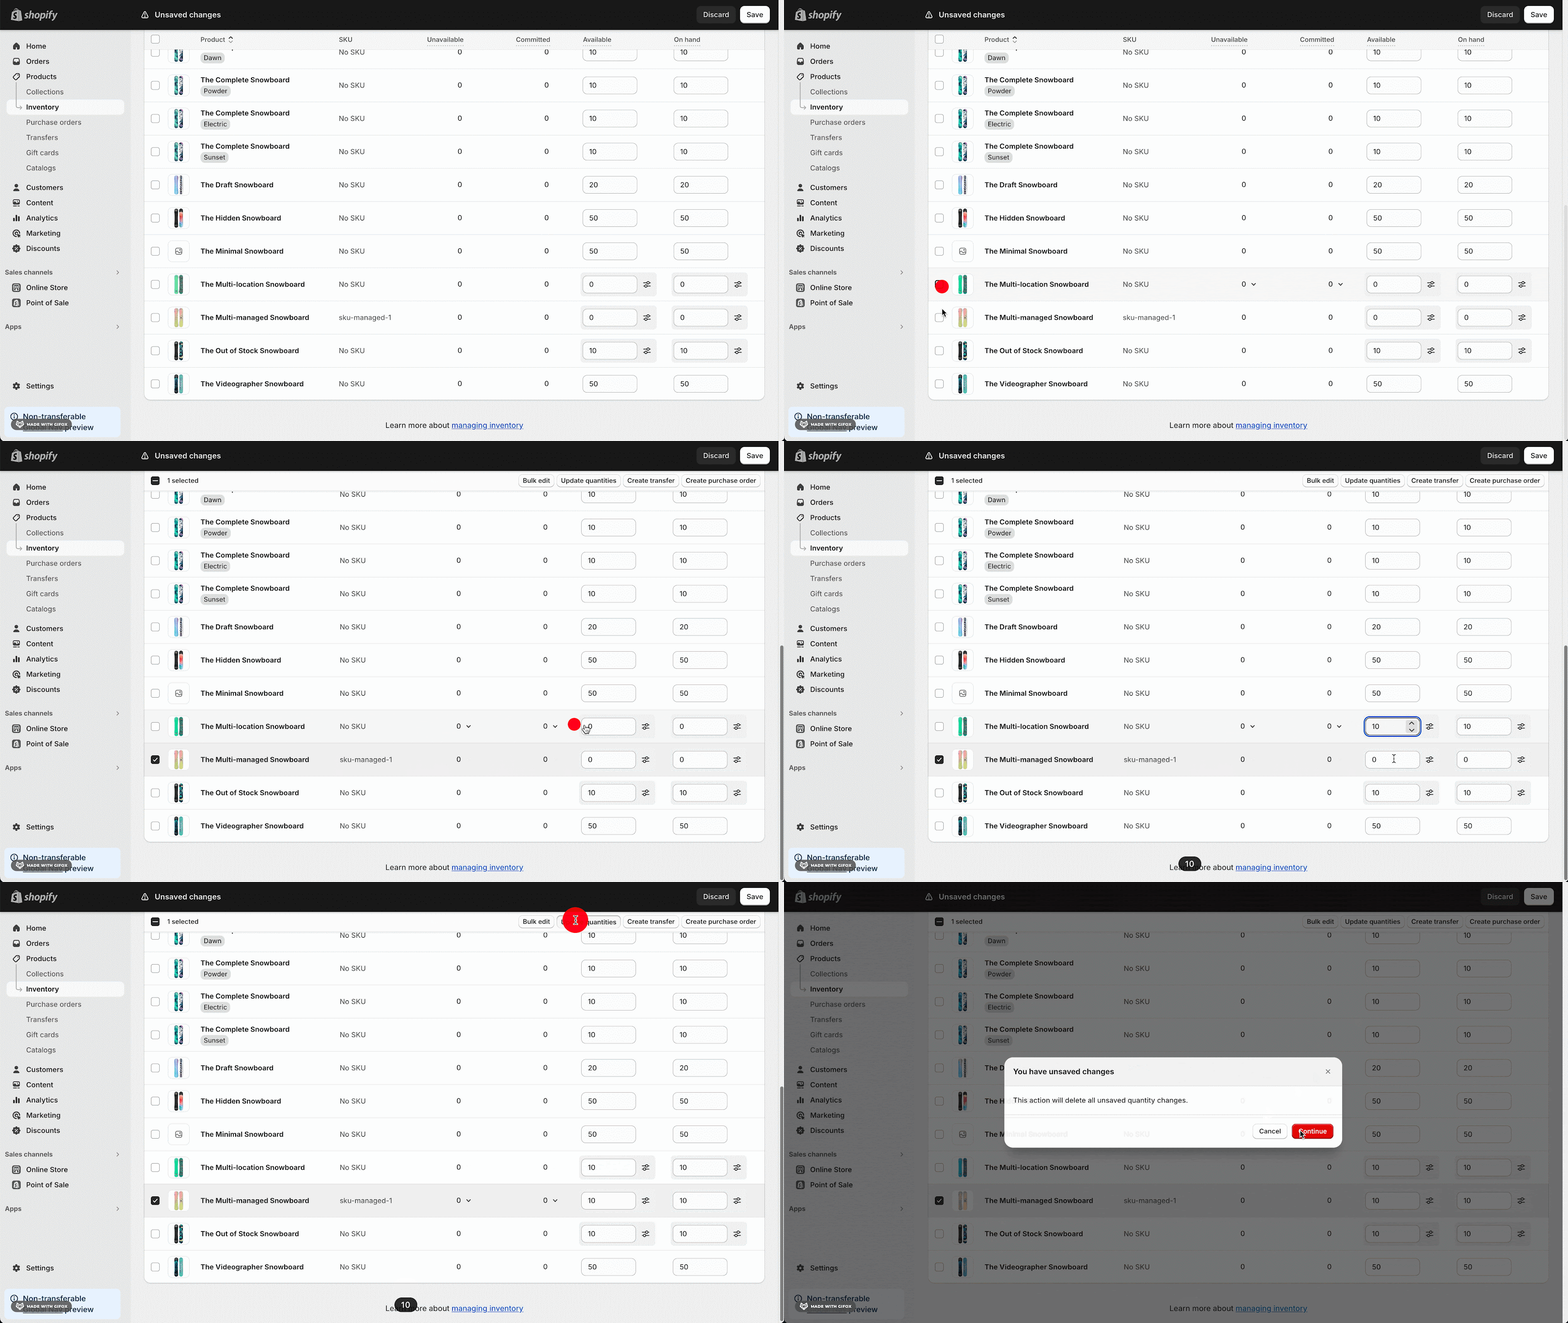
- To adjust multiple variants by the same amount, select the variants that you want to edit and click Update quantities
- Click Save.
Select “Continue Selling When Out Of Stock”
- Step 1: In the Shopify admin, go to Products > Inventory
- Step 2: Select product that you want to continue selling when out of stock. Go to Inventory > Enable Continue selling when out of stock
- Step 3: Click Save to apply changes
If you suspect that one of the third-party apps you’re using might override the default “Add to Cart” button, please contact the support team of that third-party app or contact OneTick Support Team for assistance.
Tips & Best Practices
- Always ensure the theme helper for OneTick is enabled to allow Shopify’s JavaScript codes to function correctly
- Keep a close eye on your inventory and consider enabling the “Continue selling when out of stock” option to avoid missing out on sales
If you encounter any issues not covered in this article, please reach out to OneTick Support Team for assistance.
