Overview
Summary: This article dives into OneTick’s exciting new Product Offer feature. After reading this, you will know how to display targeted promotions directly in your customers’ carts, enticing them to add more items and boosting your bottom line.
Requirements
- OneTick App Installed: Make sure you have already installed OneTick app in your Shopify store
- Check OneTick Product Offer to understand the definition of the elements inside
How To Create Product Offer With OneTick?
Quickly create a product offer with OneTick by following these steps:
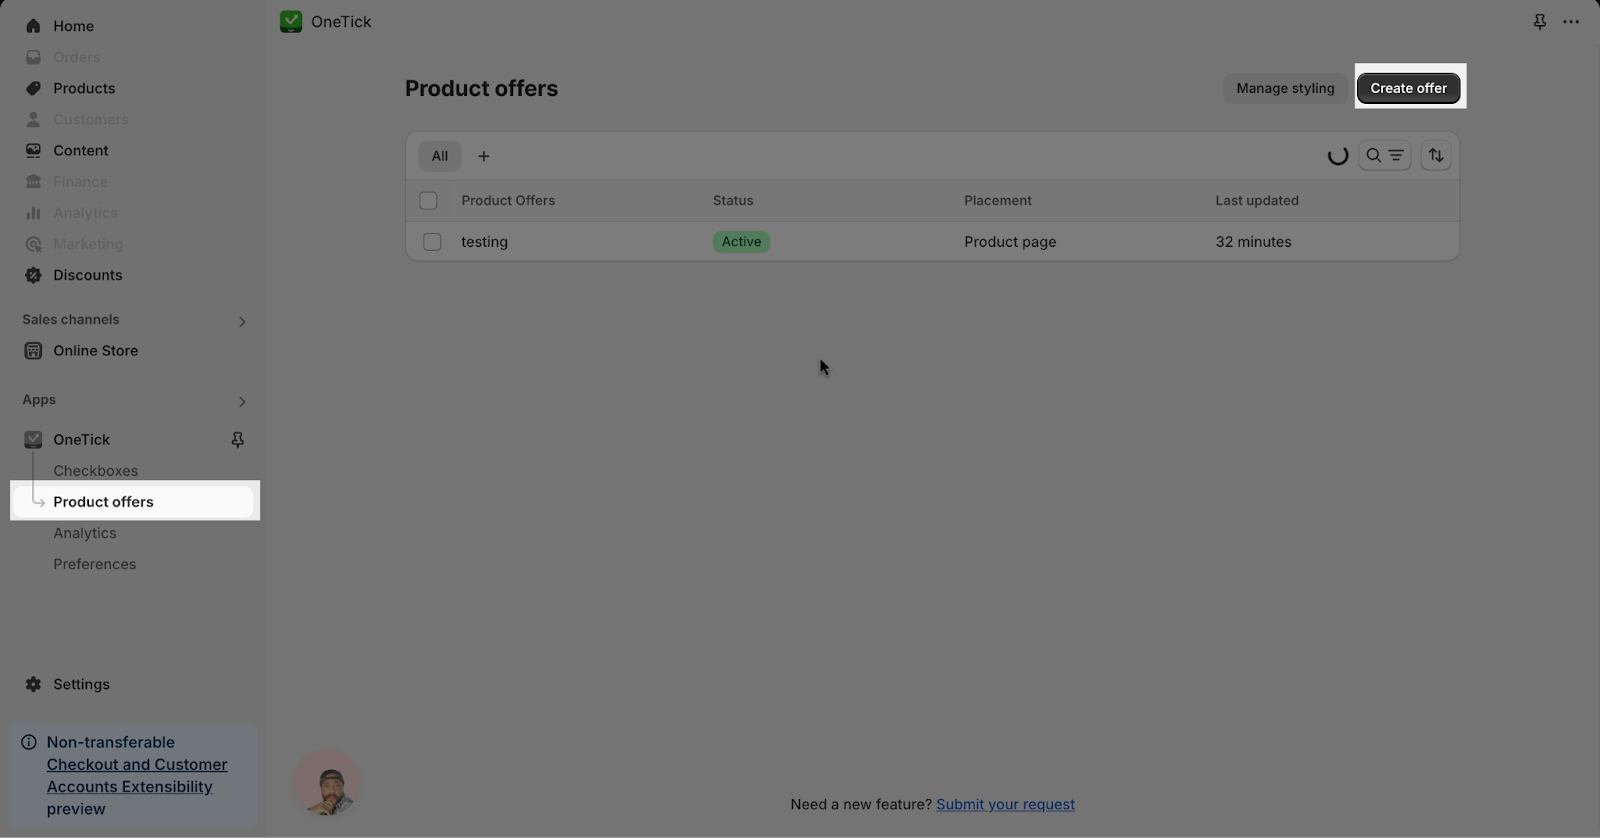
Step 1: Click “Create offer”
On the OneTick Dashboard, head to the Apps section > Choose the Product offers > click on the “Create offer” button
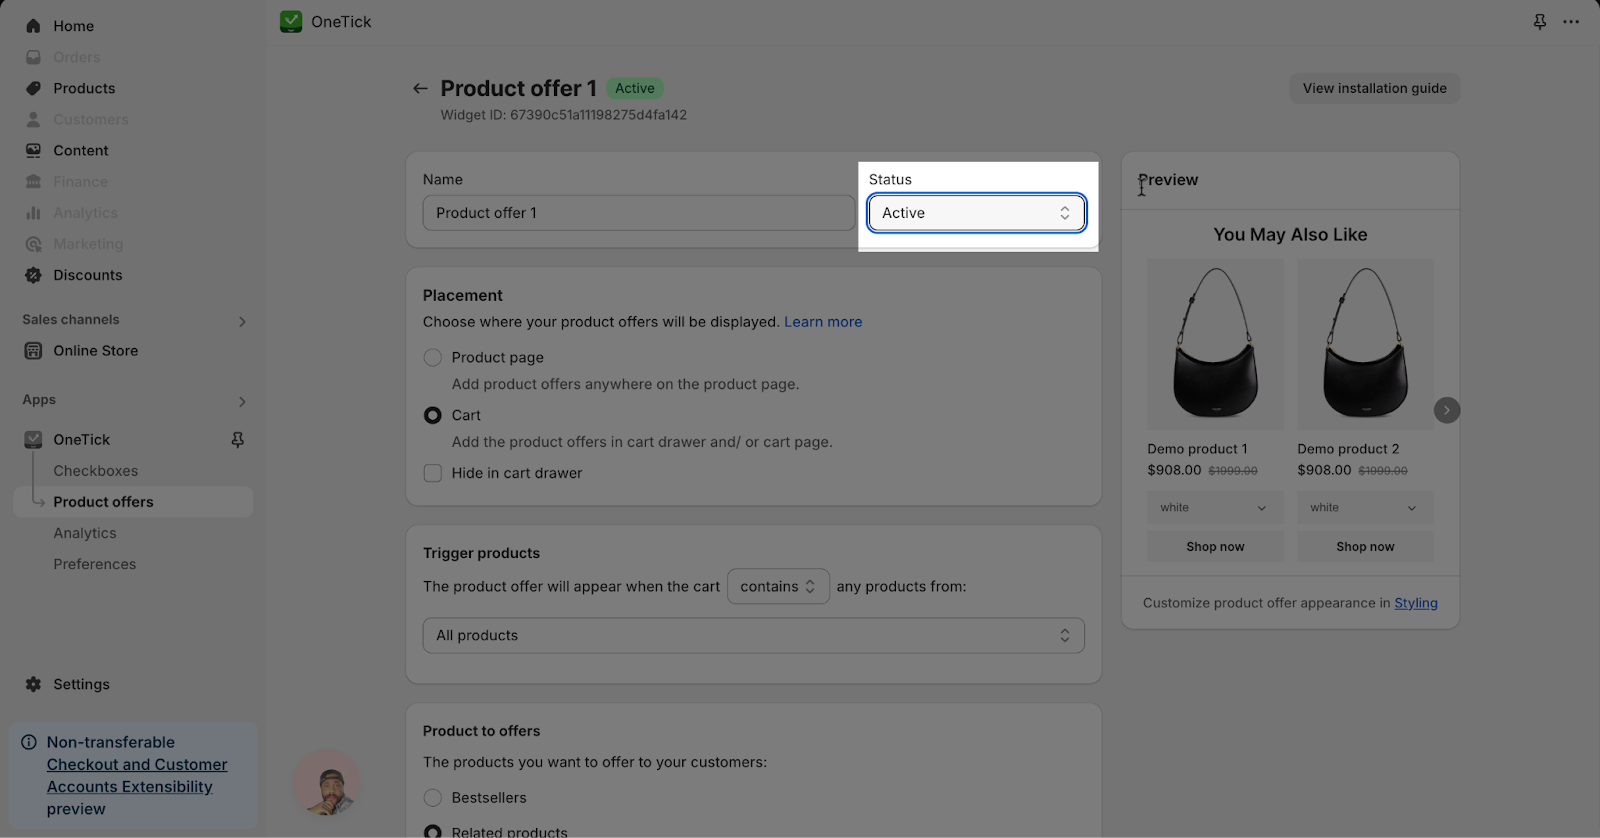
Step 2: Set Product Offer’s Name and Status
Name: You can add the product offer name
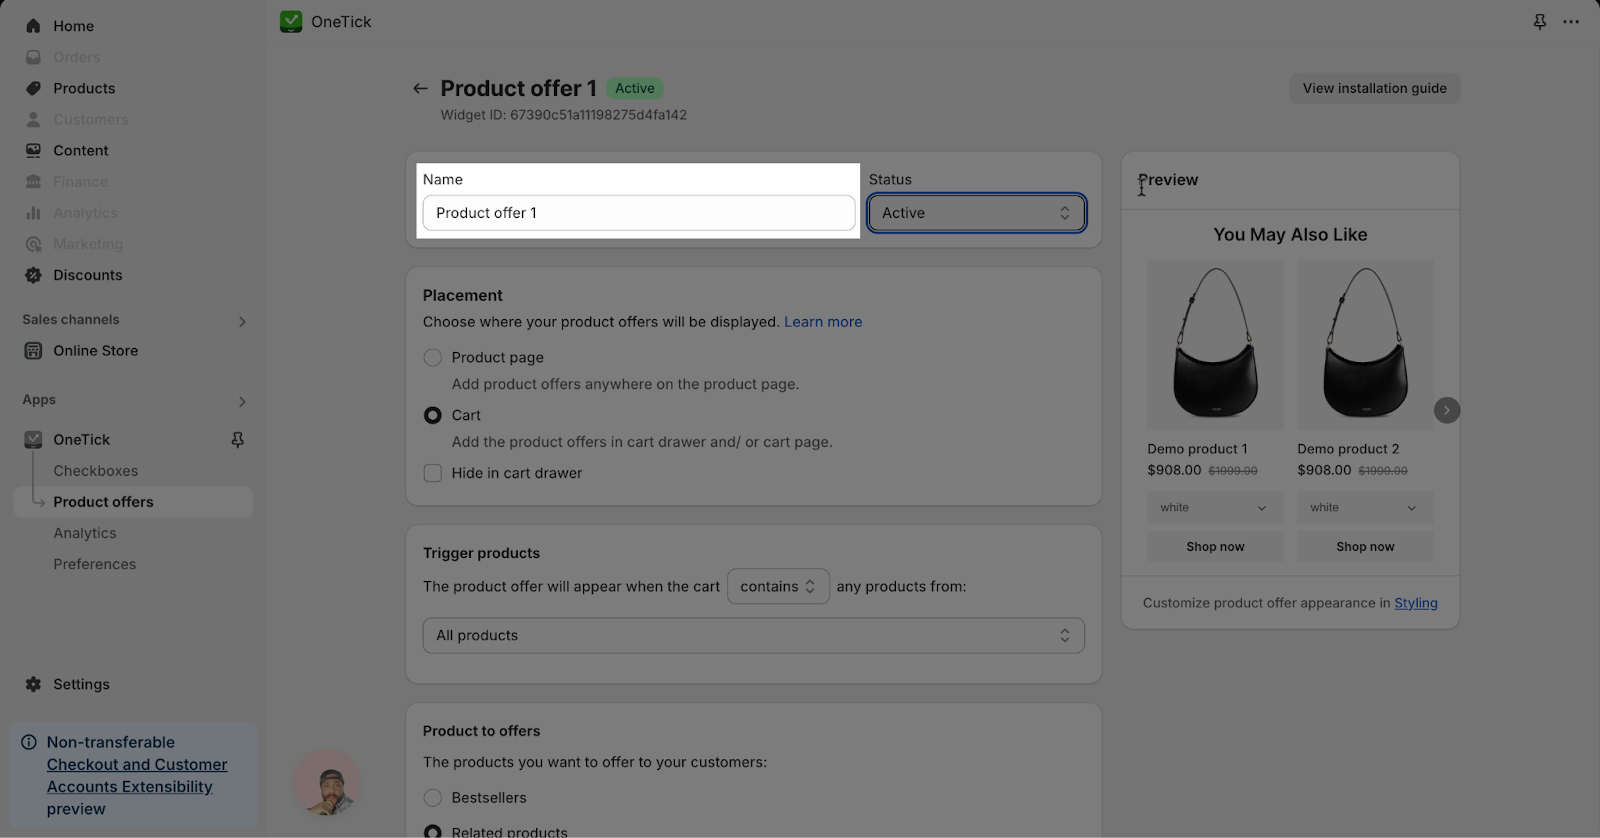
In the Status dropdown, select “Active” to ensure all product offers are visible in the live view.
Step 3: Set Up Placement and Trigger Products
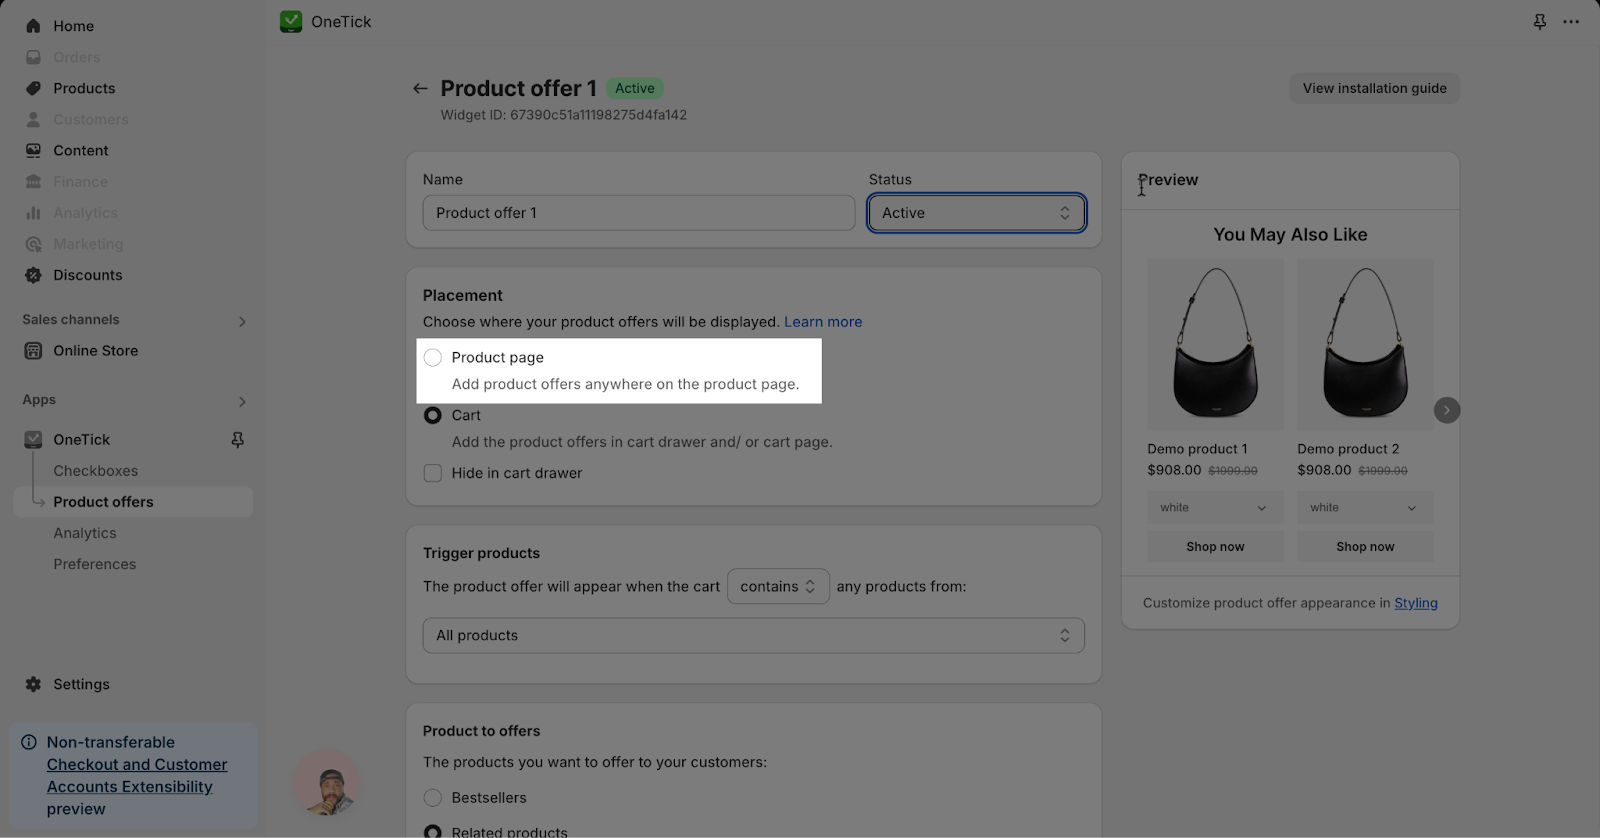
Choose Placement
You can choose where the product offers will be displayed: Product page or Cart.
- Product page: Add product offers anywhere on the product page.
- Cart: Add the product offers in the cart drawer and/or cart page. Select the hide in cart drawer option to the product offers in the cart drawer.

Set Up Trigger Products
- Configure Trigger products: This section explains how to set conditions for when your trigger products will be activated. You can choose to activate them when the cart:
- Contains or doesn’t contain any products at all
- Trigger Products based on specific criteria:
-
- From collections: Products belonging to specific collections you’ve created.
- With tags: Products that have certain tags assigned to them.
- From vendors: Products from particular vendors.
- Of product types: Products belonging to specific categories (e.g., clothing, electronics).
- From specific products: Products you can manually add.
Example: In this example, we’ll configure the trigger to activate when the cart contains any products from collections you’ve created.

- Select products based on the conditions set in the previous step. For example, if you chose ‘from collection’ as a condition in step 3, now choose the specific collections you want to set as trigger products.
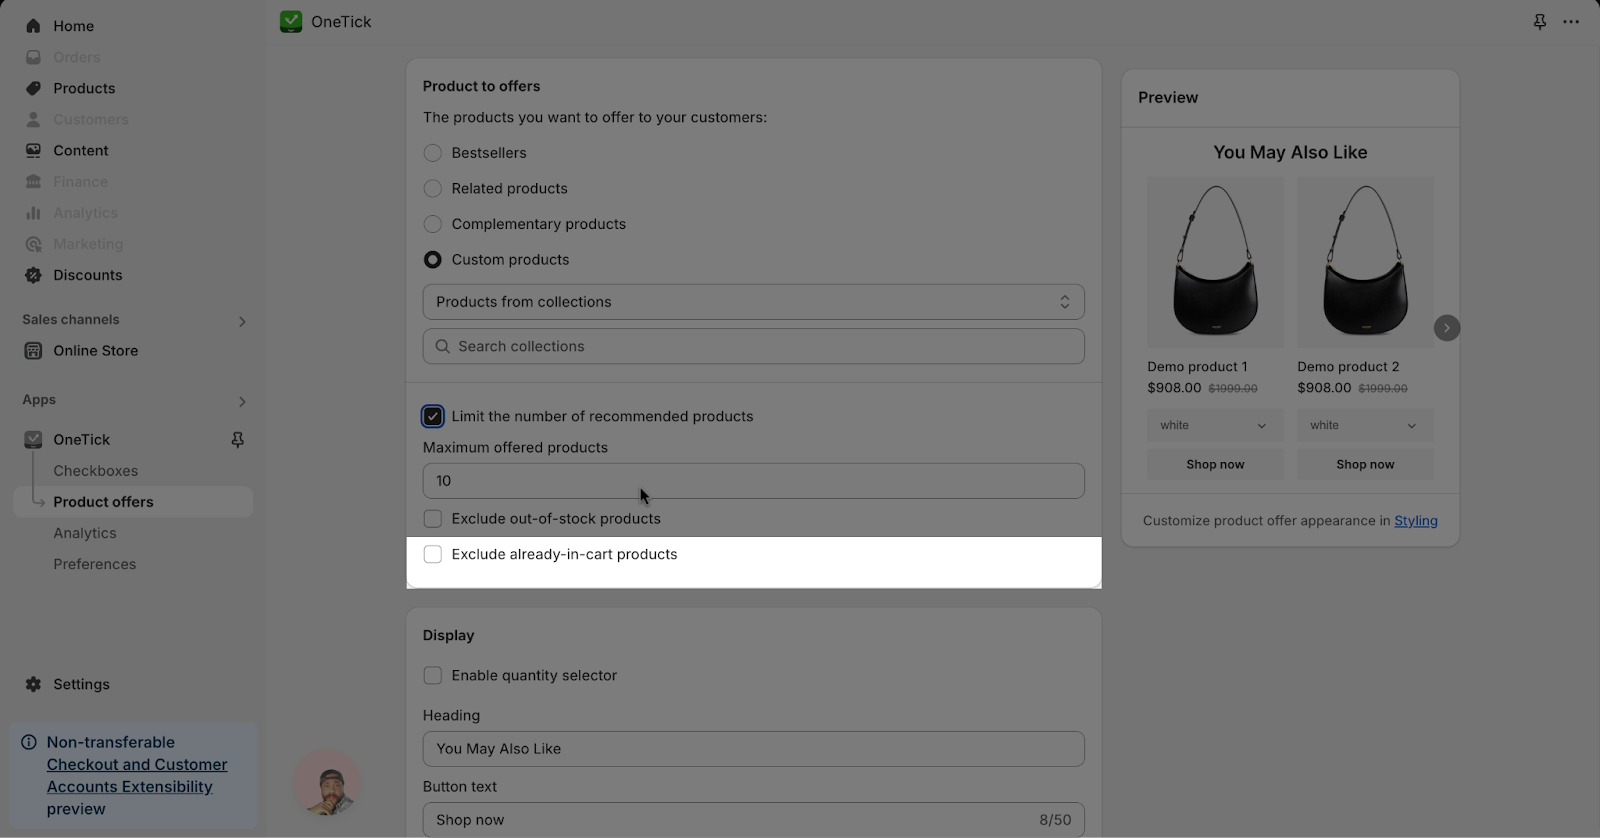
Step 4: Choose Products to Offer
This section lets you pick which products will be presented to your customers. You can select from these options:
- Bestsellers: This automatically includes your most popular selling products.
- Related products: Offer products similar to the one being interacted with. Shopify auto-generates recommendations, which can be configured in the Shopify Search & Discovery app.
- Complementary products: Offer products that complement the one being interacted with. Please manually set up the product list in the Shopify Search & Discovery app.
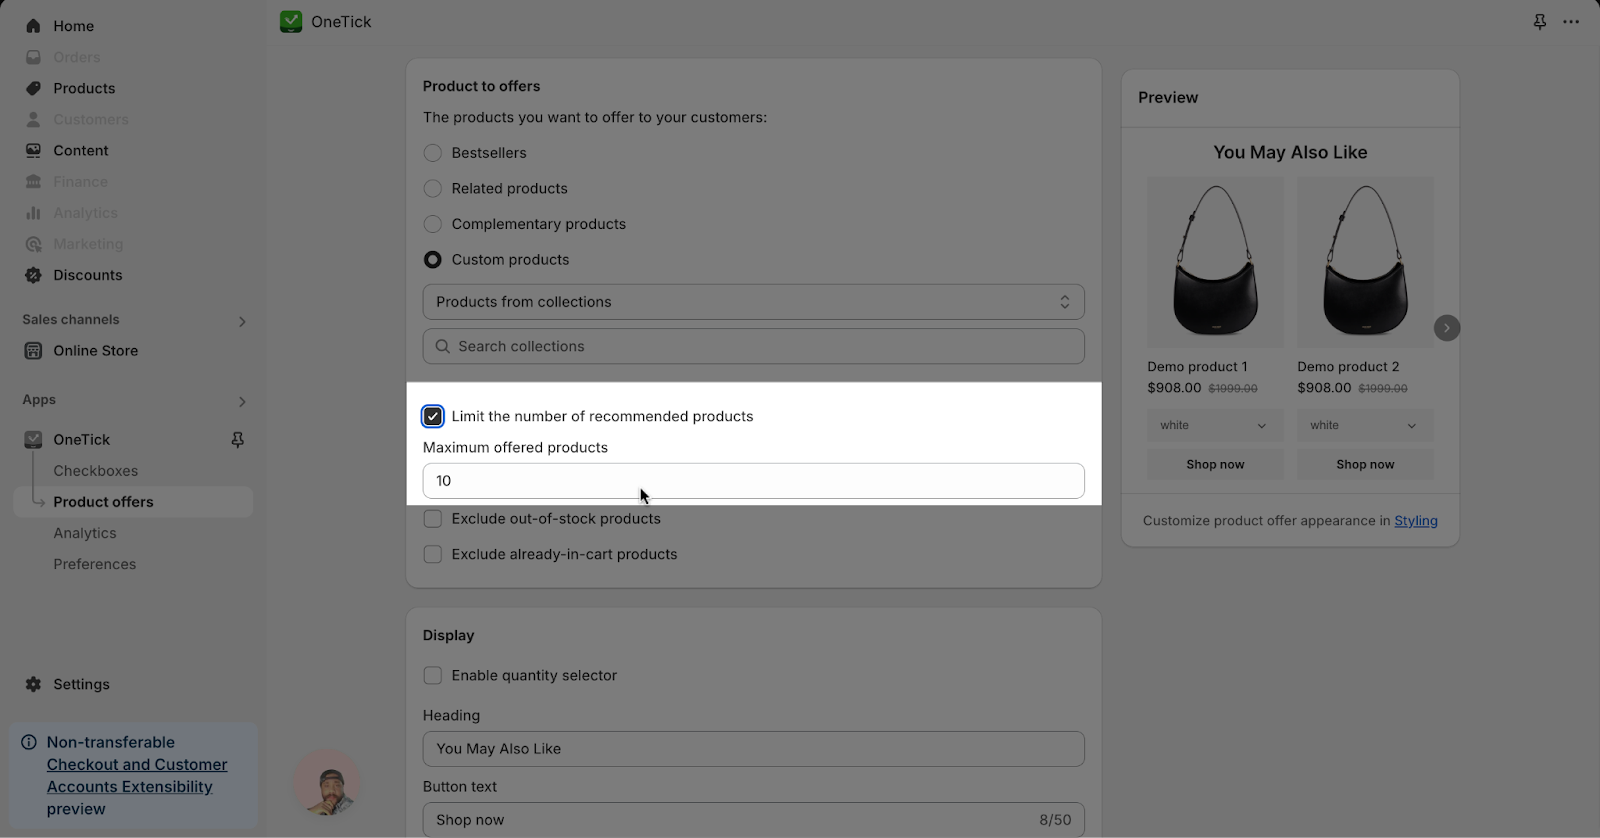
- Custom products: This allows you to hand-pick individual products from collections/Products with tags/Products from vendors/Products of product types
Example: For this example, we’ll choose the “Specific products”.
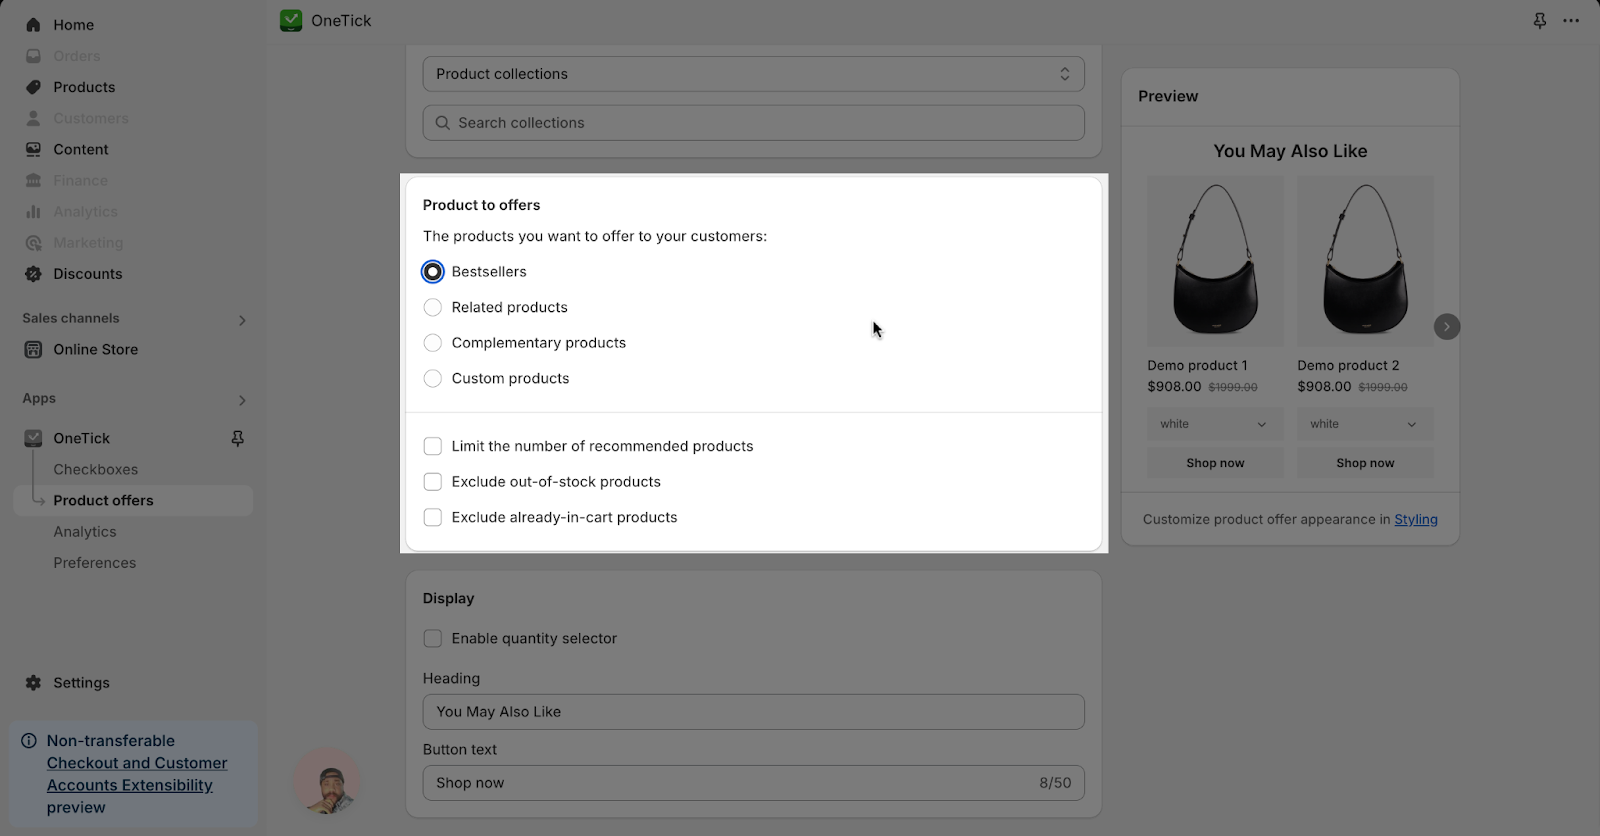
- Limit the number of recommended products: You can select the limit and set the maximum number of recommended products.
- Exclude out-of-stock products: Select the option to exclude out-of-stock products.
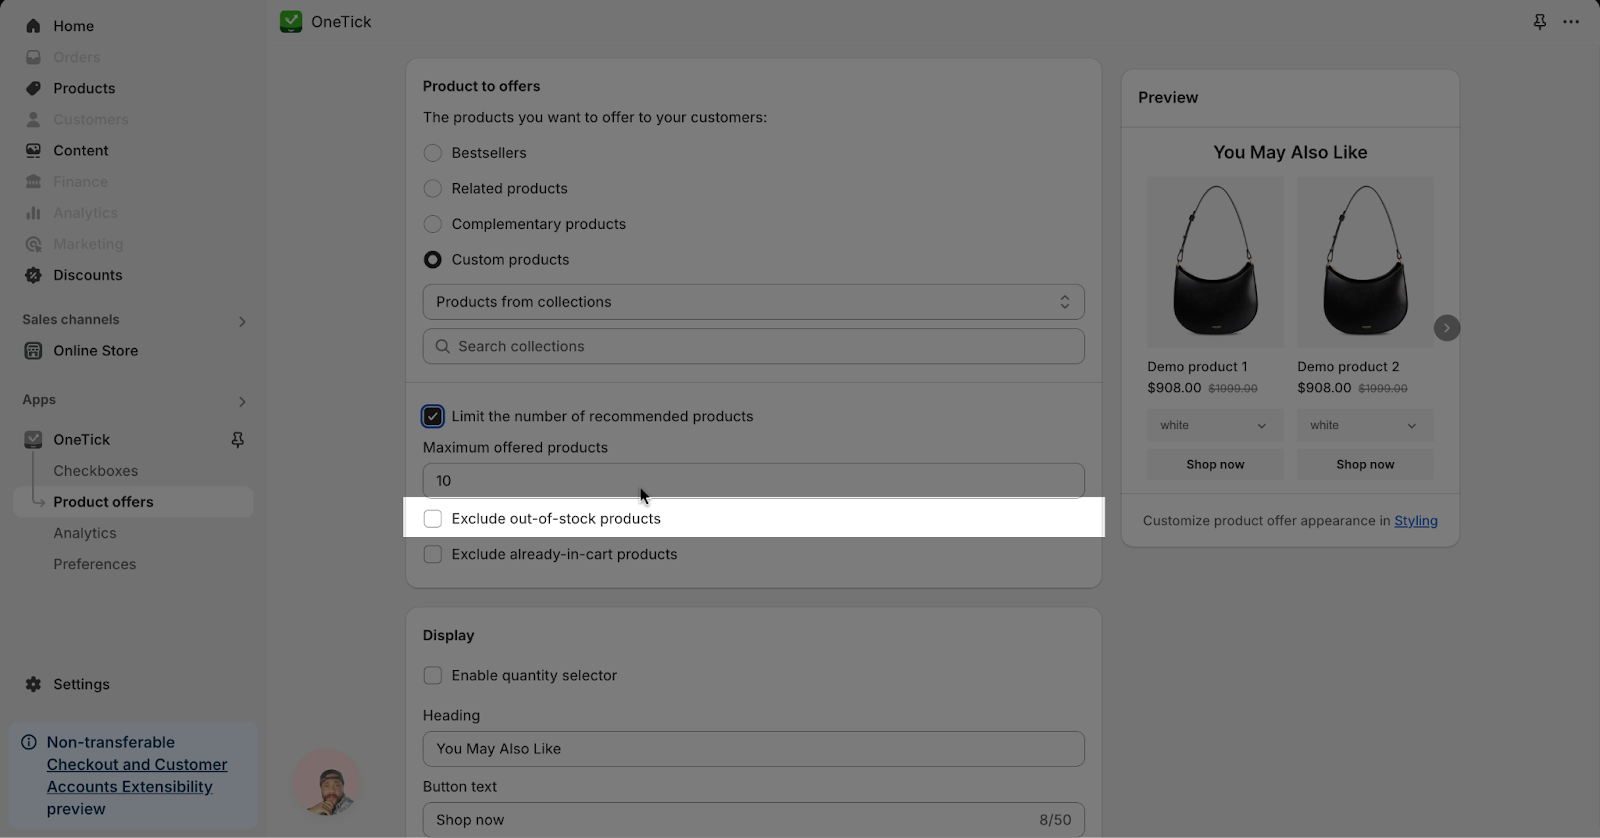
- Exclude already-in-cart products: Select the option to exclude the products already in the cart.
Example: Since we chose “Specific products” in step 6, you’ll now see a list of all your products. Simply pick the ones you want to include.
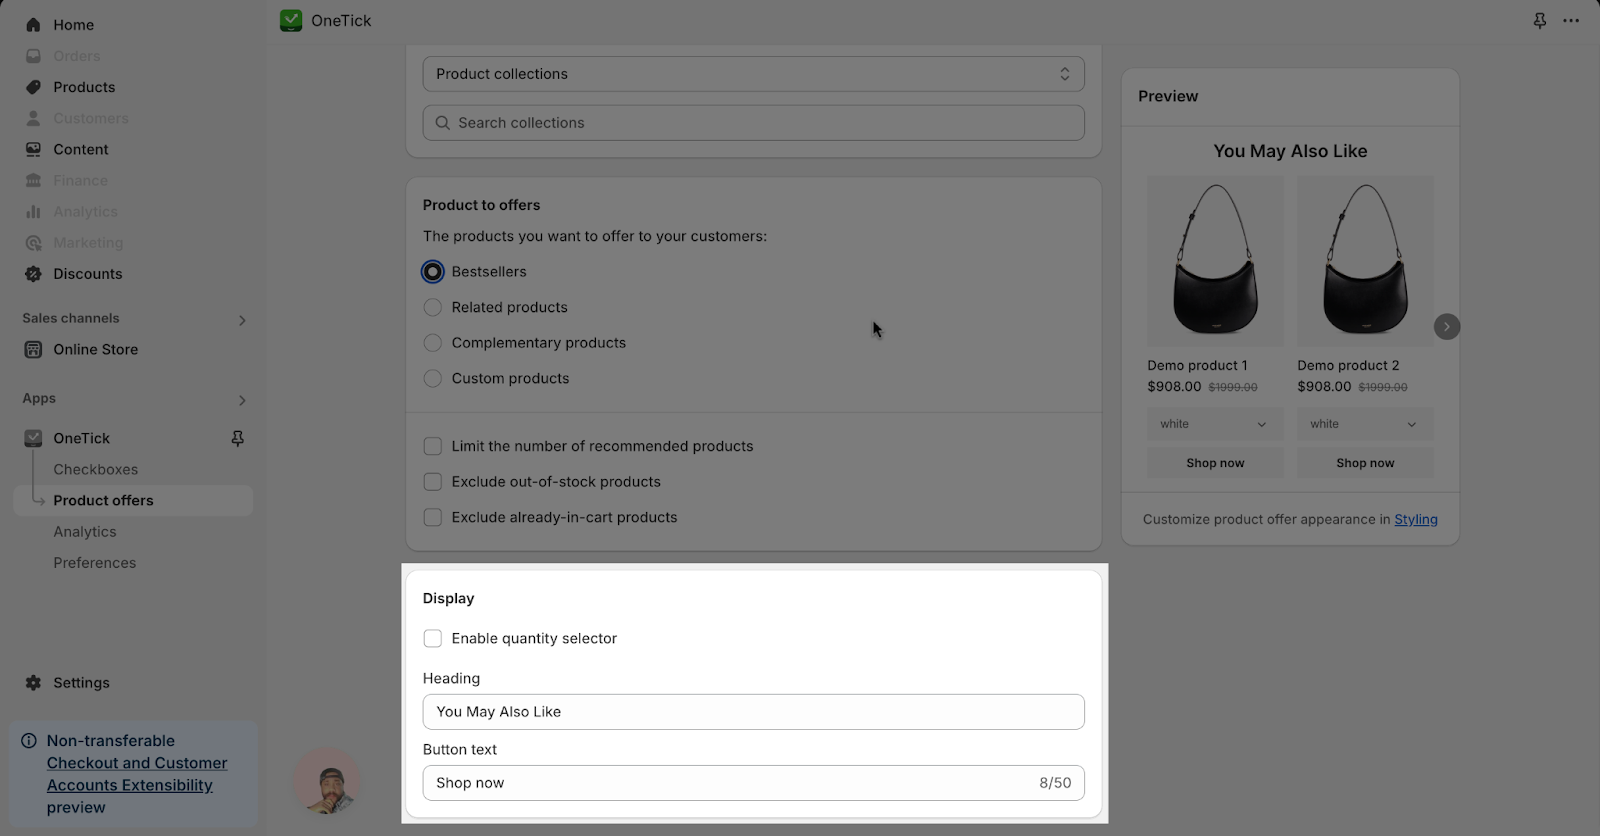
Step 5: Select Display Settings
In Display settings, you can enable the quantity selector and enter the offer’s Heading and Button text.
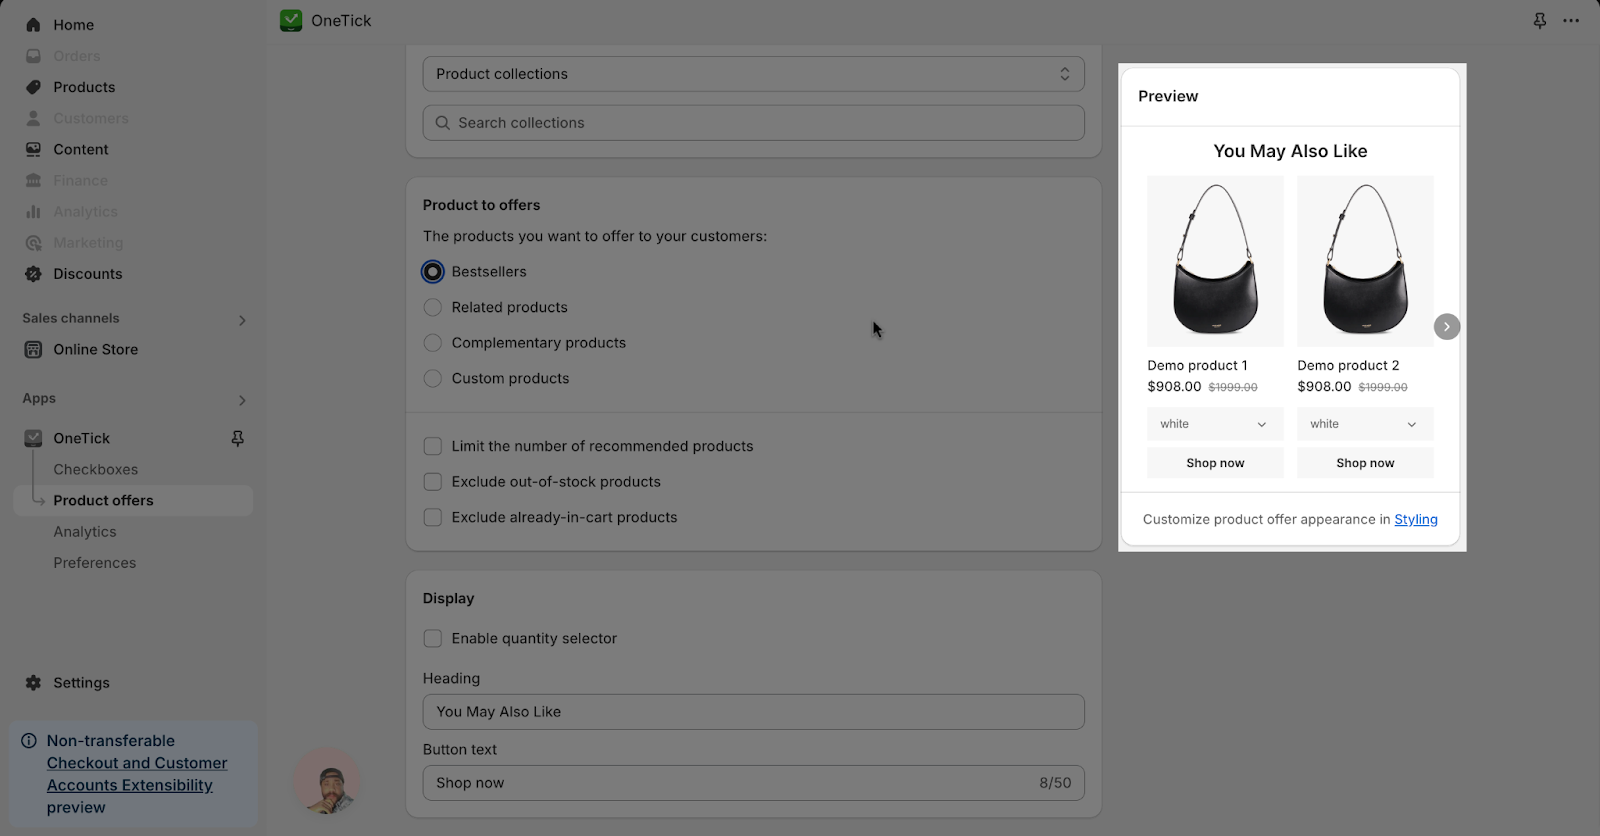
Step 6: Preview
You can preview your customized product offer appearance and make any additional changes before saving it
For more information about configuring OneTick product offers, please refer to the Product offer documentation.
Step 7: Add On Cart or Product Page
Go to Theme Customize, then navigate to the Cart page.
You can also go to the product page to add the “Product offer” block.
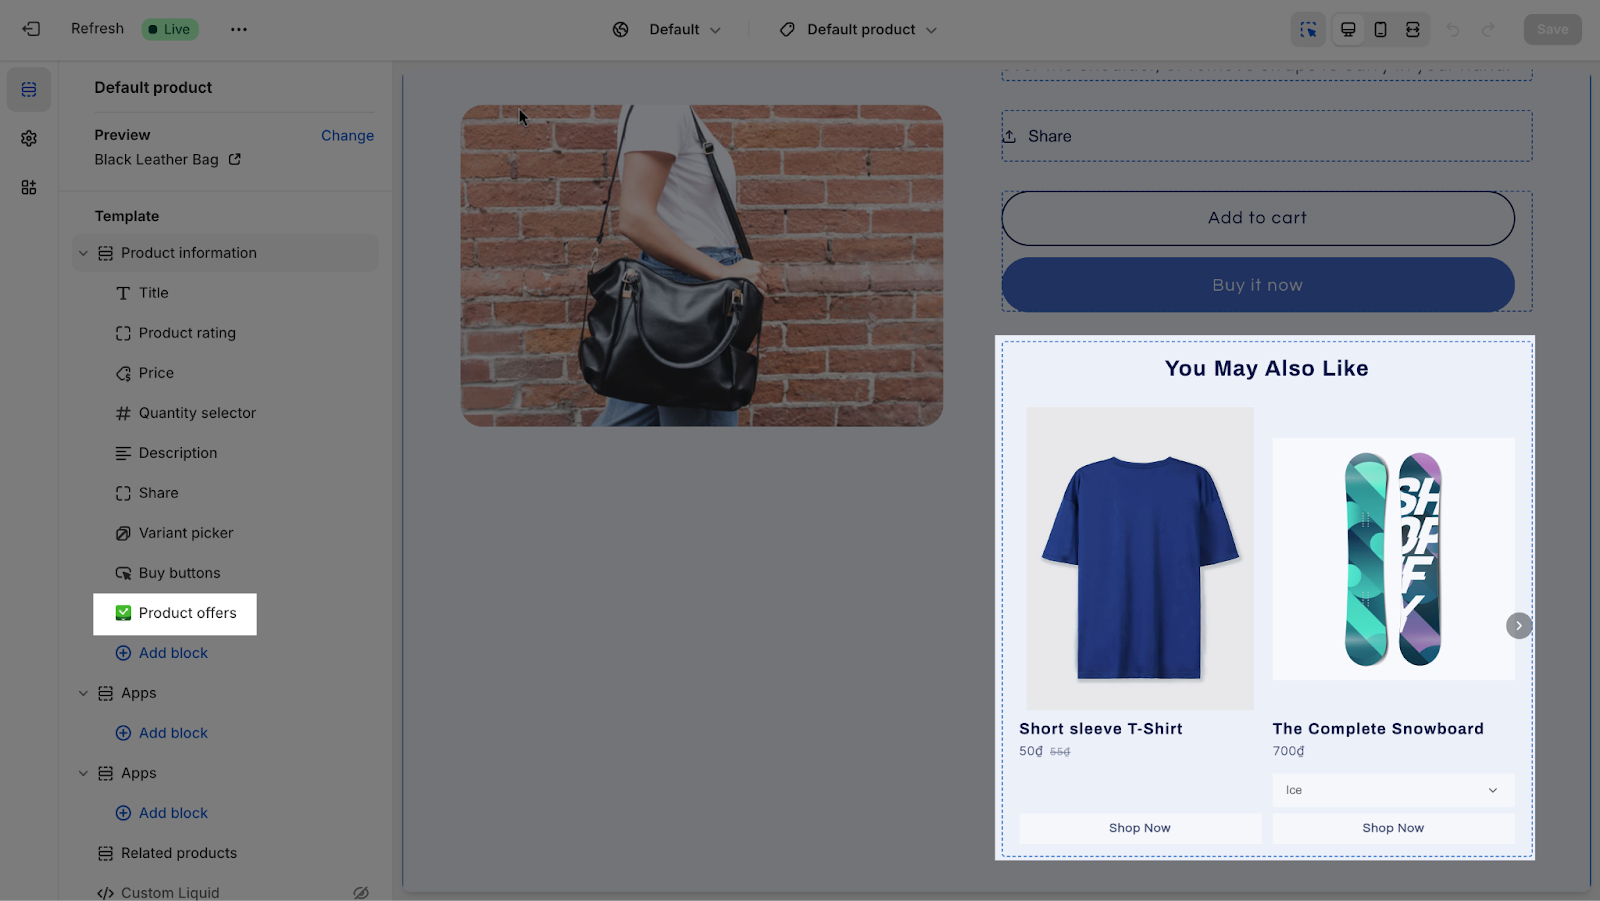
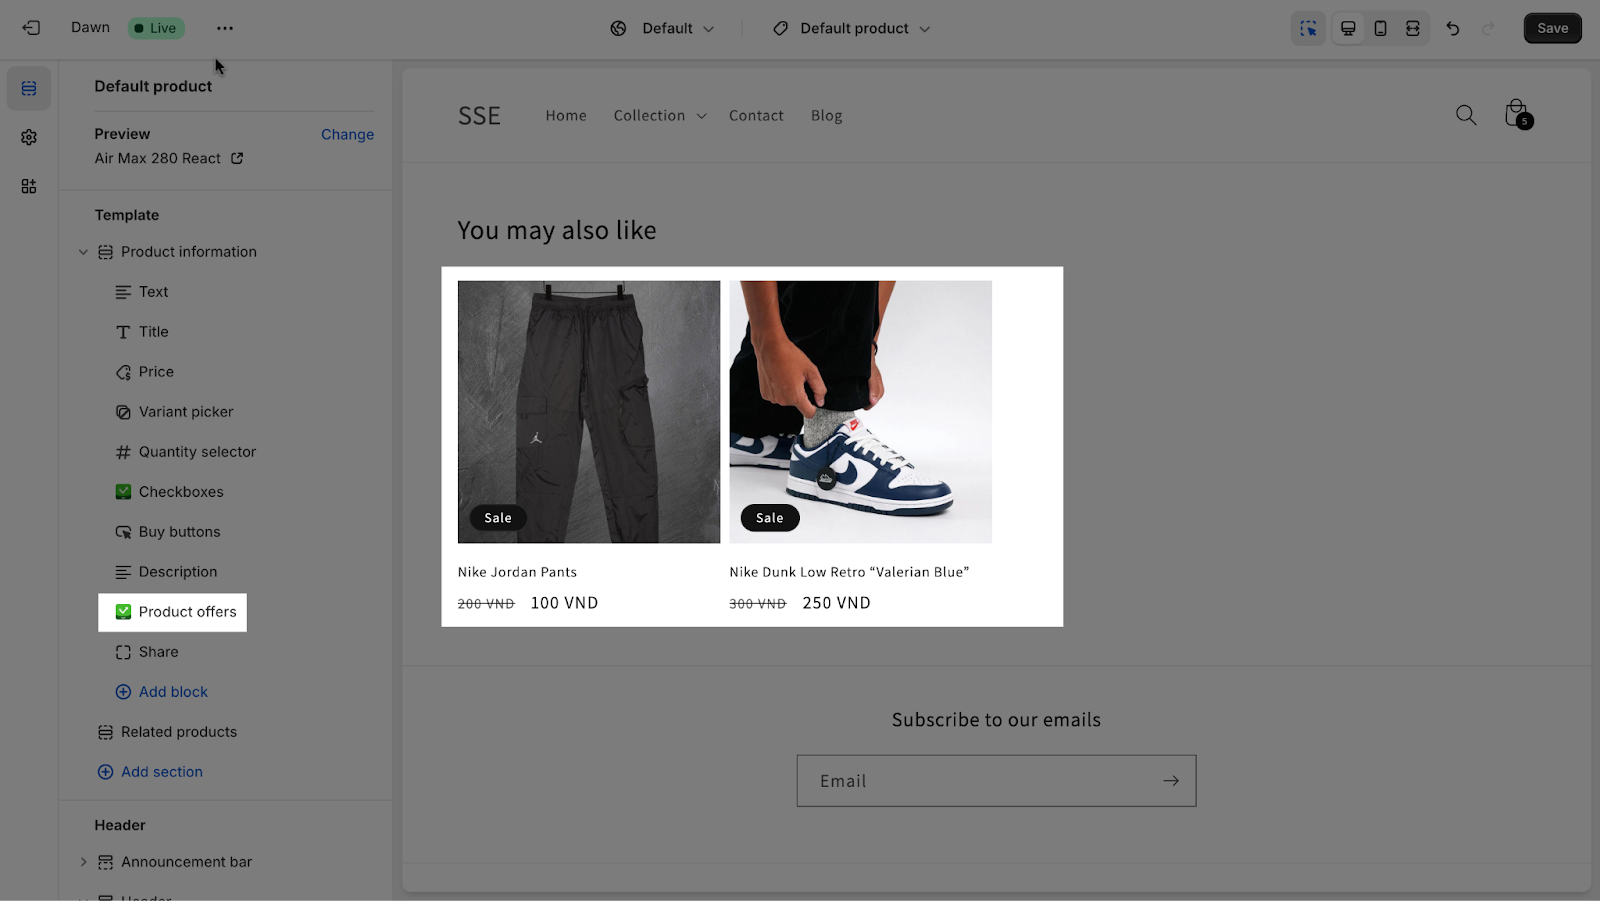
Step 8: Add “Product Offer” App Block
Click the “Add block” button, then select the “Product offer” block.
When the customer selects a product that matches the pre-configured product offer, its matching recommended product(s) will appear:
Frequently Asked Questions
1. What happens when I use OneTick product offer?
The OneTick app displays product offers in the cart drawer or product pages when the Product offer is set to Active. By default, the app detects the cart drawer class for themes from the Shopify Theme Store and adds the product offer directly below the items in the cart. Also you can add the product offer block on your product page using placement you can set the product offer to display either in the cart or product pages.
If OneTick cannot detect your theme’s cart drawer class automatically, you’ll need to manually enter it in the ‘Custom selector’ field in the settings. Once entered, OneTick will use this class to add product offers below the items in the cart.
For detailed instructions on how to find your cart drawer class, please refer to this article.