Overview
The OneTick Product Offer function is a handy tool for Shopify store owners. It lets you create targeted product recommendations that appear directly below a customer’s cart items.
Within the app, you can create a variety of offers using two methods: Shopify AI Recommendations or Manual Conditions.
To get the most out of OneTick Product Offer, it’s important to follow some best practices. In this article, we will cover:
Requirements
Before displaying the OneTick Product Offer on your Shopify store, it’s essential to meet certain requirements and complete preliminary steps. This preparation will streamline the integration process and set the stage for effective use of the feature in active form:
- The product offer must be in an “Active” state to be visible in the live view.
- When selecting the Manual option for product recommendations, ensure at least one condition is “enabled”.
How To Use OneTick Product Offers On Your Theme
Integrating OneTick Product Offers into your Shopify theme can significantly enhance your store’s promotional capabilities. Here’s a concise step-by-step guide to help you get started:
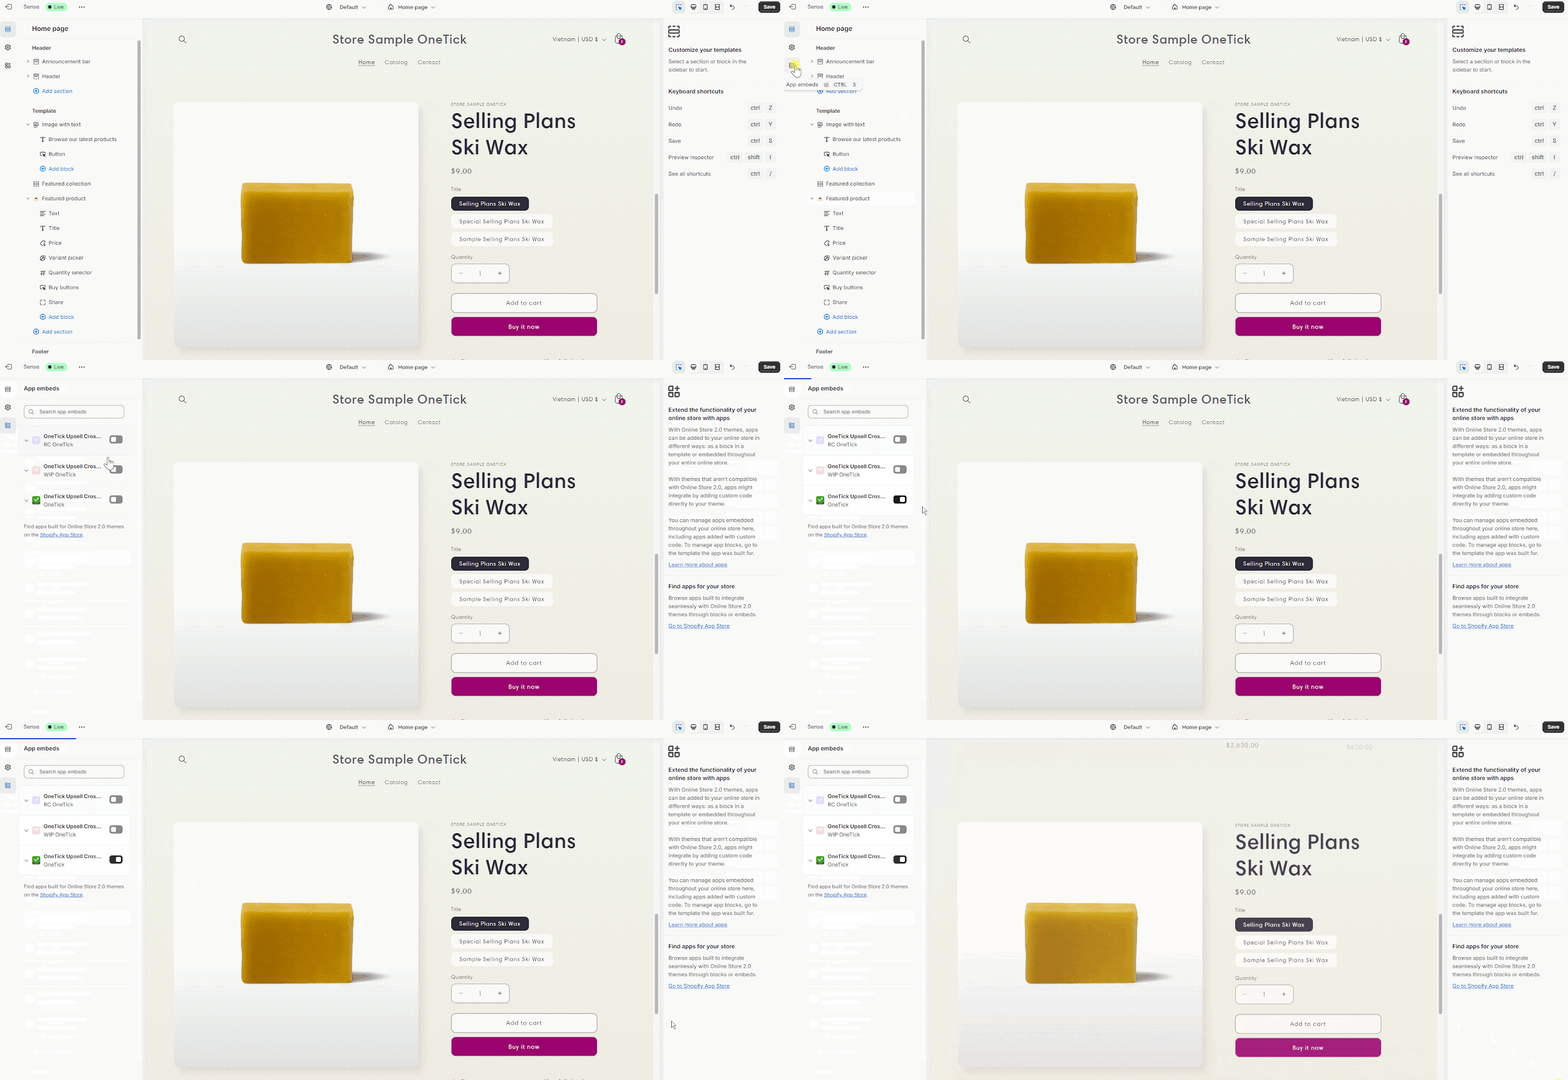
Step 1: Enable “OneTick Upsell Cross Sell” In Theme Editor
Enable “OneTick Upsell Cross Sell” in your theme editor under App embeds for the best functionality.
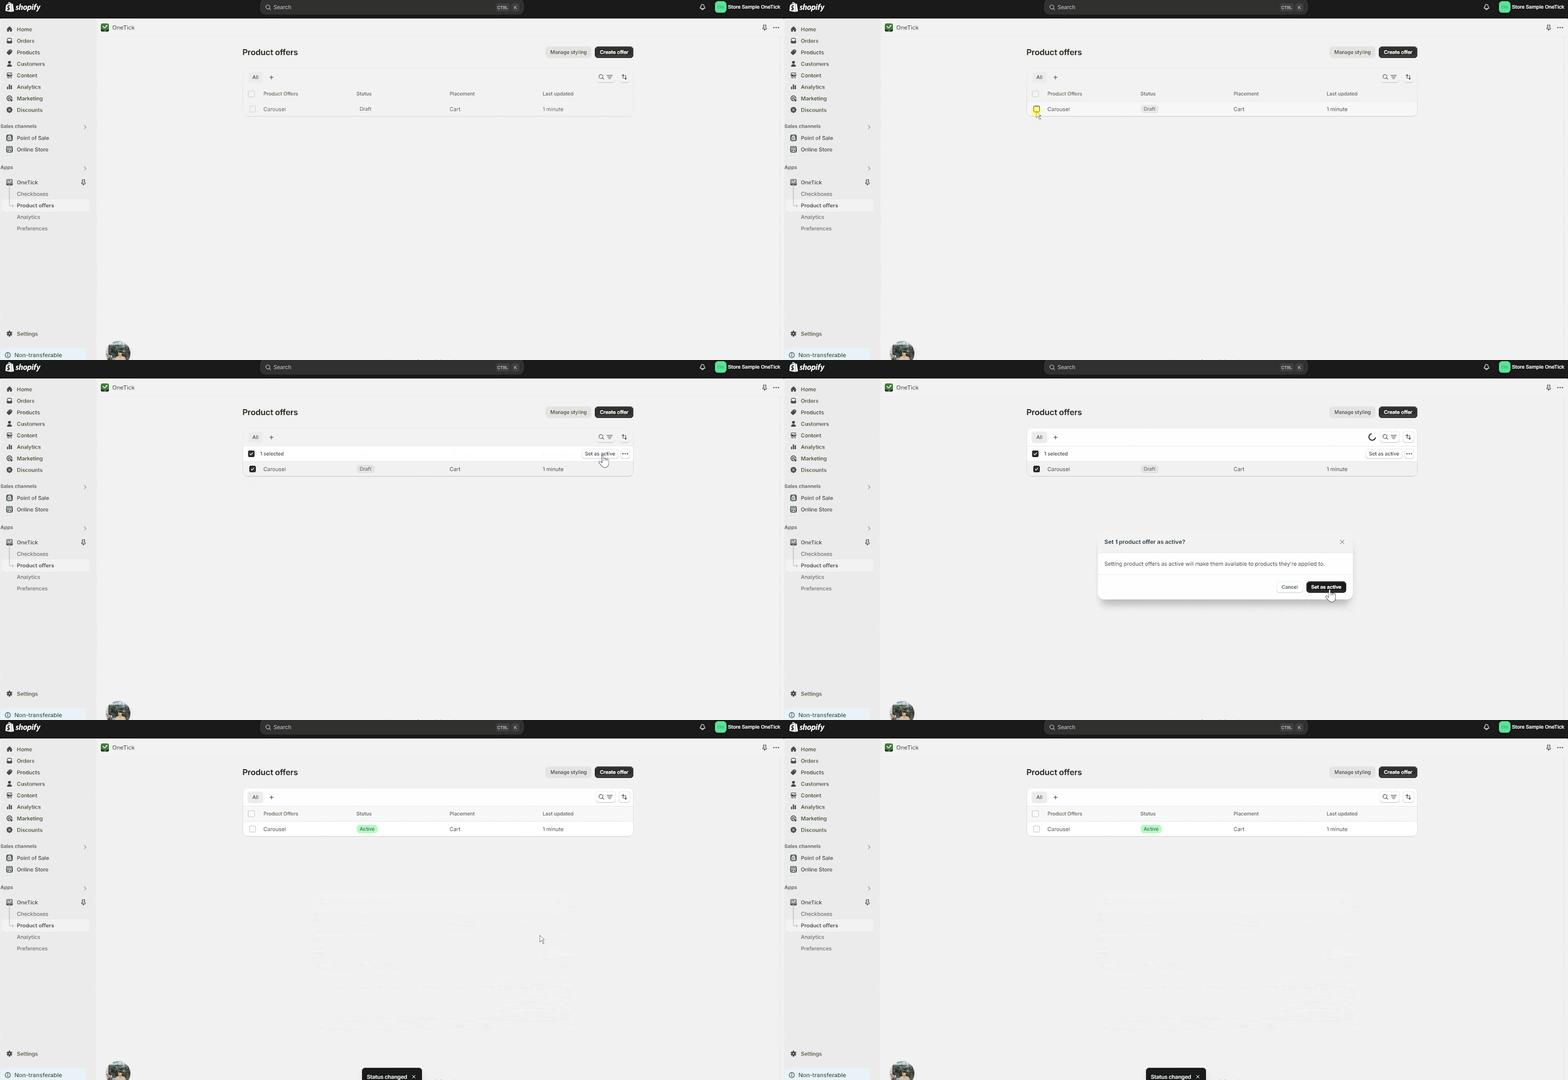
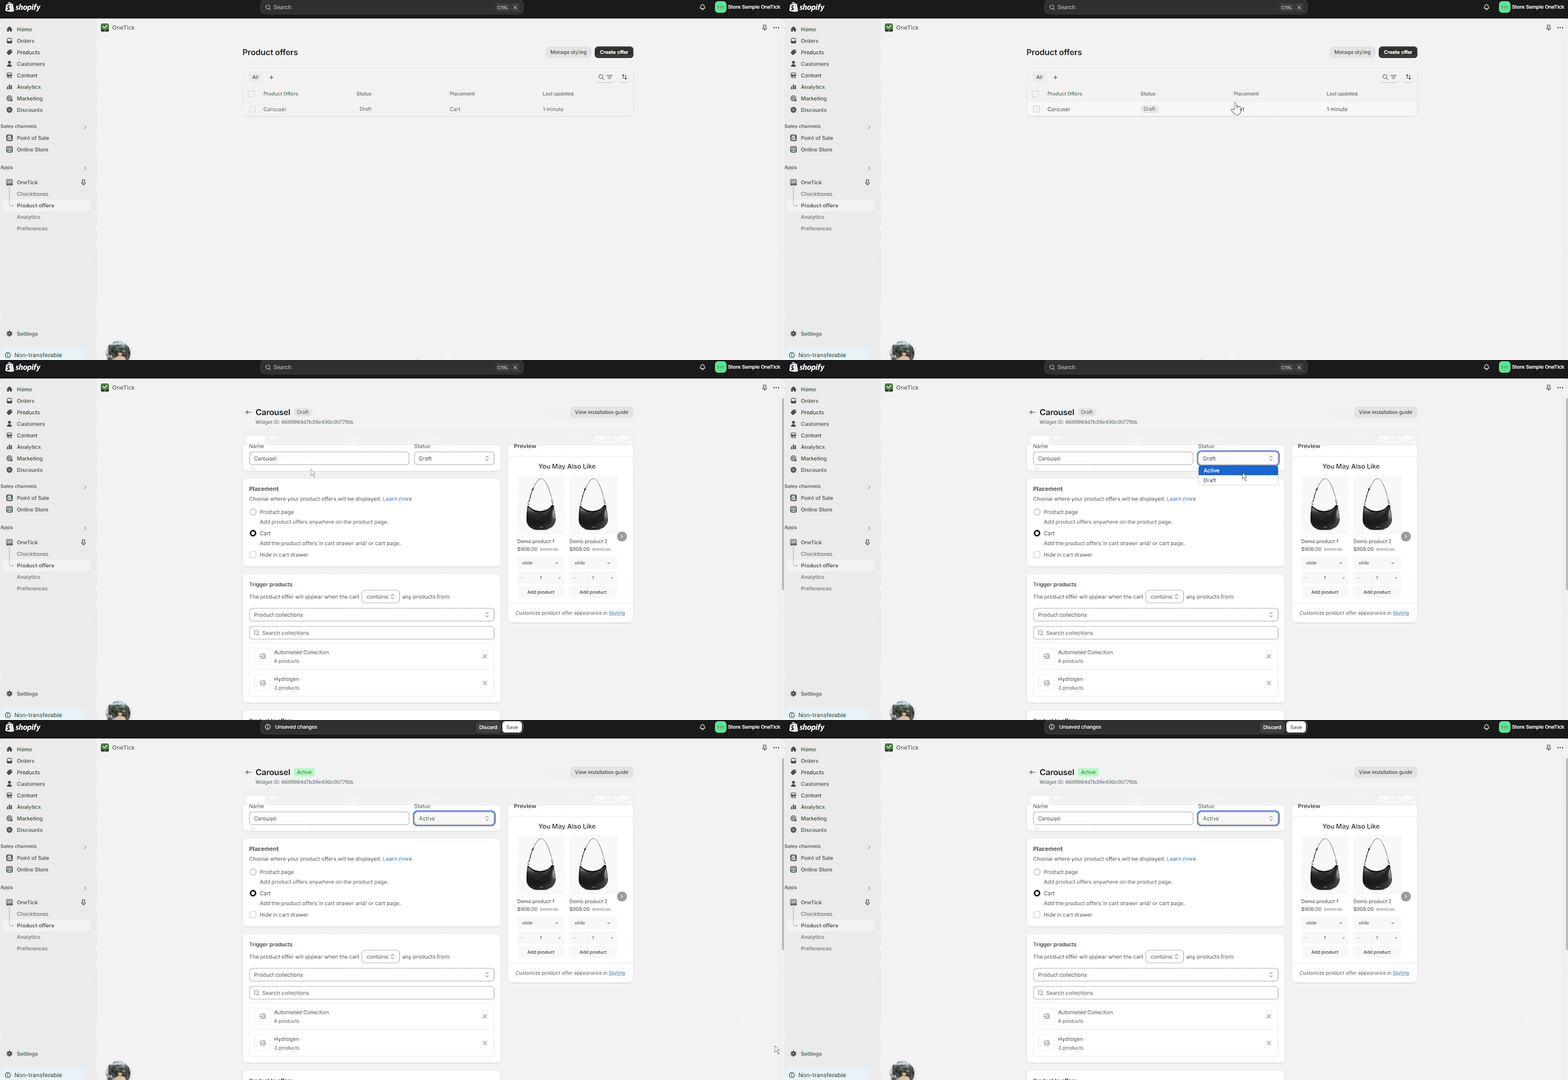
Step 2: Set “Active” Status Of The Product Offer
Ensure that the product offer is set to “Active” so it can be displayed and utilized correctly on your storefront. There are 2 ways for you to set the Product Status to “Active”:
1: Setting “Active” status on the Product Offer listing
In order to do this, after navigating yourself to the Product offers page, select the offer you want, click on the three dots button and click “Set to Active”
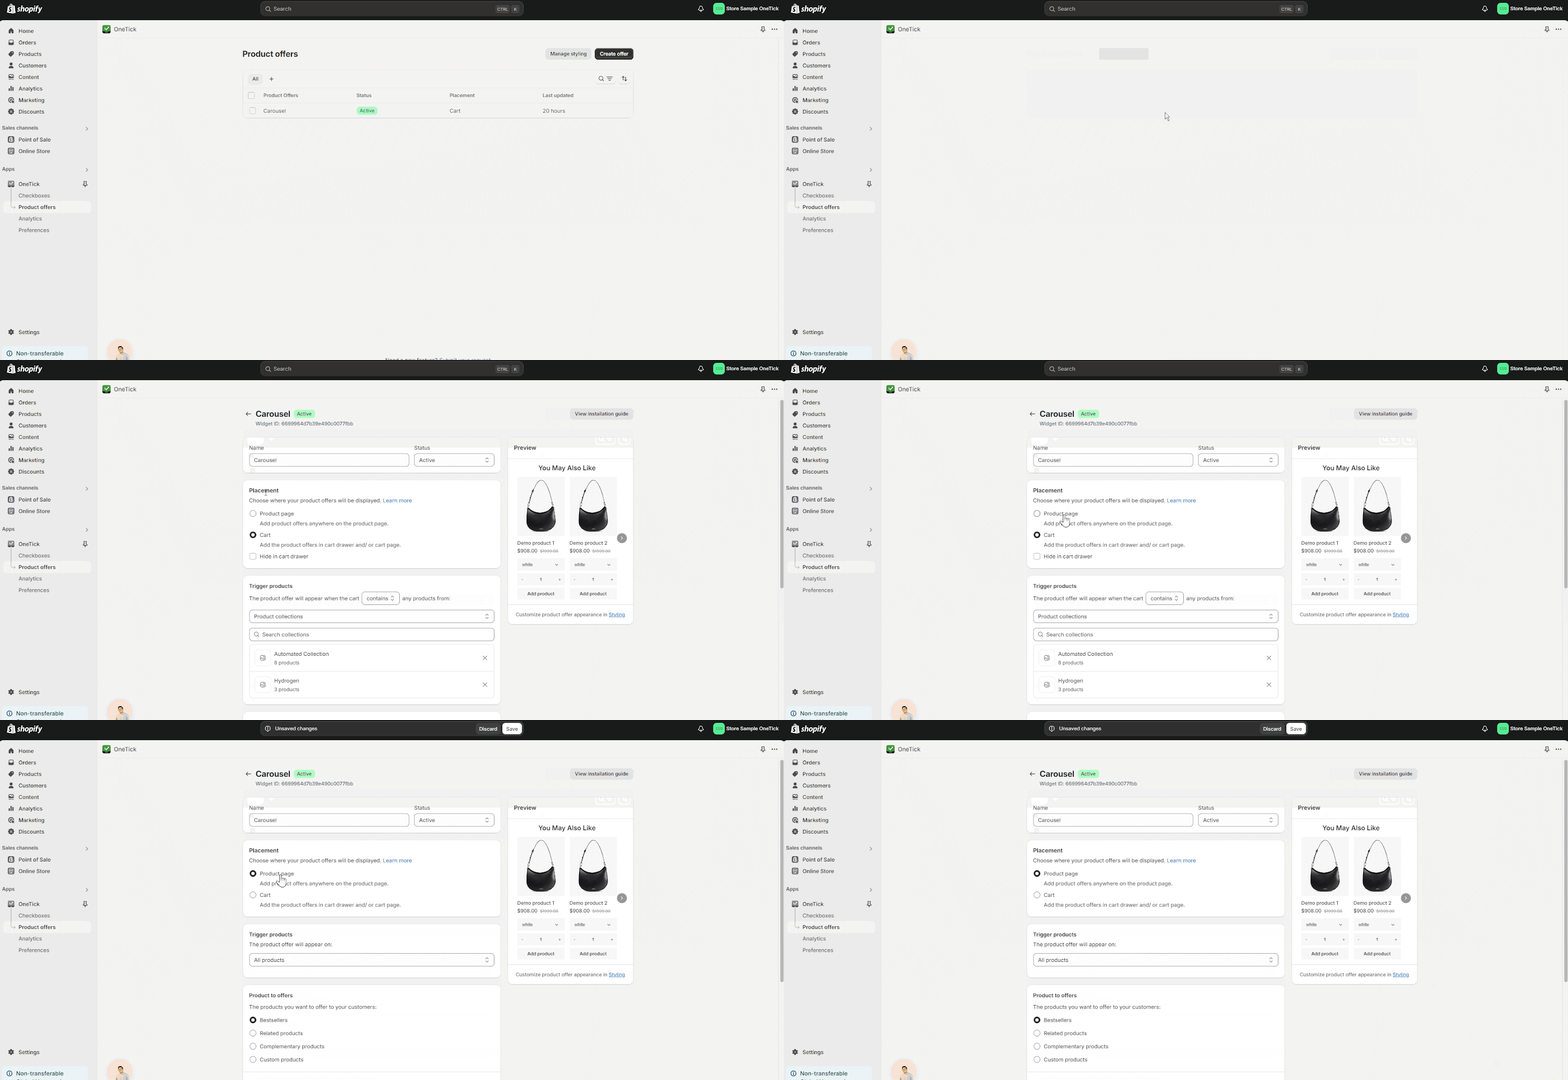
2: Setting “Active” status in the offer customization page. If you click on an offer on the offers listing, you will be taken to the offer customization page. From there, you can set the status of your offer as “Draft” or “Active”
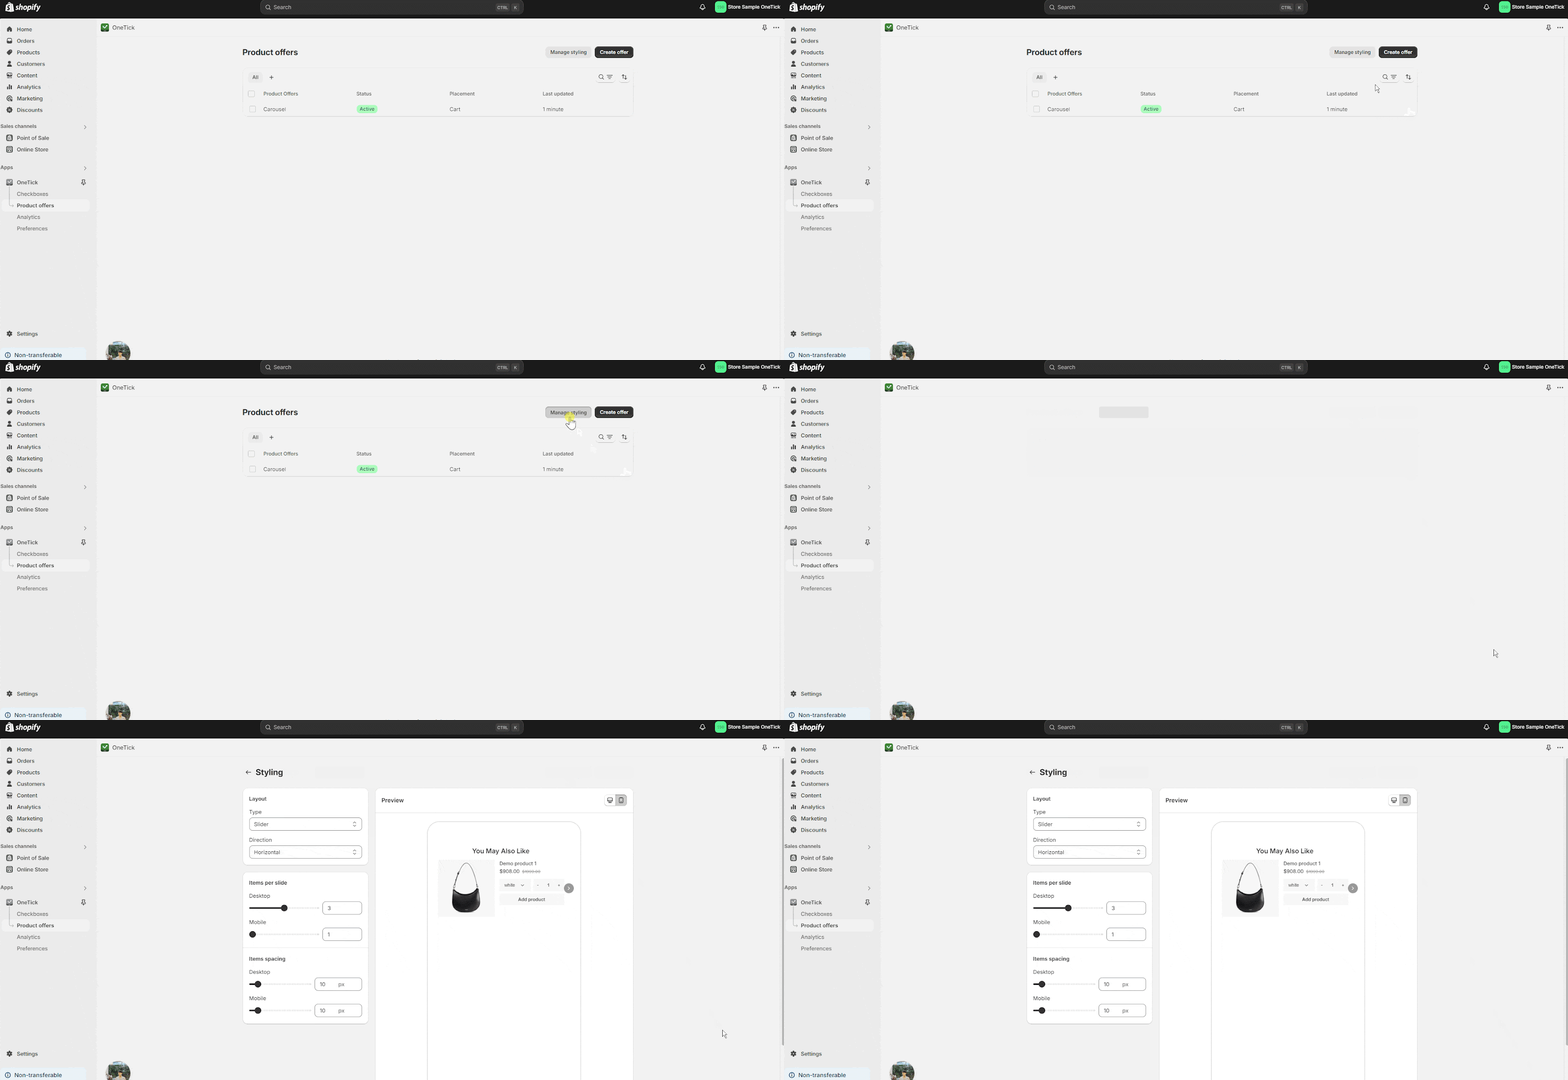
Step 3: Manage Product Offer’s Styling
After you set the product offer, you can edit the product offers for yourself by going to Manage Styling on the Product offers tab to style the product offers.
You can make changes to its layout. Besides, you can preview the product offer on the Desktop and Mobile.
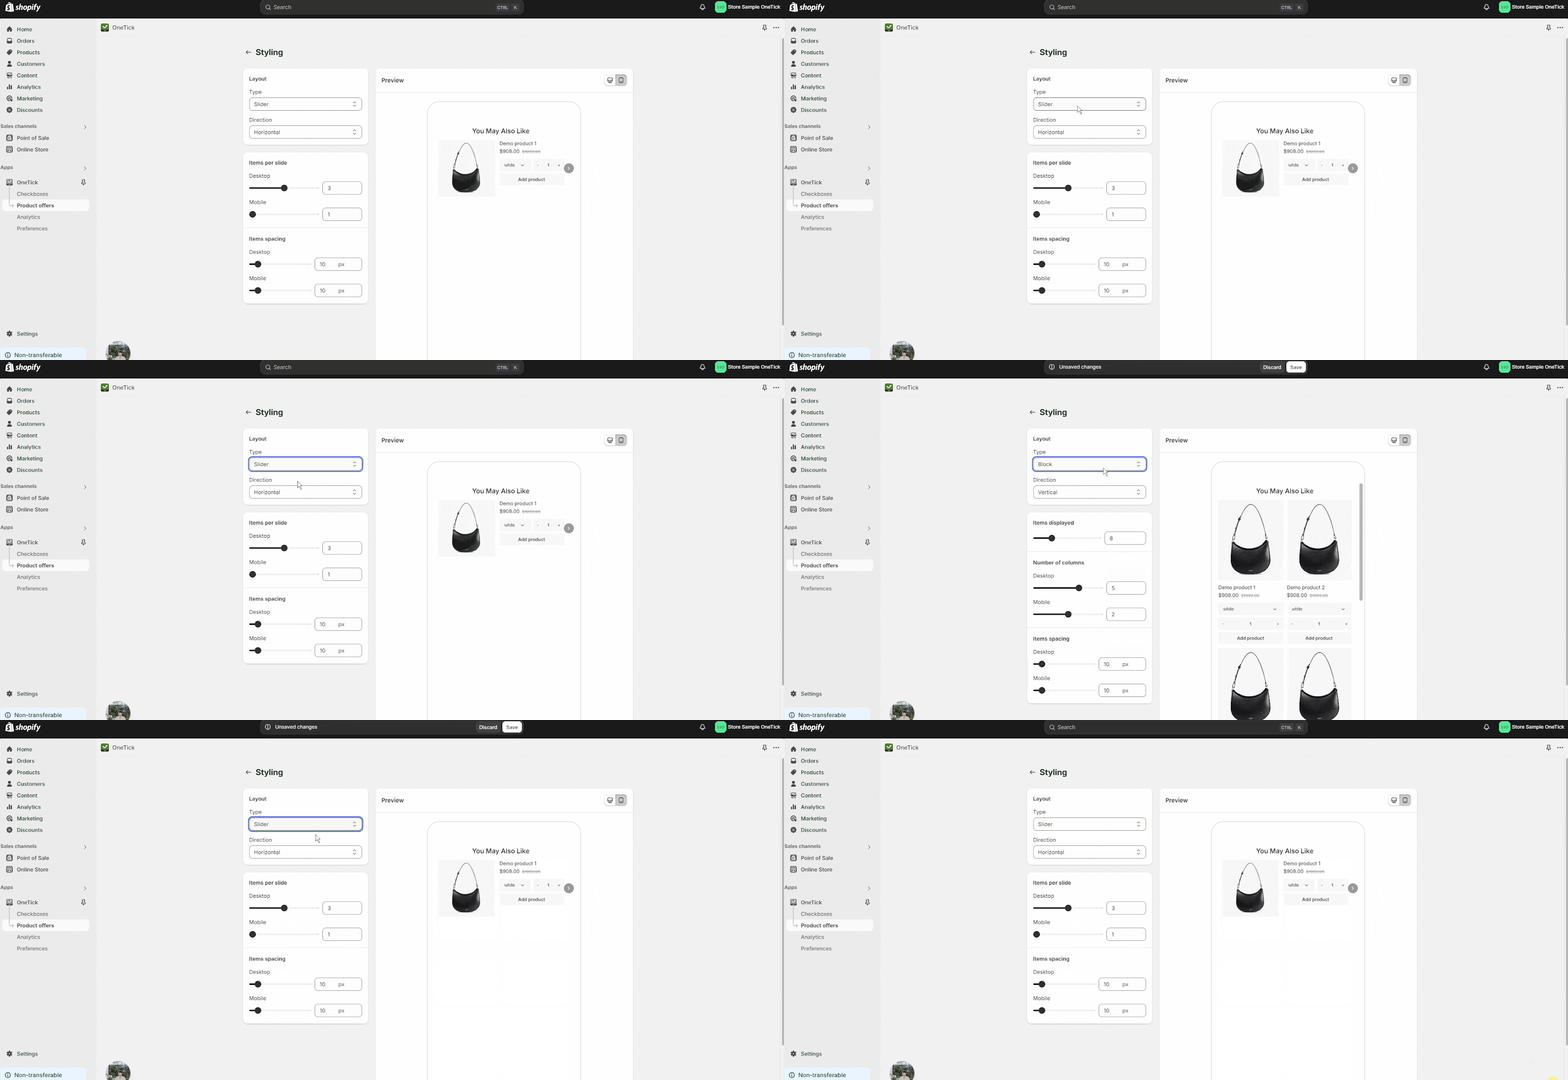
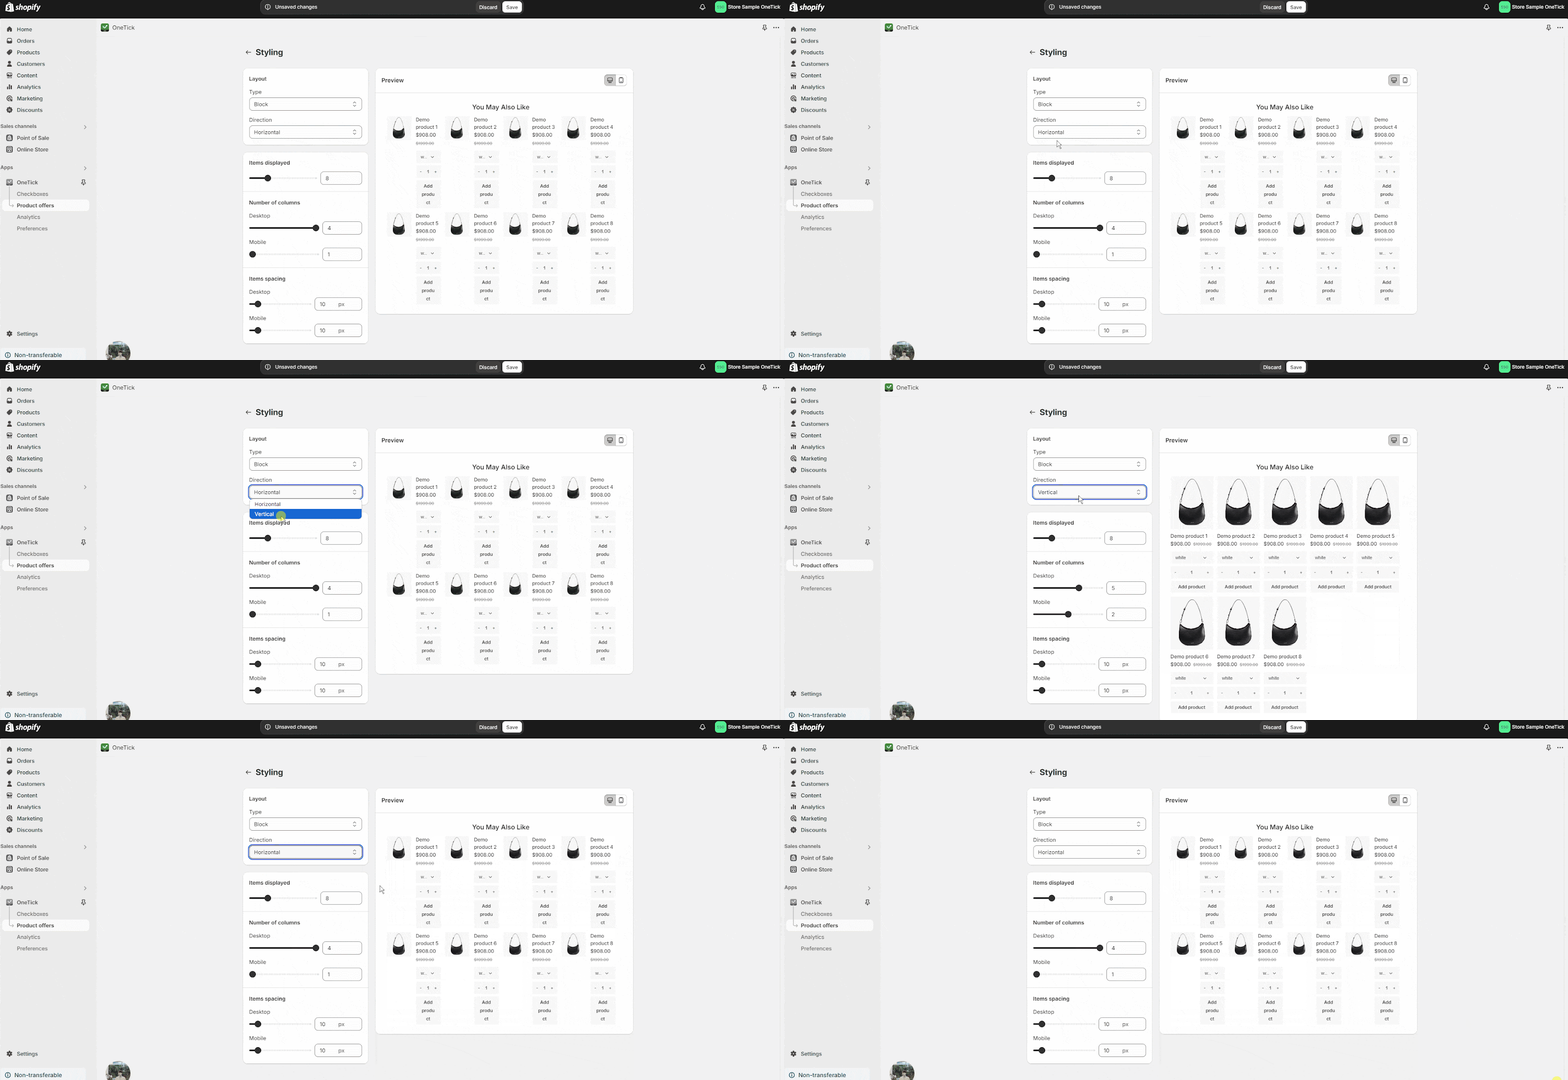
- For Layout you can set Type and Direction for Product Offers.
- Type: You can set it as a Slider or Block.
- Direction: You can set it as Horizontal and Vertical.
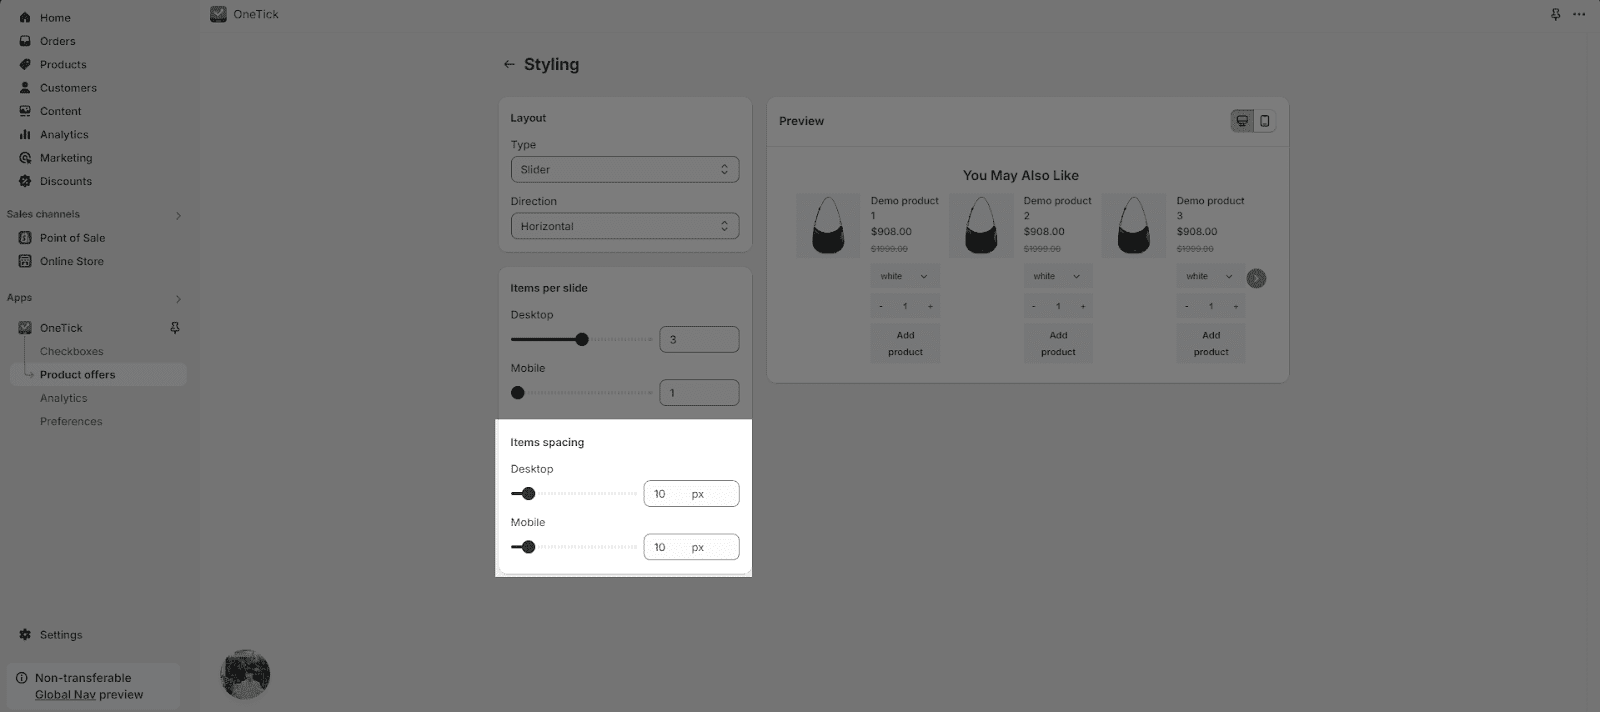
- If you choose Type is Slider, you can make changes on Items per slide and Items spacing on Desktop and Mobile.
- Items per slide: You can set it for Desktop and Mobile.
- Item spacing.
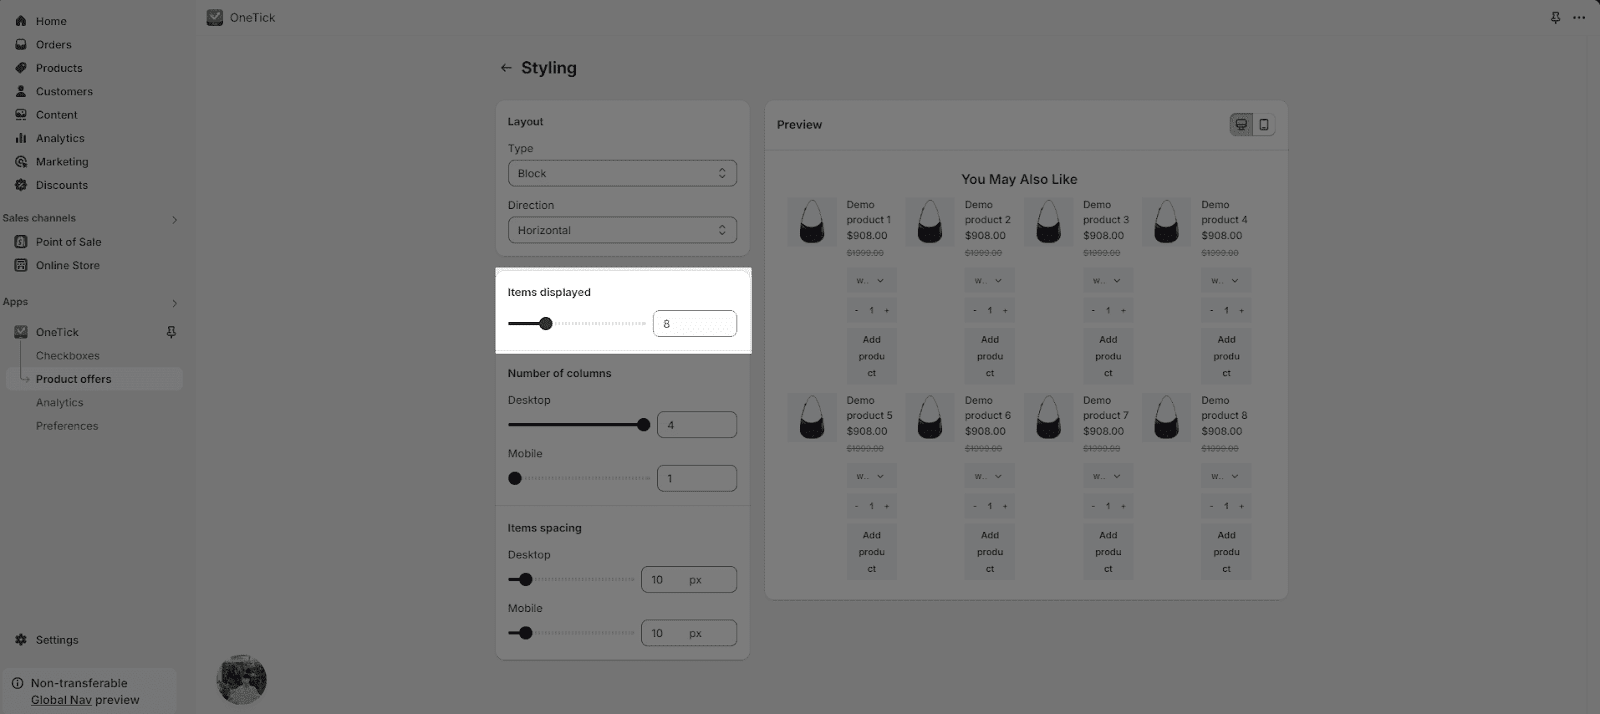
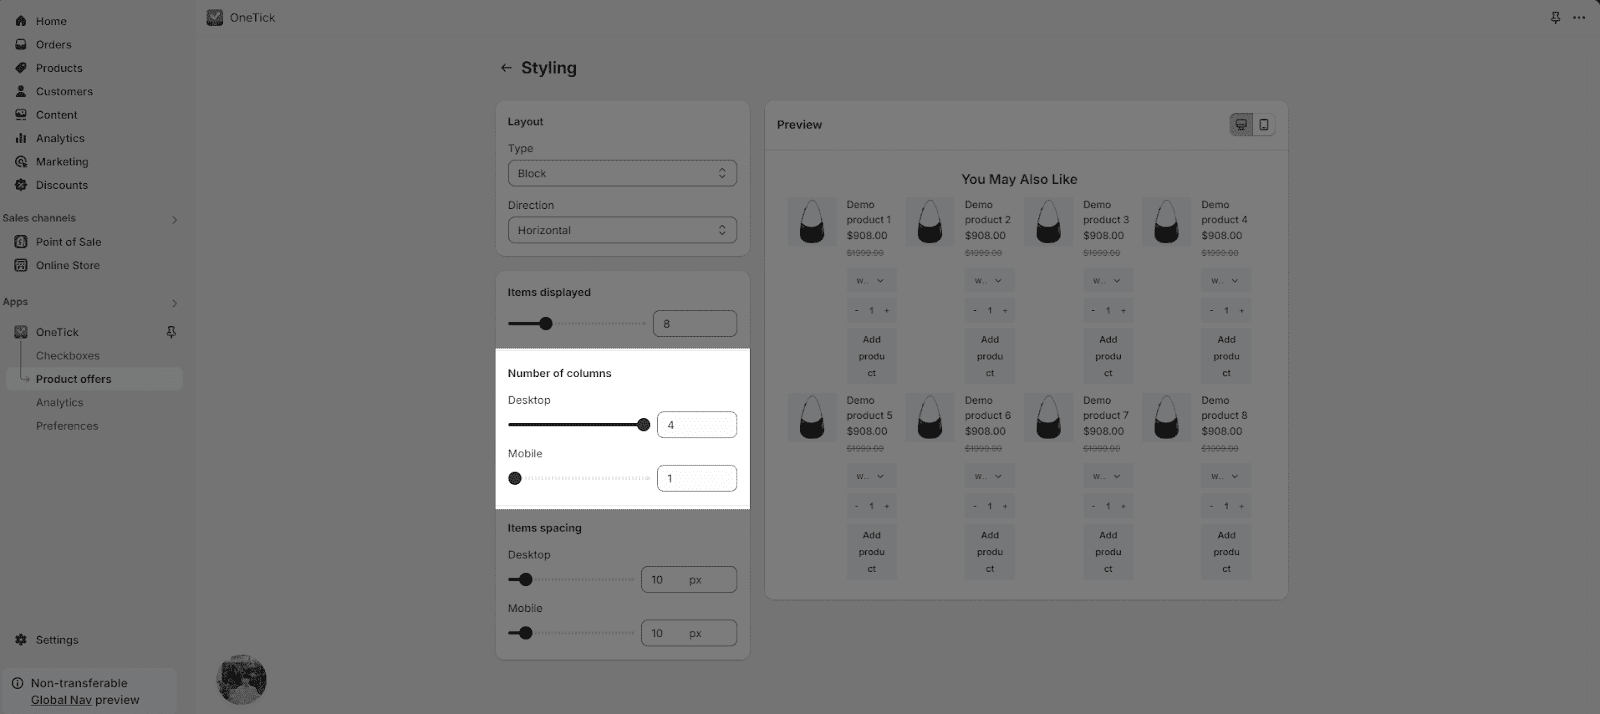
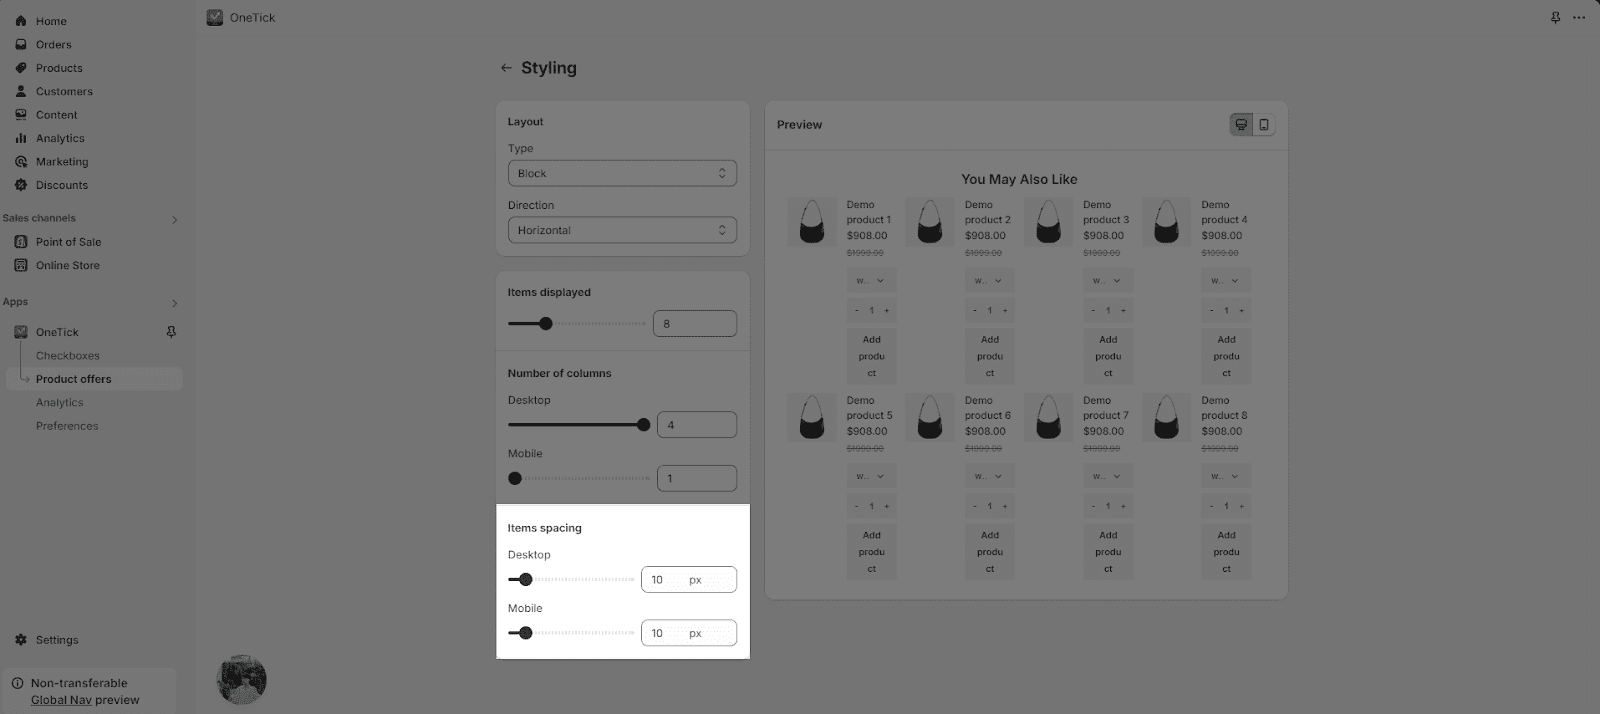
- If you choose Type is Block, you can set the Number of Items displayed, Number of columns and Spacing.
- Items displayed: The number of items will be shown.
- Number of columns: You can set the number of columns on Desktop and Mobile.
- Items spacing: You can set the space for each item on Desktop and Mobile.
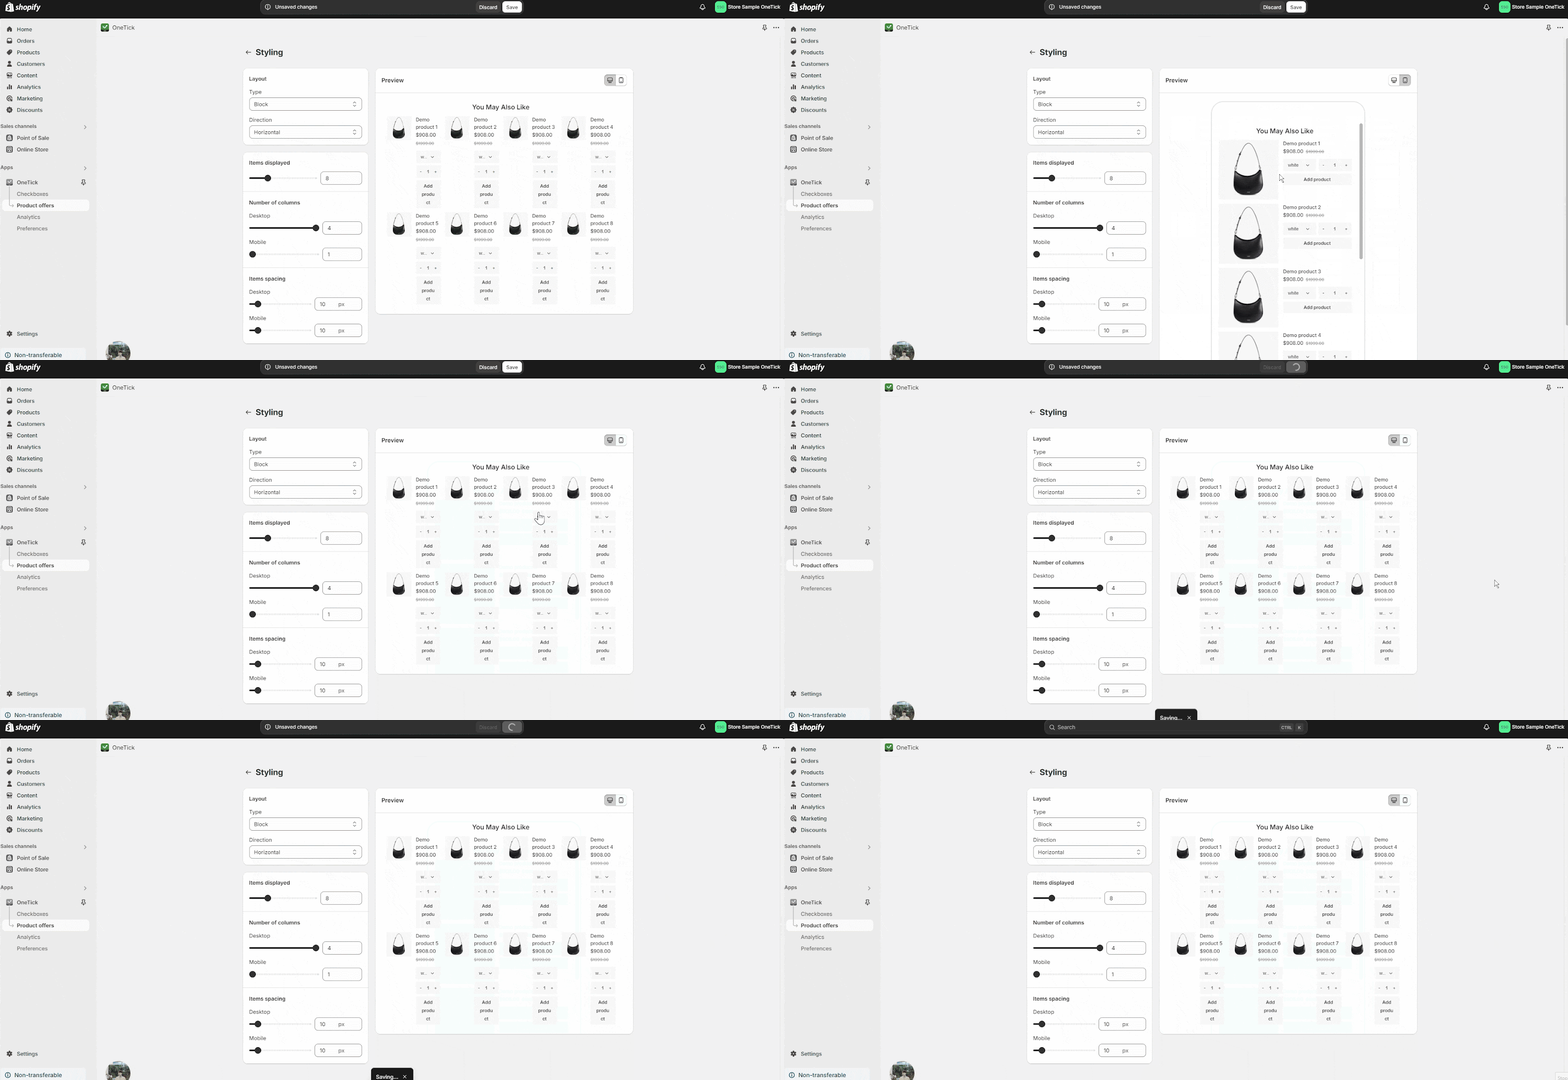
After you set all the needed options, you can choose to preview it on Desktop and Mobile and click Save.
Step 4: Access Theme Customization
Navigate to your theme customization settings to begin integrating the product offers.
Step 5: Add Product Offers App Block
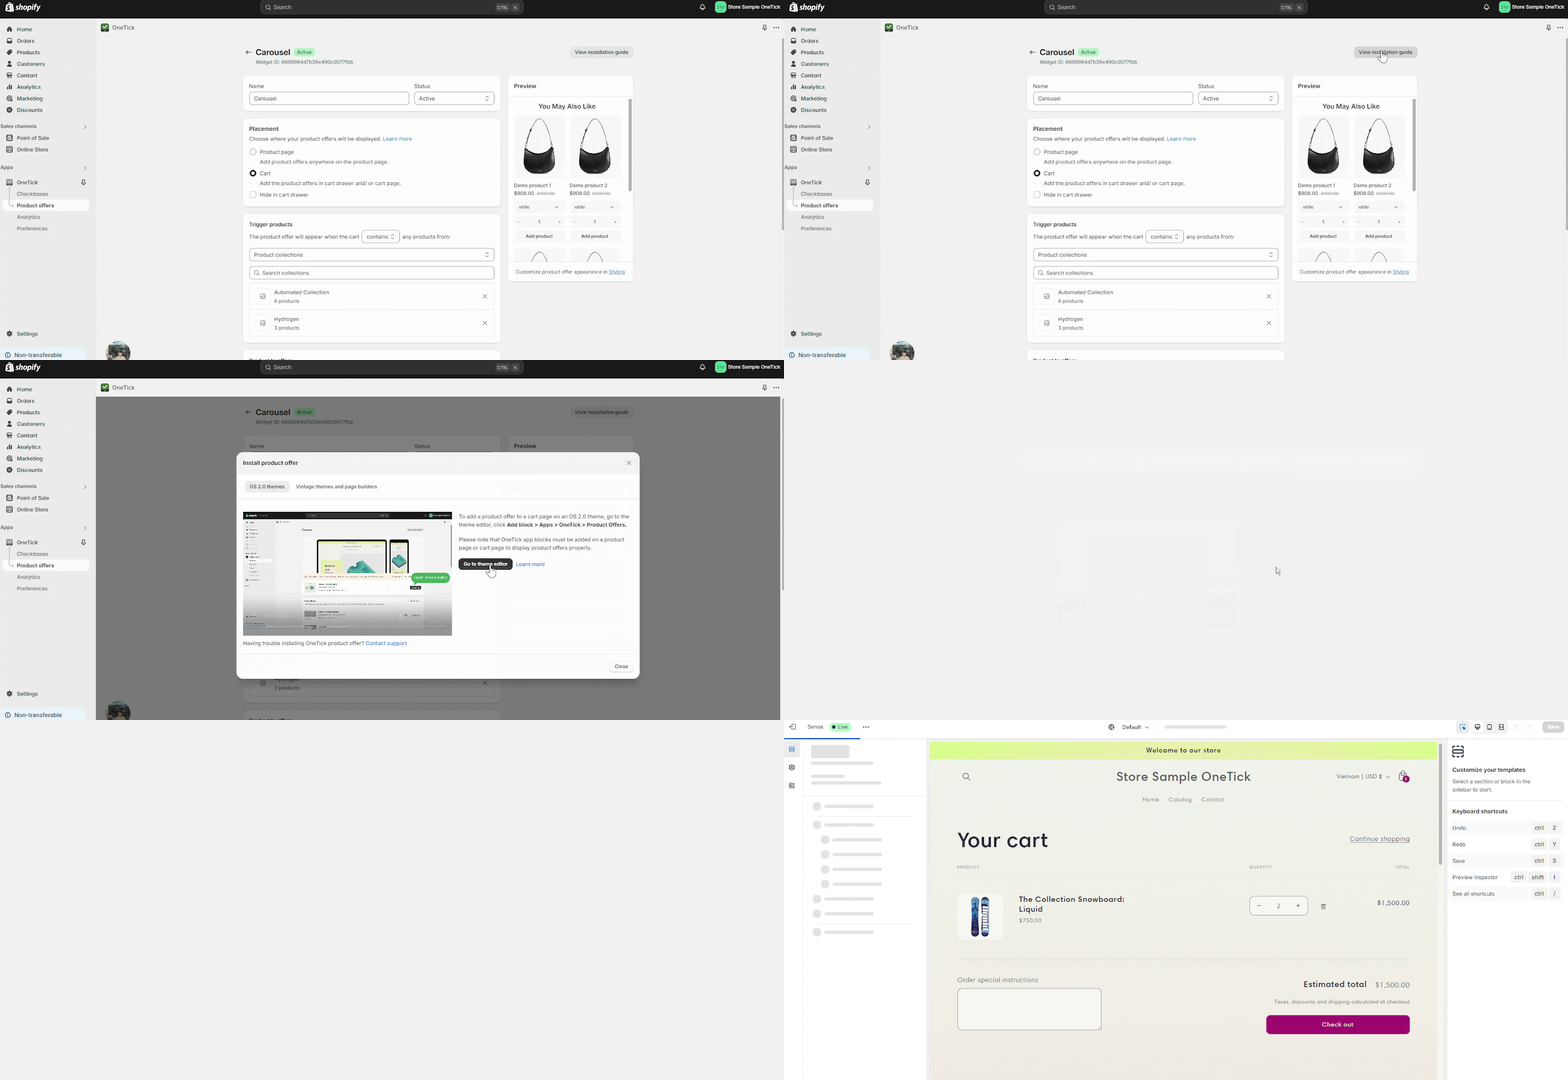
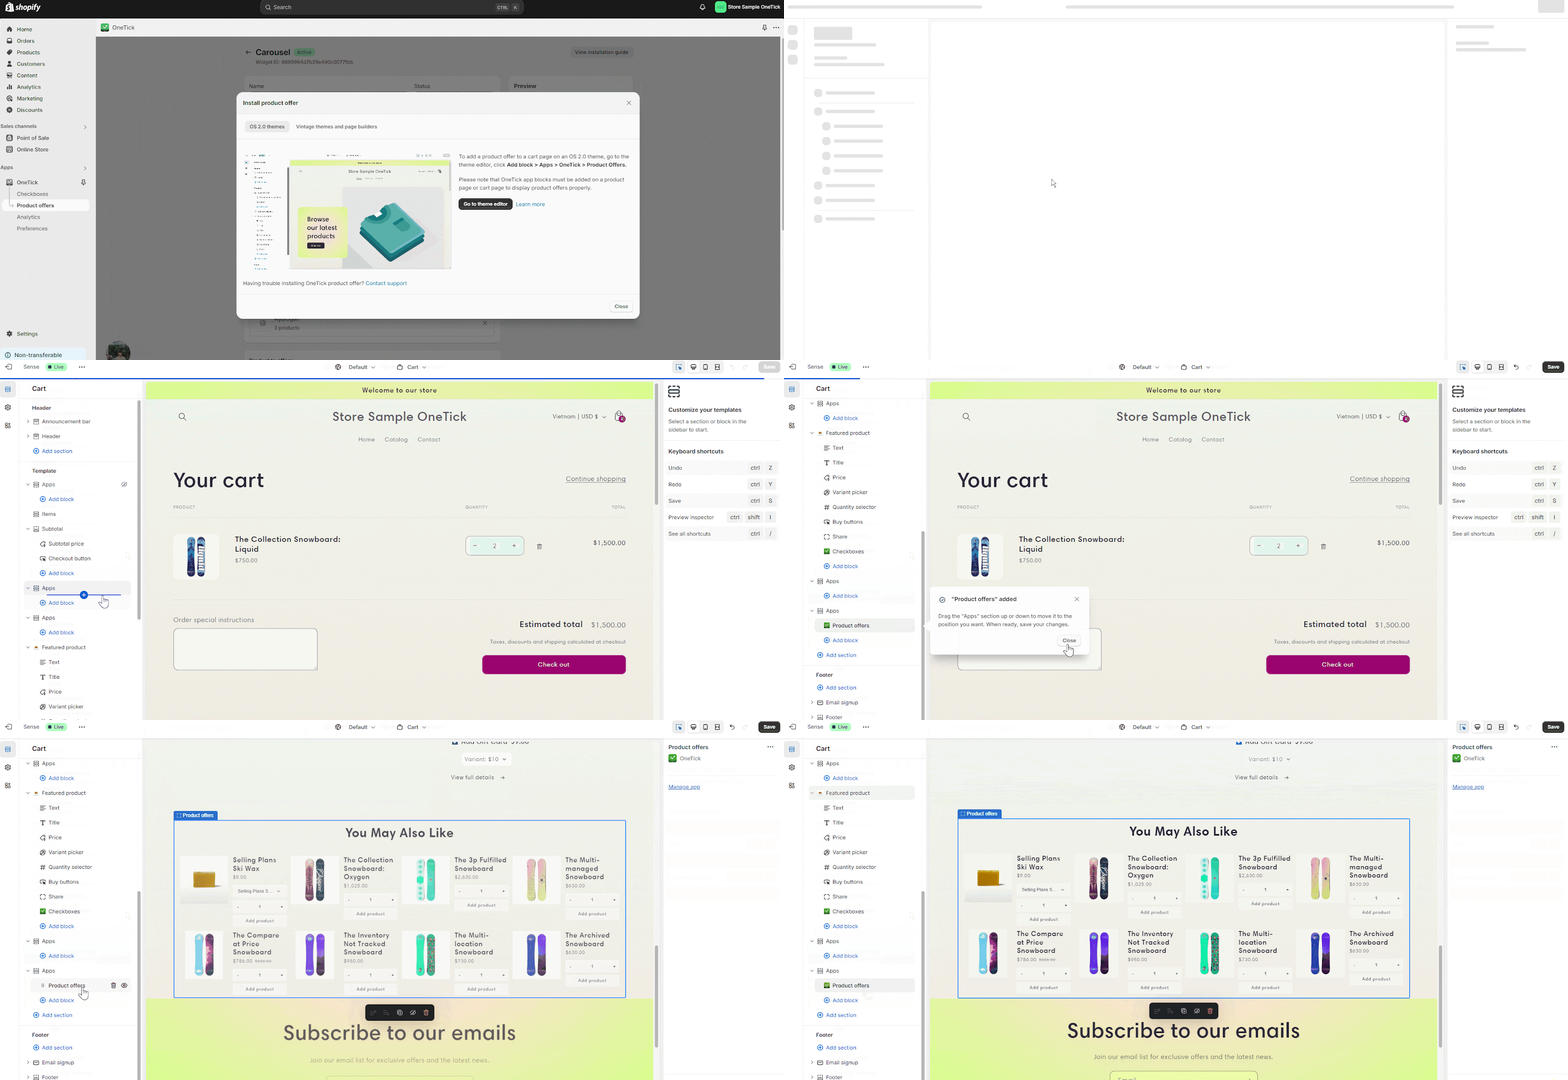
When you click on the “Go to theme editor” button, OneTick will automatically add the “Product offers” app block to your Cart page or Product page based on the Placement you chose back in the customization page. With this feature, you can now add your “Product offers” app block anywhere in your Product page or your Cart page via your Theme customization.
If the cart is not automatically added, go to Apps, click Add Block, and select Product Offers.
In order to add the “Product offers” app block in the Product page, you will need to set the “Placement” field in your Product offers customization page to Product page.
Step 6: Click Save
After adding the product offers, click “Save” to apply the changes to your theme.
Common Cases
Moving forward, it’s important to consider some common scenarios that may occur when using:
- Offer Activation and Visibility: The product offer is set to an “Active” state to ensure it appears on the live view of the Cart page. This ensures that only offers ready for promotion are displayed to customers.
Frequently Asked Questions
1. Why can’t I see the Product Offers in my Theme customization?
In order for the Product Offers to show up in your Theme customization, make sure you have enabled the OneTick Upsell Cross Sell option in the App Embed field in your Theme customization.
2. Can I have my Product Offer on my Cart page and Product Page at the same time?
No, with the new Placement feature of OneTick, you are able to add your Product offers either in your Cart page or your Product page. There is no option for the Product offers to be displayed in both Cart and Product page at the same time.
3. Can I track the performance of product offers using OneTick?
Yes, OneTick can help you track how many sales you get from product offers using built-in analytics.
