Overview
The cart drawer, also known as a mini cart, is a quick-access area that slides into view when a user adds an item to their cart. It provides a convenient way for customers to view their cart contents without leaving the current page. The cart drawer is styled and controlled using CSS classes.
- How to find cart drawer class
- Common Cases
How To Find Cart Drawer Class: Step By Step Guide
By following these steps, you can easily find and customize the cart drawer class in your Shopify store:
Step 1: Access The Cart Page
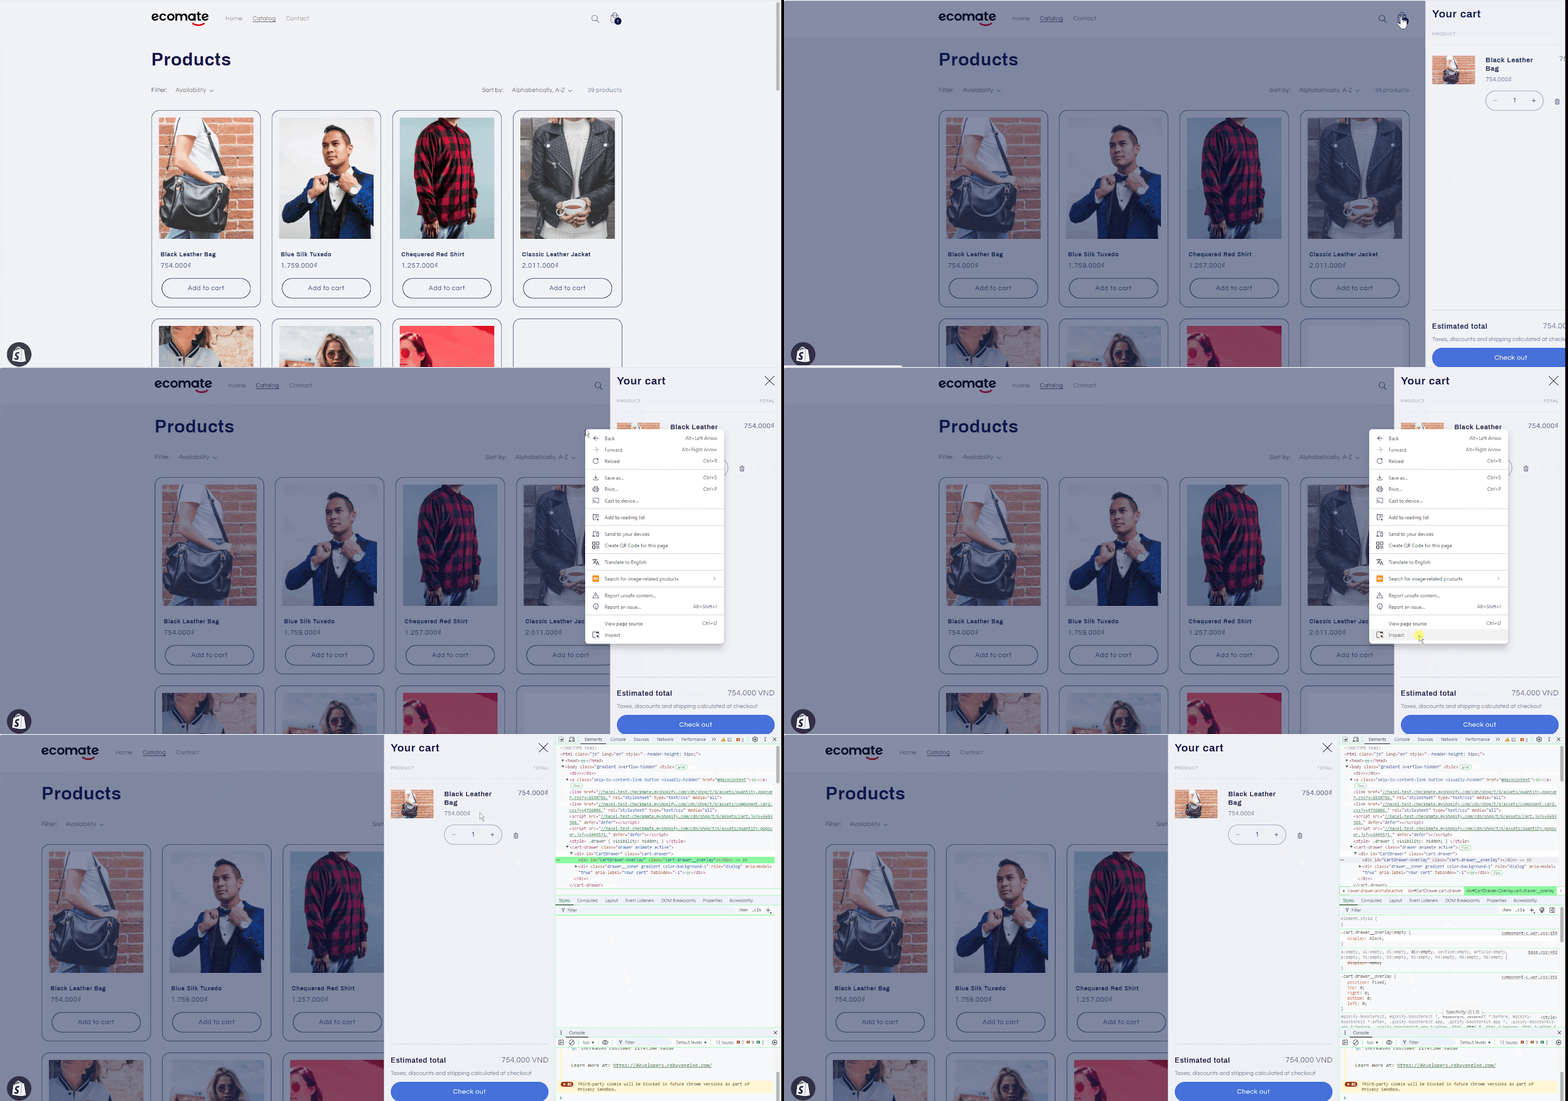
To view the cart drawer’s code:
- In the live view, open the cart drawer.
- Right-click anywhere on the cart drawer.
- Select “Inspect” from the menu (or use Ctrl+Shift+I on Windows/Linux or Cmd+Option+I on Mac).
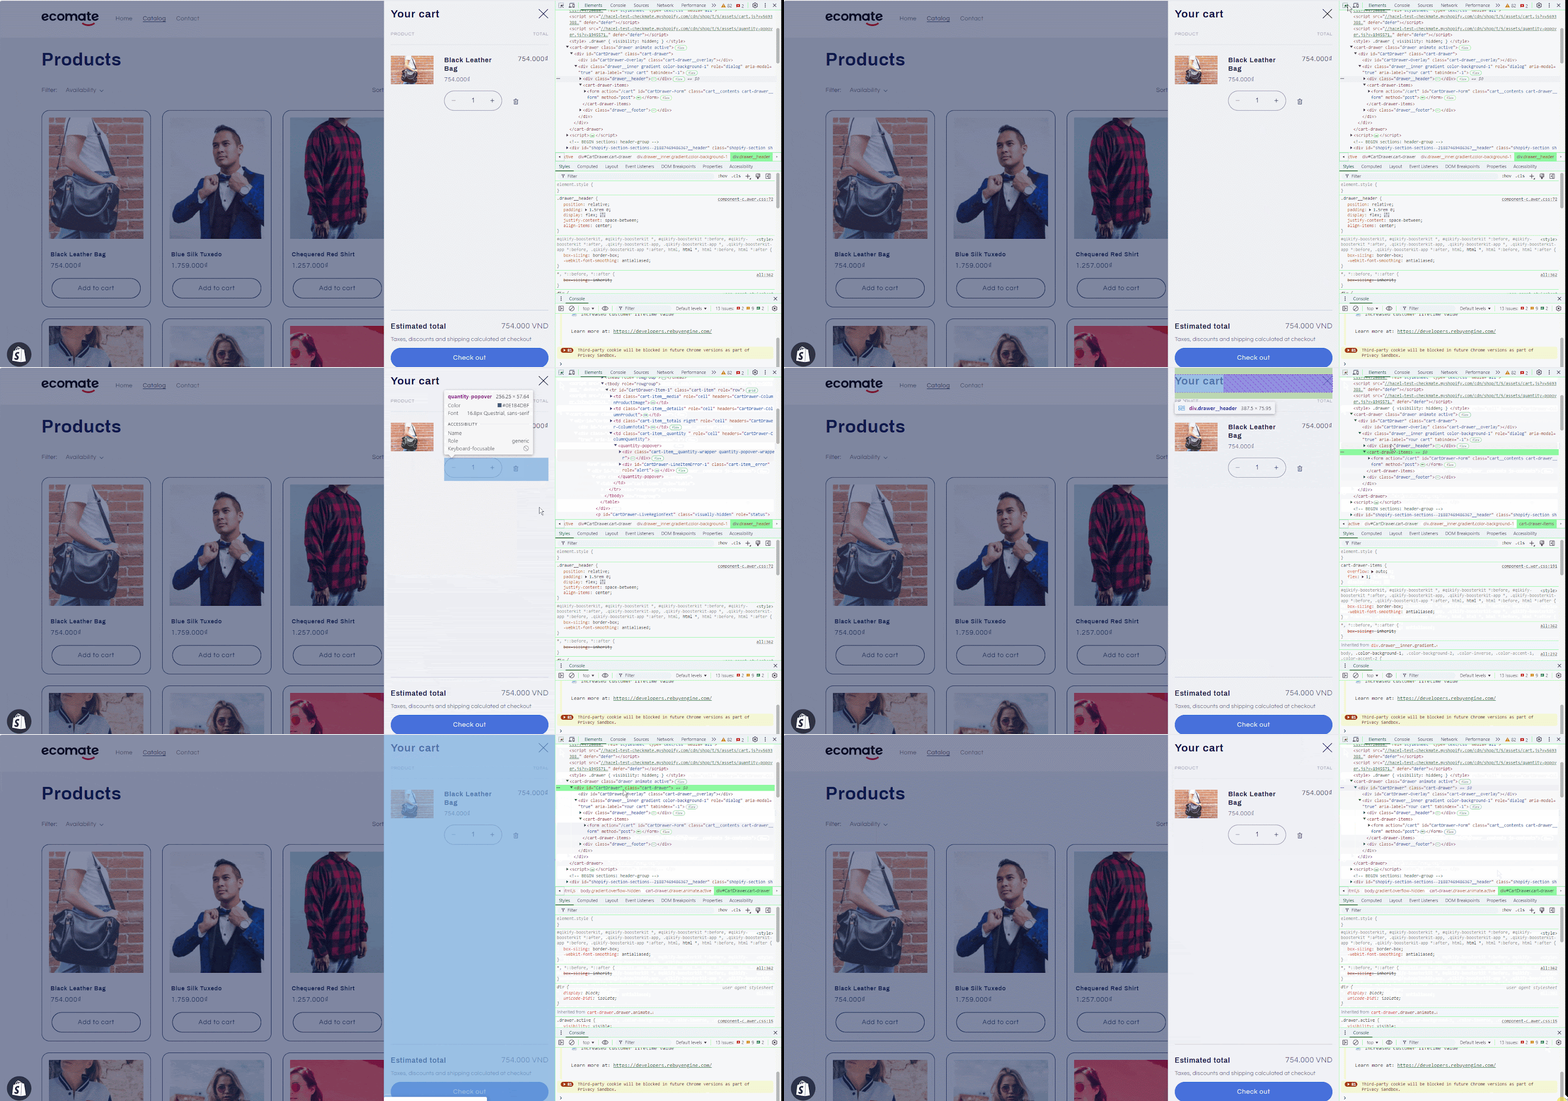
Step 2: Inspect Elements in the Browser
- Use the Elements tab to inspect the HTML structure and identify the class name of the cart drawer.
- Find the container block of cart items (the block that wraps all cart items) to ensure product offers are added correctly below the cart items. The class or tag of the cart items container usually contains words like ‘drawer items‘ or ‘cart drawer items‘.
Step 3: Add Product Offers Or Checkboxes To Cart Drawer (optional)
By default, the OneTick system automatically detects the cart drawer for common Shopify themes. However, if you’re using a vintage or custom theme, you may need to enter the cart drawer class to ensure the app correctly adds product offers or checkboxes to your storefront.
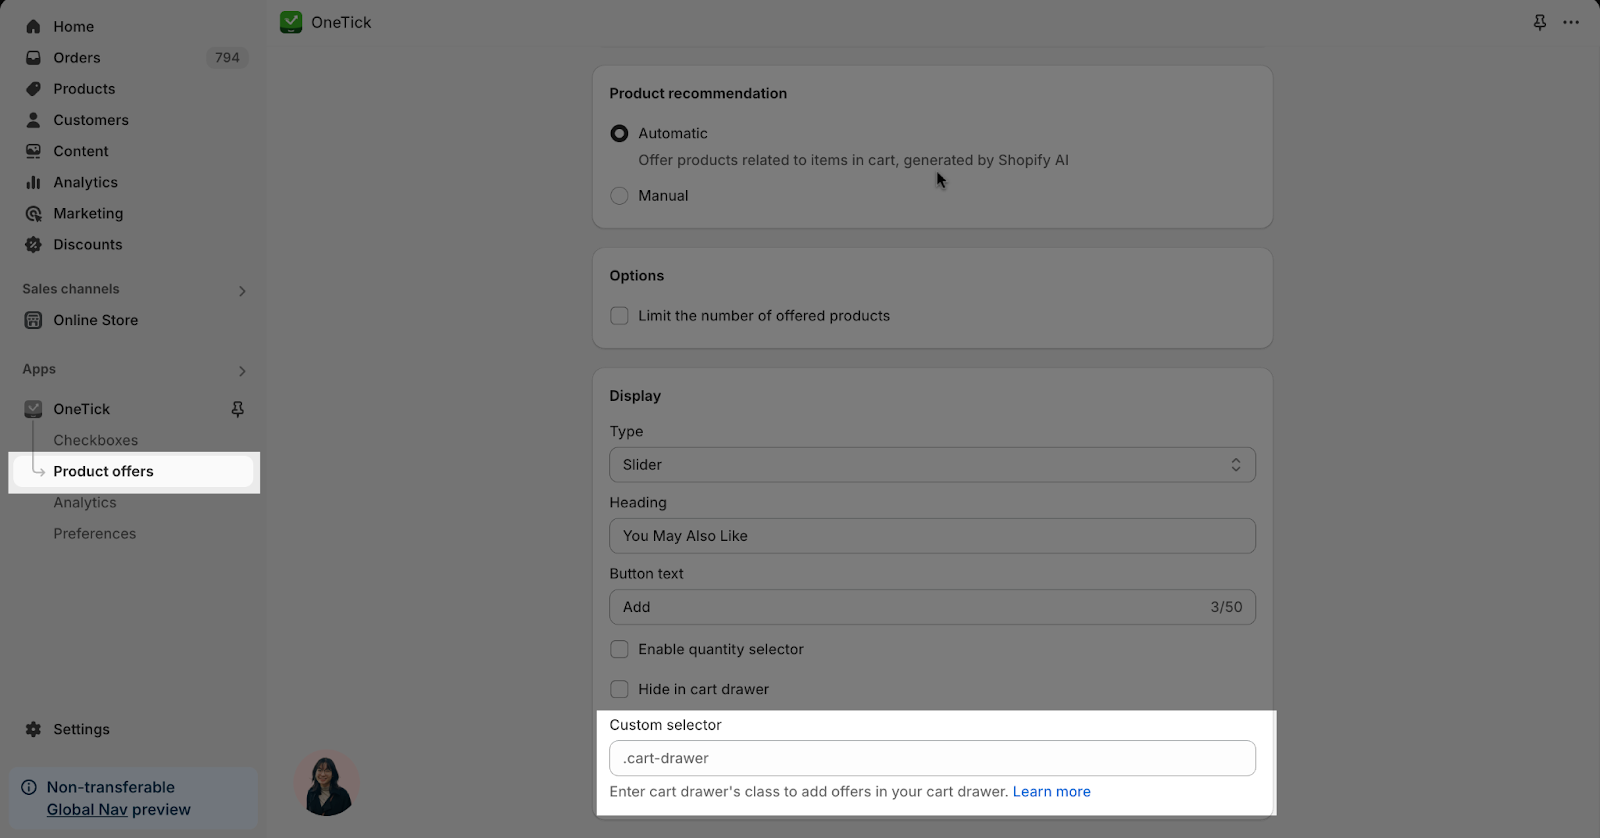
To add product offers to the cart drawer:
- In the OneTick app, navigate to Product offers > Display.
- Paste the name of the cart items container into the Custom selector field.
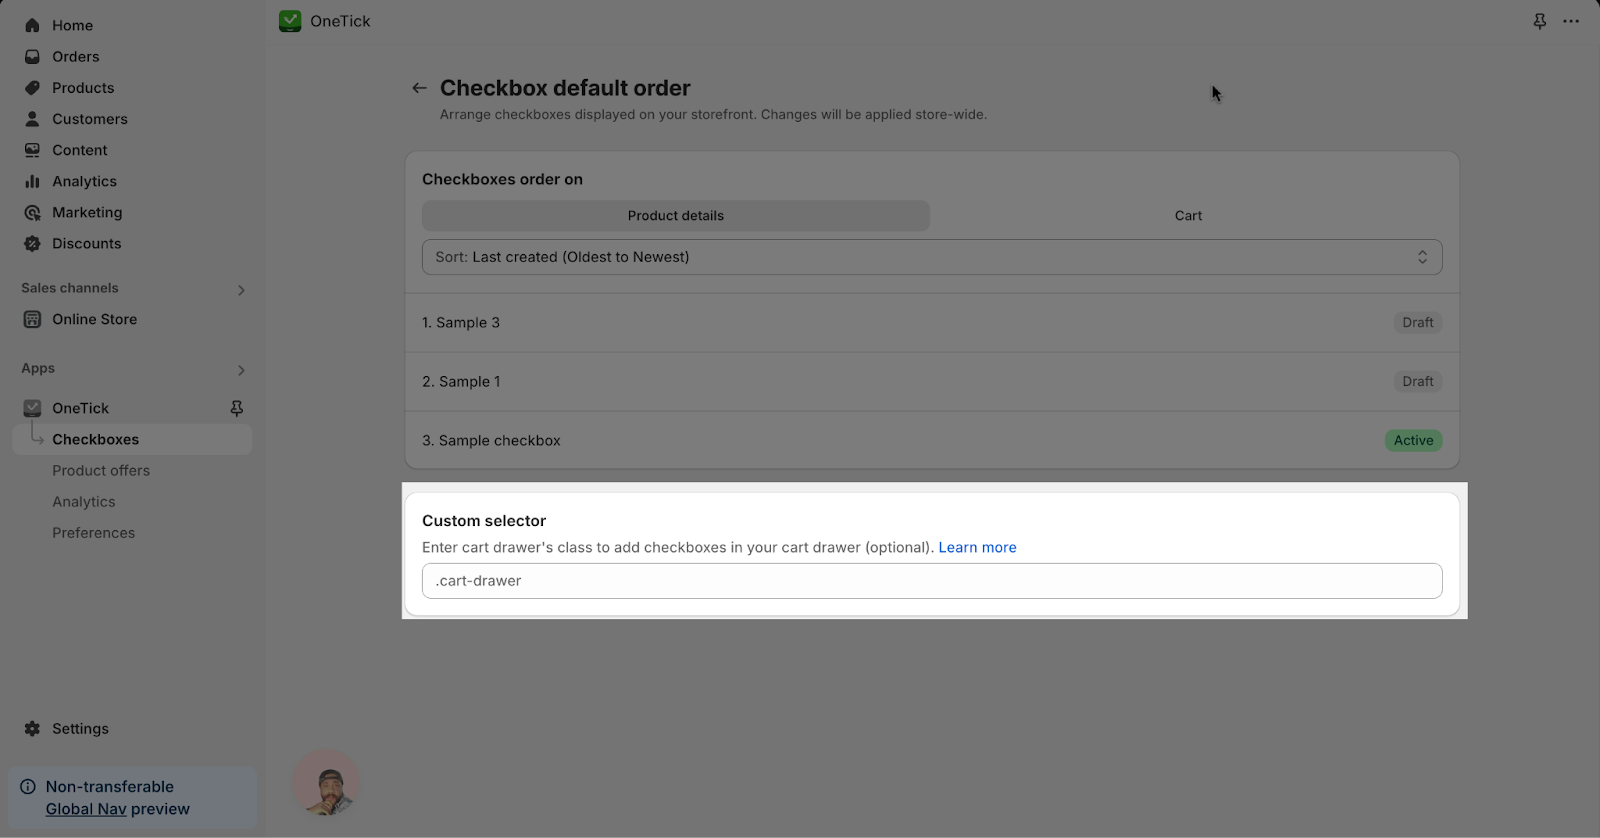
To add checkboxes to the cart drawer:
- In the OneTick app, go to Checkboxes > Manage checkbox orders.
- Paste the name of the cart items container into the Custom selector field.
Formatting guidelines:
- For tags, use this format: ‘cart-items’
- For classes, use this format: ‘.drawer__items’ (include the . before the class name)
- To combine tag and class for more precise targeting, use this format: ‘cart-drawer-items > .cart__contents’.
If you’re unable to find the class or if it doesn’t work, don’t hesitate to contact our live chat. Our support team will be happy to assist you further.
Common Cases
Finding the cart drawer class can sometimes involve various scenarios and challenges:
- OneTick normally finds your cart drawer automatically. But if it doesn’t, you can tell it where to look by entering the cart drawer’s name (called a ‘class’ or ‘tag’) in the app settings. This lets OneTick show your checkboxes and product offers in the cart drawer under the cart items.
- Each theme may use custom or unique class names for the cart drawer. Finding the right class might require examining your theme files or consulting the theme’s documentation (if available).
Frequently Asked Questions
1. Why do I need to find the cart drawer class in Shopify?
To add checkboxes and product offers to your cart drawer, OneTick needs to locate the cart drawer class, which is a unique identifier in your theme’s code. Unlike apps that create a new cart drawer to override your theme’s cart drawer, OneTick works with your existing theme. Since themes use different names for the cart drawer, a custom selector was created to avoid complex coding. OneTick recognizes the cart drawer classes of most popular themes, but if you have a custom theme or one from outside Shopify’s theme store, you may need to manually enter the class for seamless integration.
2. What if I can’t find the cart drawer class in my Shopify theme?
If you can’t locate the class or if adding it doesn’t resolve the issue, feel free to reach out to our friendly support team via live chat. We’re happy to help!


